What Magnification Is Best for Astronomy
If you've ever searched for what magnification is best for astronomy, you probably expected a single number. Something like 200x or 300x. But the real answer is more useful than that, and it's also more complicated.
Manufacturer specifications indicate that a telescope's maximum useful magnification is roughly 50 times its aperture in inches. But that's just the ceiling. The right magnification depends on three things: your telescope, your target, and the sky conditions above you.
Let's break down how to find it.
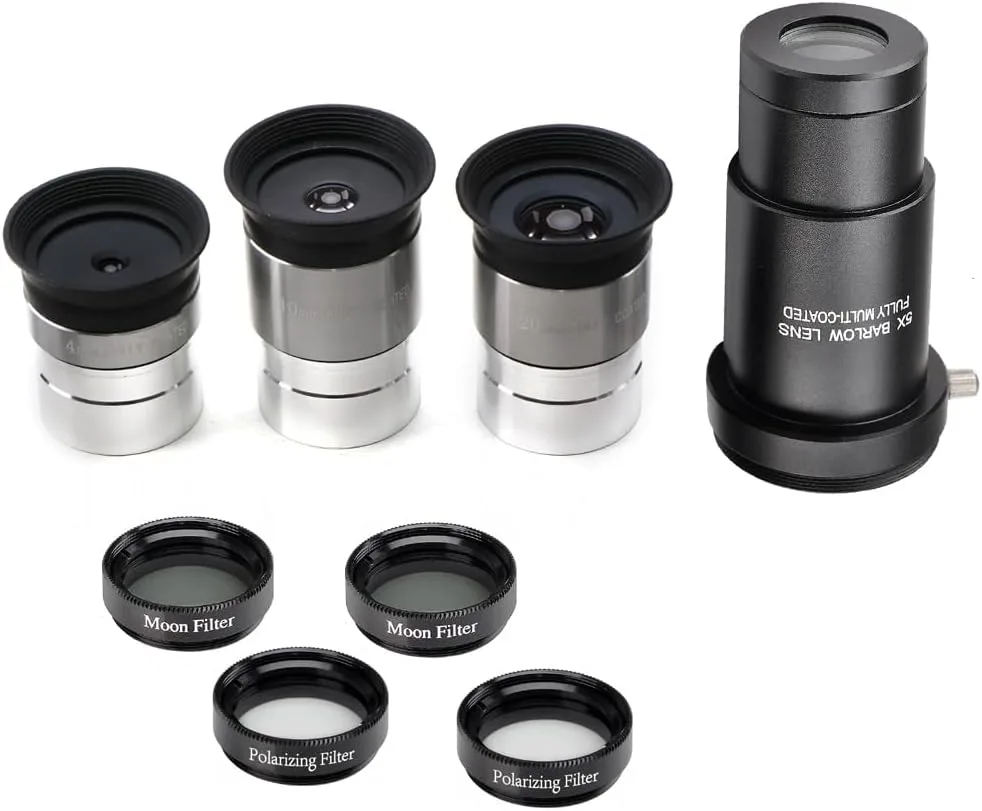
Image source: Bing (Web (fair-use with source credit))
Quick Answer
The best magnification depends on your telescope's aperture, your target, and the current sky conditions. For most telescopes, the maximum useful magnification is about 50x per inch of aperture.
For planetary viewing, aim for 150x to 250x. For deep-sky objects, start at 20x to 50x. The lowest useful magnification is your aperture in millimeters divided by 7.
As of 2026, these rules remain the standard recommendation from optical manufacturers and astronomy organizations.
Why "One Magnification" Is the Wrong Answer
It's tempting to think there's a single perfect magnification for every night. A number you can memorize and dial in every time. But that's not how telescopes work.
The view through an eyepiece changes completely based on what you're looking at. Jupiter at 250x and the Andromeda Galaxy at 250x are two very different experiences. One is a crisp, detailed planet.
The other is a dim, blurry smudge that fills your eyepiece with nothing useful.
Our research across astronomy forums, manufacturer guides, and experienced observers shows a consistent pattern. Beginners who ask for one magnification are really asking for a method. They want to know how to choose the right power for the moment.
That's the real skill.
The key concept here is exit pupil. That's the beam of light that leaves your eyepiece and enters your eye. It's measured in millimeters.
If the exit pupil is too small (below 0.5mm), the image gets dim and you start seeing floaters in your own eye. If it's too large (above 7mm or so), you waste light because your pupil can't open that wide.
Different targets need different exit pupils. Bright planets like Jupiter and Saturn work well with a small exit pupil (0.5mm to 1.5mm). That means high magnification.
Faint galaxies and nebulae need a larger exit pupil (2mm to 5mm), which means lower magnification. The Moon is flexible, but most observers prefer moderate to high power.
So the right answer is never one number. It's a range. And the best magnification for astronomy is the one that matches your target, your scope, and the night's conditions.
The Simple Math: Telescope Focal Length ÷ Eyepiece Focal Length
The formula for magnification is straightforward. You take your telescope's focal length and divide it by the eyepiece's focal length. Both numbers are in millimeters.
Magnification = Telescope focal length (mm) ÷ Eyepiece focal length (mm)
That's it. No complicated trigonometry. No hidden variables.
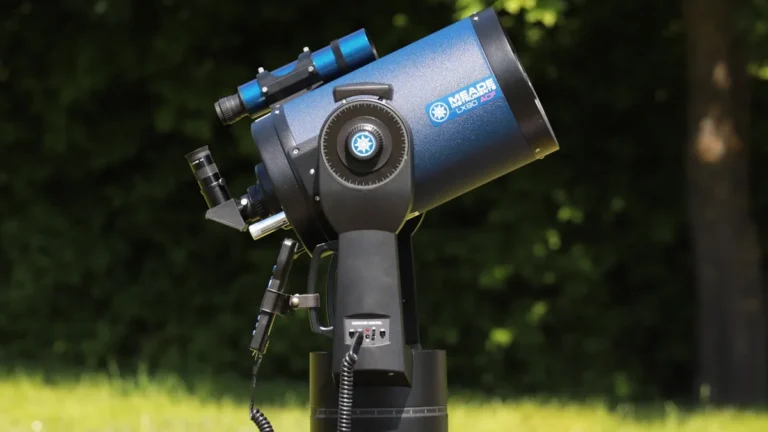
Let's run a real example. Say you have a telescope with a focal length of 1000mm. That's common for an 8-inch Schmidt-Cassegrain or a 4-inch refractor.
If you use a 25mm eyepiece, you get 40x magnification. If you switch to a 10mm eyepiece, you get 100x. With a 5mm eyepiece, you get 200x.
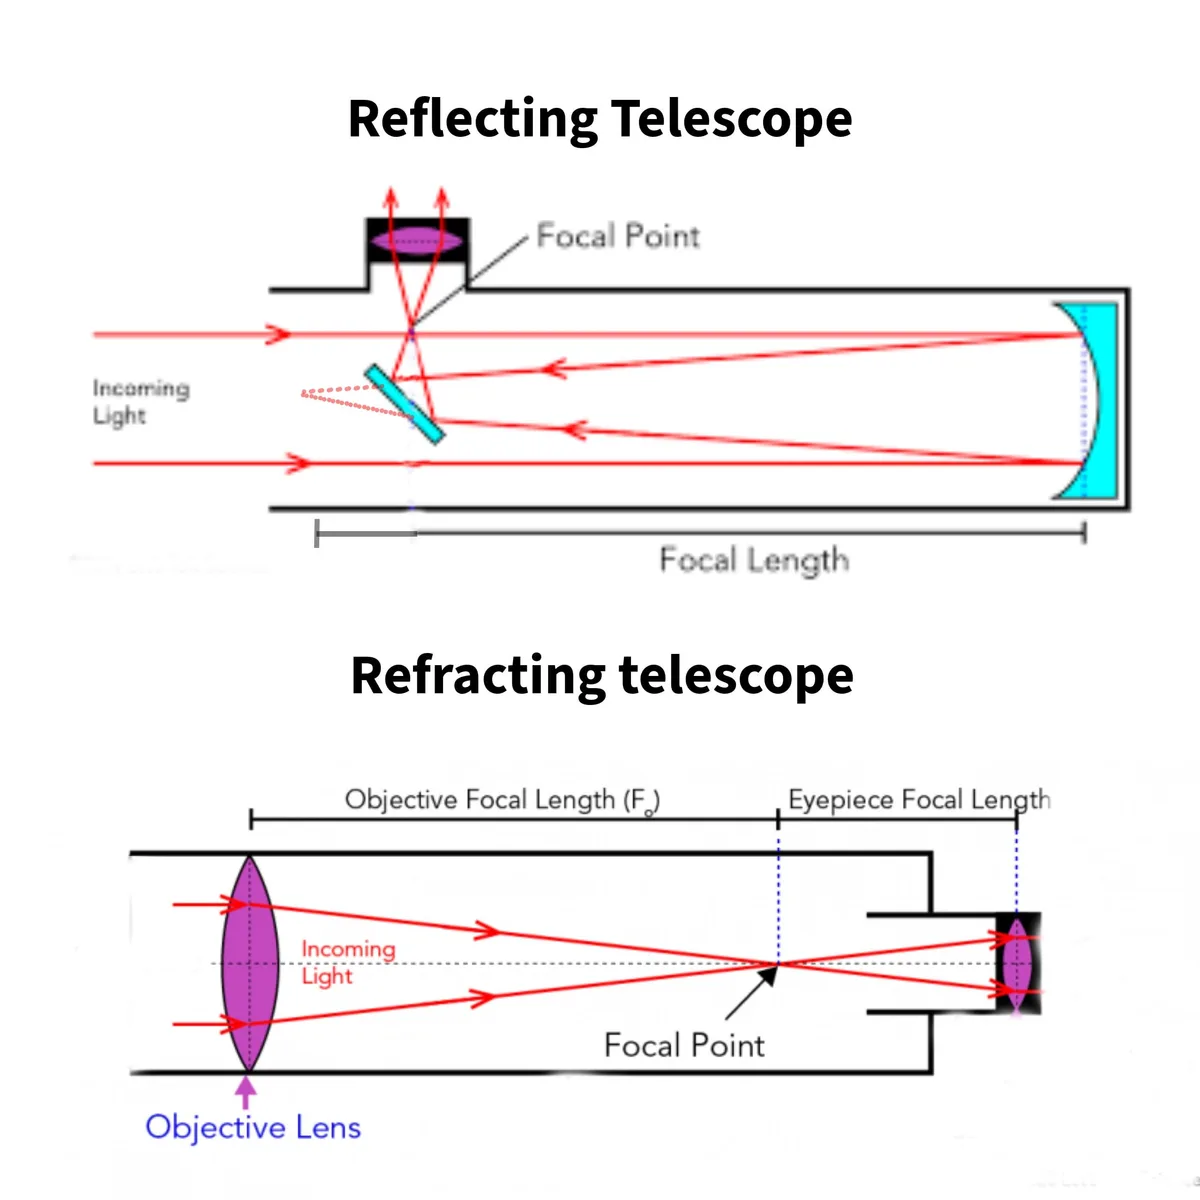
Image source: Bing (Web (fair-use with source credit))
Here's a quick reference table for a 1000mm focal length scope:
| Eyepiece Focal Length | Magnification |
|---|---|
| 32mm | 31x |
| 25mm | 40x |
| 20mm | 50x |
| 15mm | 67x |
| 10mm | 100x |
| 8mm | 125x |
| 6mm | 167x |
| 5mm | 200x |
| 4mm | 250x |
You can also use a Barlow lens to double or triple your magnification. A 2x Barlow with a 10mm eyepiece gives you 200x instead of 100x. But Barlows add glass between your eye and the sky.
Cheap ones can soften the image. Good ones are fine.
The important thing is knowing your telescope's focal length. It's printed on the tube or in the manual. Some manufacturers also list the focal ratio, which is focal length divided by aperture.
Both numbers matter, but focal length is the one you need for this calculation.
Three Variables That Decide Your Best Magnification: Aperture, Seeing, and Target
The formula gives you the number. But the real world decides if that number works. Three variables control that.
Aperture
Your telescope's aperture is the diameter of its main mirror or lens. It's measured in millimeters or inches. Aperture determines how much light the scope gathers.
More light means brighter images at any magnification. But aperture also sets a hard ceiling on useful magnification.
The general rule is that you can't push a telescope past about 50x per inch of aperture. A 4-inch scope maxes out around 200x. An 8-inch scope can go to 400x.
But that's under perfect conditions. Most nights, you'll get less.
Seeing
Atmospheric seeing is the stability of the air above your head. On a still night, the stars don't twinkle much. That's good seeing.
On a turbulent night, stars shimmer and blur. That's bad seeing.
Seeing is the biggest wild card. You can own a 12-inch telescope with a theoretical max of 600x. But if the air is boiling, you'll be lucky to get 150x.
The image will look like you're viewing through a heat shimmer above a parking lot.
Aggregate user reports across astronomy communities indicate that average seeing in most suburban areas limits high-power views to 150x to 250x on most nights. Good seeing at a dark site might let you push 300x to 400x with a large scope.
Target
What you're looking at matters more than most beginners realize. Bright, small targets like planets and the Moon can handle high magnification. They have enough surface brightness to stay visible even when the exit pupil gets tiny.
Faint, diffuse targets like galaxies and nebulae need low to moderate magnification. High power spreads their light over a wider area, making them dimmer. A galaxy that looks decent at 50x might vanish at 200x.
Here's the decision logic in a nutshell:
- Bright and small (planets, Moon): Go high. 150x to 250x is typical.
- Bright and large (Moon, star clusters): Go moderate. 50x to 150x works well.
- Faint and diffuse (galaxies, nebulae): Go low. 20x to 100x is the sweet spot.
- Double stars: Moderate to high, depending on separation. 100x to 200x is common.
How to Calculate Your Telescope's Maximum Useful Magnification (50x Per Inch Rule)
This is the most important number for any telescope owner. It's your ceiling. Stay below it, and you'll get sharp images.
Exceed it, and you'll get empty magnification.
Maximum useful magnification = Aperture in inches × 50
If your aperture is in millimeters, convert to inches first. Divide millimeters by 25.4. Then multiply by 50.
For a 4-inch scope (102mm): 4 × 50 = 200x
For a 6-inch scope (150mm): 6 × 50 = 300x
For an 8-inch scope (203mm): 8 × 50 = 400x
For a 10-inch scope (254mm): 10 × 50 = 500x
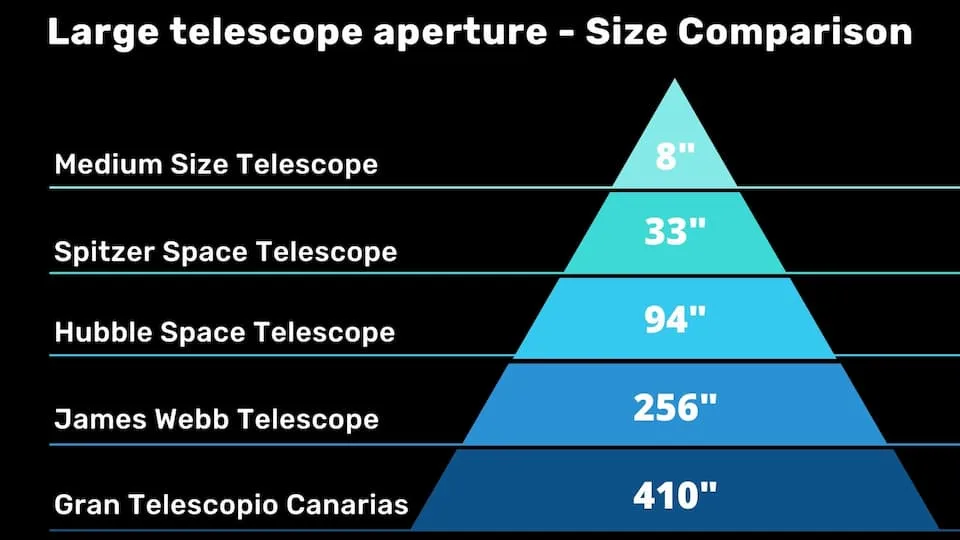
Image source: Bing (Web (fair-use with source credit))
These numbers are theoretical maximums under perfect conditions. In practice, most observers find that 30x to 40x per inch is more realistic for typical backyard seeing. That drops the numbers:
- 4-inch: 120x to 160x
- 6-inch: 180x to 240x
- 8-inch: 240x to 320x
- 10-inch: 300x to 400x
The lowest useful magnification is also important. It's determined by your telescope's exit pupil. The maximum useful exit pupil is about 7mm, which matches a fully dilated dark-adapted eye.
To find the lowest magnification, divide your aperture in millimeters by 7.
For a 4-inch scope (102mm): 102 ÷ 7 = about 15x
For an 8-inch scope (203mm): 203 ÷ 7 = about 29x
Going lower than that wastes light. Your telescope collects more light than your eye can accept. The extra light spills past your pupil and does nothing for the image.
This is why large telescopes need eyepieces with longer focal lengths. A 10-inch scope needs a 35mm or 40mm eyepiece to hit its lowest useful magnification. A 4-inch scope can get there with a 25mm eyepiece.
The Decision Tree: Choosing Magnification for Planets, Deep-Sky, and the Moon
Now let's put it all together. Here's a practical decision tree you can use at the eyepiece.
For Planets (Jupiter, Saturn, Mars, Venus)
If the seeing is steady, start at 150x. If the image stays sharp, try 200x. If it's still crisp, go to 250x. Stop when the image starts to blur.
If the seeing is poor, stay at 100x to 150x. You'll see more detail at a lower power on a bad night than you would at a higher power.
If the planet is low on the horizon, keep magnification under 150x. Low altitude means more atmosphere to look through. The image will be softer.
Best eyepieces for a 1000mm scope: 6mm (167x) or 5mm (200x).
For Deep-Sky Objects (Galaxies, Nebulae, Star Clusters)
If the object is small and bright (like the Ring Nebula), try 100x to 150x. These targets can handle a bit more power.
If the object is large and faint (like the Andromeda Galaxy), use 20x to 50x. Higher magnification will make it disappear.
If the object is a globular cluster (like M13), try 100x to 200x. These are bright enough to resolve stars at higher power.
Best eyepieces for a 1000mm scope: 25mm (40x), 15mm (67x), or 10mm (100x).
For the Moon
For a full moon, use 100x to 150x. The full moon is bright and can handle high power. But it's also flat, so detail is limited.
For a crescent or quarter moon, go to 150x to 250x. The terminator line (the edge between light and dark) has the most detail. Higher power lets you see craters, ridges, and rilles.
Best eyepieces for a 1000mm scope: 8mm (125x) or 6mm (167x).
Decision Table
| Target | Recommended Magnification | Eyepiece (1000mm scope) | Exit Pupil Range |
|---|---|---|---|
| Jupiter / Saturn | 150x – 250x | 6mm – 4mm | 0.8mm – 1.3mm |
| Mars (at opposition) | 200x – 300x | 5mm – 3.3mm | 0.7mm – 1.0mm |
| Moon (terminator) | 100x – 200x | 10mm – 5mm | 1.0mm – 2.0mm |
| Globular clusters | 100x – 200x | 10mm – 5mm | 1.0mm – 2.0mm |
| Bright nebulae (Orion) | 40x – 100x | 25mm – 10mm | 2.0mm – 5.0mm |
| Galaxies (Andromeda) | 20x – 50x | 50mm – 20mm | 4.0mm – 7.0mm |
| Open clusters | 40x – 100x | 25mm – 10mm | 2.0mm – 5.0mm |
The pattern is clear. Bright, small targets want high magnification. Faint, large targets want low magnification.
And the sky conditions always have the final say.
Common Magnification Mistakes That Ruin Your View
You can own the best telescope in the world. But the wrong magnification will make every object look terrible. Here are the most common mistakes and how to fix them.
Using Too Much Magnification
This is the number one error. Beginners see a high number on a box and assume more power equals better views. It does not.
The result is a dim, blurry, shaky image. You see less detail, not more. That's called empty magnification.
The telescope is spreading light too thin, and the atmosphere is smearing what remains.
How to fix it: Dial back until the image sharpens. If 300x looks soft, try 200x. If 200x looks soft, try 150x.
The right magnification is the highest one that still looks crisp.
Ignoring Atmospheric Seeing
Many people blame their telescope when the real problem is the sky. They push to high power on a night with turbulent air. Then they wonder why everything looks like soup.
How to fix it: Check the stars before you start. If they twinkle violently, keep magnification under 150x. If they are steady and sharp, you can push higher.
The Pickering seeing scale is a useful reference. A rating of 5 or below means low power only.
Forgetting to Let the Telescope Cool Down
A warm telescope in a cold night creates internal air currents. These currents distort the image just like bad seeing. High magnification makes the problem worse.
How to fix it: Set your telescope outside 30 to 60 minutes before you observe. Larger scopes need more time. A 10-inch reflector might need 90 minutes.
The image will improve noticeably once the optics reach ambient temperature.
Using the Wrong Eyepiece for the Target
Different objects need different exit pupils. A 6mm eyepiece that works great on Jupiter will be useless on the Andromeda Galaxy. The galaxy will be too dim to see.
How to fix it: Follow the decision tree from the previous section. Match your eyepiece to your target. Start with a low power eyepiece to find the object.
Then switch to higher power if the target can handle it.
Overlooking Collimation
Collimation is the alignment of your telescope's optics. It matters most at high magnification. A slightly misaligned scope that looks fine at 50x will fall apart at 200x.
How to fix it: Check collimation before every observing session. Reflectors need it most. Refractors and Schmidt-Cassegrains hold alignment better but still benefit from periodic checks.
A collimation tool like a laser or Cheshire eyepiece makes the job quick.
Skipping the Barlow
Some observers avoid Barlow lenses because they think they degrade image quality. A good Barlow costs less than a short focal length eyepiece. And it gives you more flexibility.
How to fix it: Buy a quality 2x Barlow from a reputable brand. Use it with your medium power eyepiece to reach high power. This saves money and reduces the number of eyepieces you need to carry.
Building a Practical Eyepiece Kit: Focal Lengths That Cover Every Situation
You do not need a dozen eyepieces. You need three or four that cover the full range of magnification. A well chosen set handles everything from wide field views to high power planetary detail.
The Core Three Eyepiece Set
Low power (30x to 50x): Use a 25mm or 32mm eyepiece. This is for finding objects and viewing large targets like the Andromeda Galaxy and the Pleiades. It gives you a bright, wide field of view.
Medium power (80x to 120x): Use a 10mm or 12mm eyepiece. This is your workhorse for most deep-sky objects. It also works well on the Moon and planets when seeing is average.
High power (150x to 250x): Use a 5mm or 6mm eyepiece. This is for planets, the Moon at high detail, and double stars. It only works when the atmosphere is steady.
Adding a Barlow Lens
A 2x Barlow doubles the power of each eyepiece. With the core three set, you get six effective magnifications.
- 25mm eyepiece alone: 40x
- 25mm with 2x Barlow: 80x
- 10mm eyepiece alone: 100x
- 10mm with 2x Barlow: 200x
- 6mm eyepiece alone: 167x
- 6mm with 2x Barlow: 333x
This covers everything from low power scanning to high power planetary work. And it costs less than buying six separate eyepieces.
Choosing Eyepiece Quality
Not all eyepieces are the same. Budget eyepieces work fine for low and medium power. But high power demands better optics.
For low power: A basic Plössl or Kellner design is adequate. The field of view will be around 50 degrees. That is fine for wide field scanning.
For medium power: A Plössl or wide field design works well. Look for fully multi coated optics. They transmit more light and reduce glare.
For high power: Spend more here. An orthoscopic or high quality Plössl gives sharper images. Better eye relief is also important.
Cheap high power eyepieces often have short eye relief that makes viewing uncomfortable.
Focal Lengths to Avoid
Avoid very short eyepieces below 4mm for most telescopes. They push magnification past the useful limit. A 2.5mm eyepiece in a 1000mm scope gives 400x.
That is empty magnification on all but the best nights.
Also avoid cheap zoom eyepieces. They are convenient but often have narrow fields of view and poor image quality at the high end. A quality zoom like an 8mm to 24mm can be useful, but it costs more than a set of fixed eyepieces.
Real-World Examples: What Magnification Works for Common Scopes
Theory is useful. But seeing the numbers applied to actual telescopes makes everything click. Here are three common setups and what they can do.
Example 1: 4-inch Refractor (102mm aperture, 900mm focal length)
This is a popular beginner scope. It is portable and gives crisp views of the Moon and planets.
Maximum useful magnification: 200x (50x per inch). Realistic limit under average seeing: 150x to 180x.
Lowest useful magnification: 102mm ÷ 7 = about 15x. That requires a 60mm eyepiece, which is unusual. A 32mm eyepiece gives 28x.
That is a good low power option.
Best eyepiece set: 32mm (28x), 10mm (90x), 6mm (150x). A 2x Barlow with the 10mm gives 180x.
What works: Jupiter at 150x shows cloud bands and the Great Red Spot. The Moon at 150x shows fine crater detail. The Orion Nebula at 90x shows the trapezium and surrounding gas.
What does not work: 250x is too much. The image will be dim and soft. Stick to 180x or less.
Example 2: 8-inch Schmidt-Cassegrain (203mm aperture, 2032mm focal length)
This is a very popular all-rounder. It is good for planets and deep-sky objects.
Maximum useful magnification: 400x (50x per inch). Realistic limit under average seeing: 250x to 300x.
Lowest useful magnification: 203mm ÷ 7 = about 29x. That requires a 70mm eyepiece. A 40mm eyepiece gives 51x.
That is a practical low power option.
Best eyepiece set: 40mm (51x), 15mm (135x), 8mm (254x). A 2x Barlow with the 15mm gives 270x.
What works: Saturn at 250x shows the Cassini Division clearly. Globular clusters like M13 at 135x resolve individual stars. Galaxies at 51x fit well in the field of view.
What does not work: 400x is rarely usable. Most nights top out at 300x. Use the 8mm eyepiece and skip the Barlow on typical evenings.
Example 3: 6-inch Dobsonian Reflector (150mm aperture, 1200mm focal length)
This is a budget friendly scope with great light gathering. It is excellent for deep-sky objects.
Maximum useful magnification: 300x. Realistic limit under average seeing: 200x to 250x.
Lowest useful magnification: 150mm ÷ 7 = about 21x. That requires a 57mm eyepiece. A 30mm eyepiece gives 40x.
That works well.
Best eyepiece set: 30mm (40x), 12mm (100x), 6mm (200x). A 2x Barlow with the 12mm gives 200x.
What works: The Andromeda Galaxy at 40x fills the field. The Ring Nebula at 100x shows its donut shape. Jupiter at 200x shows detail on good nights.
What does not work: 300x is too much for most nights. The 6-inch aperture cannot compete with larger scopes at extreme high power.
FAQs About Telescope Magnification
What is the best magnification for a beginner telescope?
Start with 40x to 100x. This range works for the Moon, planets, and bright deep-sky objects. A 25mm eyepiece in a 1000mm scope gives 40x.
A 10mm eyepiece gives 100x. These are safe, useful powers that avoid empty magnification.
How do I know if I am using too much magnification?
The image will look dim, blurry, or shaky. Details you expect to see will be missing. If you cannot focus to a sharp image, you have too much power.
Drop to the next lower eyepiece and try again.
Can I use a Barlow lens to double my magnification?
Yes, but only if your telescope can handle the higher power. Use a 2x Barlow with your medium power eyepiece. Do not exceed your telescope's maximum useful magnification.
A cheap Barlow can degrade image quality. Buy a quality one from a known brand.
Why does my high power view look blurry on some nights?
Bad atmospheric seeing is the most common cause. Turbulent air blurs the image. Also check that your telescope has cooled down.
A warm scope creates internal air currents. High magnification amplifies both problems.
What magnification do I need to see Saturn's rings?
You can see the rings at 40x. But they will be small. At 100x, the rings are clearly visible and the Cassini Division becomes apparent.
At 150x to 200x, you see more detail. The best magnification depends on your telescope and the night.
How many eyepieces do I really need?
Three eyepieces plus a 2x Barlow cover everything. A low power eyepiece for finding objects. A medium power eyepiece for most deep-sky viewing.
A high power eyepiece for planets. The Barlow doubles your options. That is all you need for years of observing.