How Do Binoculars Work
So, how do binoculars work? It's a simple question with a surprisingly visual answer. Binoculars rely on a precise arrangement of lenses and prisms.
Understanding that arrangement is almost impossible without a picture or diagram.
Per the ISO 14132-1:2002 standard, binocular magnification is calculated by dividing the focal length of the objective lens by the focal length of the eyepiece. That single number, like 8x or 10x, tells you how much larger an object appears. But the real magic happens inside the body, where prisms flip the image right side up.
Let's start with why a visual guide is so essential.
Quick Answer
Binoculars use two telescopes mounted side by side. Light enters the front objective lens. It is magnified and focused.
Prisms inside flip the image upright. The eyepiece lets your eye see the enlarged image. Two barrels give you depth perception that a single telescope cannot.
Why You Need a Picture to Understand Binoculars
Optics is a visual science. You can describe lenses and prisms in words all day, but the light path through a binocular is a zigzag that is hard to picture from text alone. That is why every manufacturer's manual, every optics textbook, and every serious review includes a diagram.
The diagram shows you exactly where the light bends and how the image gets corrected.
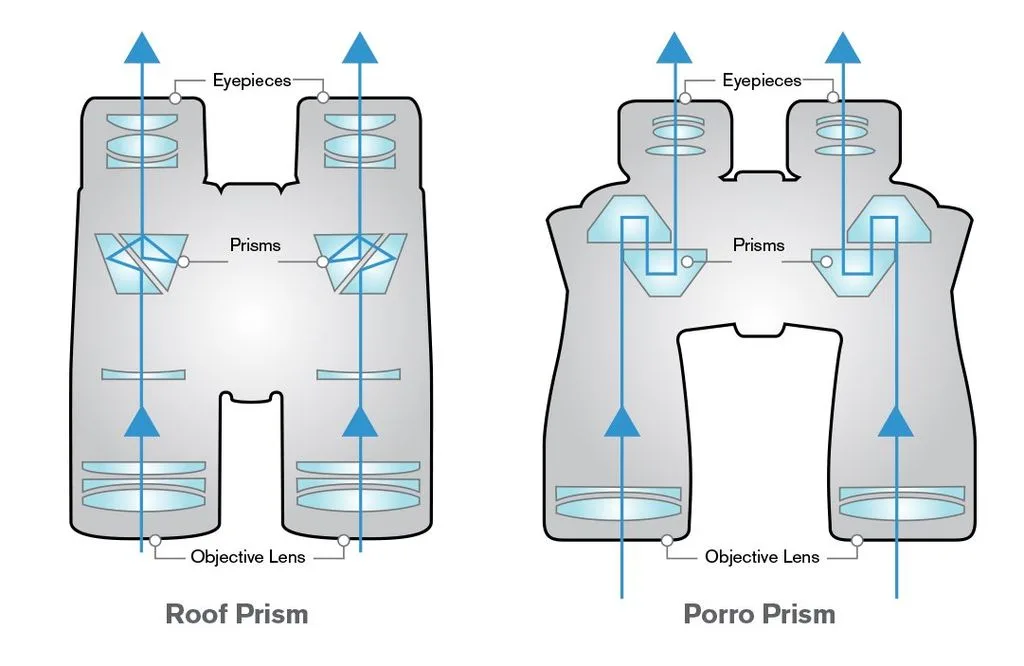
Image source: Bing (Web (fair-use with source credit))
Think about the problem. When you look through a binocular, you see a magnified scene that is right side up. But a simple magnifying lens alone produces an inverted image.
The binocular has to flip that image back before it reaches your eye. The device that does the flipping is a prism. And the way the prism sits inside the tube matters a lot.
Without a diagram, most people assume the light travels in a straight line from the front lens to the back lens. It does not. The light bounces off internal surfaces inside the prism.
It changes direction. It travels a longer path inside the body than the outside length of the binocular suggests. That folded light path is what makes the whole package compact enough to hold.
A good diagram also shows you the relationship between the objective lens and the eyepiece. The objective lens is larger. It collects light.
The eyepiece is smaller. It magnifies the image. The prism sits between them, and its job is to correct the orientation.
If you look at a side cutaway view, you see exactly how these three components line up.
Knowing the layout helps you understand why certain binoculars are shaped differently. A Porro prism binocular has that classic offset shape, with the objective lenses wider apart than the eyepieces. A roof prism binocular has a straight tube.
The internal arrangement of the prisms is what causes that difference. Without a diagram, the shape seems arbitrary. With a diagram, it clicks.
So if you are trying to learn how binoculars work, find a diagram. Look at the light path. Trace it from the front lens through the prism to the eyepiece.
That one visual will teach you more than a thousand words of description.
How Binoculars Actually Work — The Simple Version
Let's strip it down to the basics. A binocular is two telescopes bolted together. Each telescope has a lens at the front called the objective lens.
It has a lens at the back called the eyepiece. And it has a prism in the middle.
The objective lens does two things. It gathers light from a distant scene. And it focuses that light into a real image inside the tube.
That image is upside down and reversed left to right. If you looked at it directly, you would see a scene that is completely flipped.
The prism intercepts that image. It acts like a mirror but better. A mirror would reflect the light.
A prism bends the light using internal reflection. The prism flips the image so it is upright and correct left to right.
The eyepiece then takes that corrected image and magnifies it. It acts like a magnifying glass. You put your eye to the eyepiece, and you see a large, upright, correctly oriented view of the distant scene.
Magnification is the ratio of the objective lens focal length to the eyepiece focal length. An 8×42 binocular has an objective lens that is 42 millimeters in diameter. It magnifies the scene eight times.
That means a bird that is 80 feet away looks like it is 10 feet away.
The two barrels give you something a single telescope cannot. Depth perception. Your brain combines the two slightly different images from each eye.
That creates a three dimensional sense of depth. It is the same thing your eyes do naturally. With a monocular, you lose that stereo effect.
With binoculars, you keep it.
The focus mechanism is simple. You turn the center wheel. That moves the eyepieces forward or backward.
That changes the distance between the eyepiece and the focal plane. When that distance is correct, the image is sharp. Some binoculars also have a diopter ring on one eyepiece.
That adjusts for the difference in vision between your two eyes.
That is the whole process. Light enters. It gets focused, flipped, magnified, and delivered to your eye.
The components are simple. The arrangement is precise.
What's Inside — The Key Components and What They Do
Let's open up the tube and look at the parts. Every binocular has the same basic components. The quality and design of these parts determine how well the binocular performs.
Objective lens. This is the big lens at the front. Its diameter is the second number in the binocular spec. In an 8×42, the objective is 42 millimeters across.
A larger objective collects more light. That gives you a brighter image, especially in low light. But it also makes the binocular heavier and bulkier.
The objective lens is usually a compound lens made of two or three elements bonded together. That reduces chromatic aberration, which is the color fringing you sometimes see around bright objects.
Prism. This is the heart of the image correction system. The prism sits behind the objective lens. It reflects the light path multiple times.
That flips the image and also folds the light path so the binocular can be shorter. There are two main types of prisms, Porro and roof. We will get into the difference in a later section.
Eyepiece. This is the small lens you put your eye to. It magnifies the image formed by the objective. Eyepieces are also compound lenses.
A good eyepiece gives you a wide field of view and a sharp image across the whole field. A cheap eyepiece might be sharp only in the center and blurry at the edges.
Focus mechanism. Most binoculars use a center focus wheel. Turning the wheel moves the eyepieces together. Some binoculars use individual focus, where each eyepiece adjusts separately.
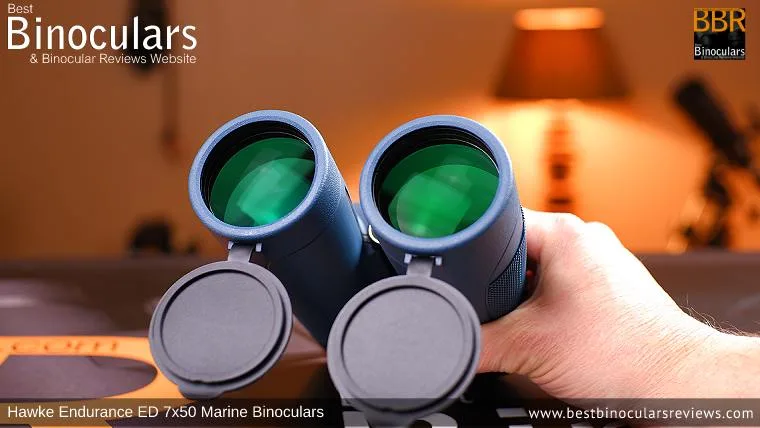
Center focus is faster for general use. Individual focus is more rugged and waterproof, common in marine binoculars.
Diopter adjustment. This is a small ring on one eyepiece. It lets you balance the focus between your two eyes. You set it once and then forget it.
If you skip this step, your binoculars will never be perfectly sharp for you.
Body and chassis. The body holds everything in alignment. It needs to be rigid. If the body flexes, the prisms can shift.
That causes double vision. Good binoculars use magnesium alloy or aluminum. Cheap ones use plastic.
The body is also sealed to keep out dust and moisture.
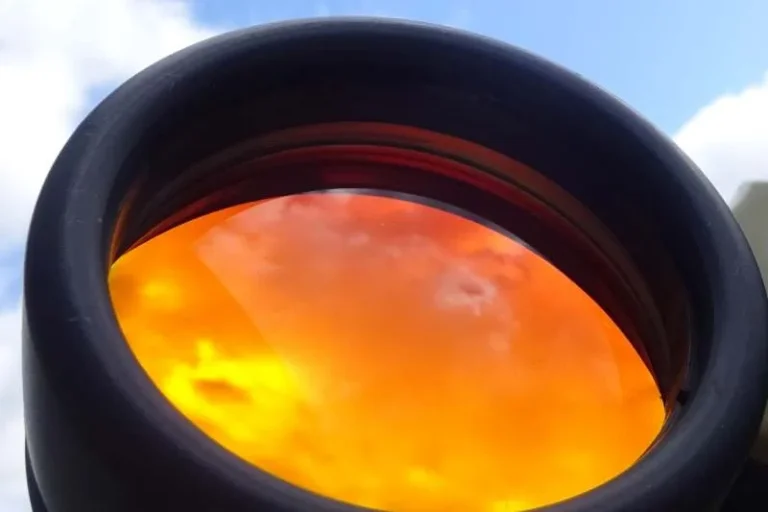
Coatings. Every glass surface has a thin coating. Coatings reduce light loss. They reduce glare.
They improve contrast. Fully multi coated binoculars have multiple layers on every lens surface. That is the standard you want for decent image quality.
Eyecups. These are the rubber or plastic rings around the eyepieces. They hold your eye at the correct distance from the eyepiece. That distance is called eye relief.
If you wear glasses, you need longer eye relief. Twist up eyecups let you adjust the distance.
Here is a quick reference table.
| Component | Job | What to look for |
|---|---|---|
| Objective lens | Collects light, forms initial image | Larger diameter for brighter image |
| Prism | Flips image upright, folds light path | Porro for depth, roof for compactness |
| Eyepiece | Magnifies the image | Wide field of view, sharp edges |
| Focus wheel | Moves eyepieces for sharpness | Smooth action, no wobble |
| Diopter ring | Compensates for eye difference | Locking ring is best |
| Body | Holds alignment | Metal chassis, sealed |
| Coatings | Reduce glare, improve light transmission | Fully multi coated |
| Eyecups | Position your eye | Twist up for glasses wearers |
Each component matters. The overall quality of a binocular is limited by its weakest part. A great objective lens is wasted on a cheap prism.
A good prism is wasted on a flimsy body. When you know what is inside, you can look at a price tag and understand where the money went.
The Light Path — Step by Step Through the Tube
This is where the diagram becomes essential. The light path inside a binocular is not a straight line. It bends.
It folds. It zigzags. Understanding that path is the key to understanding how binoculars work.
Let's walk through it step by step.
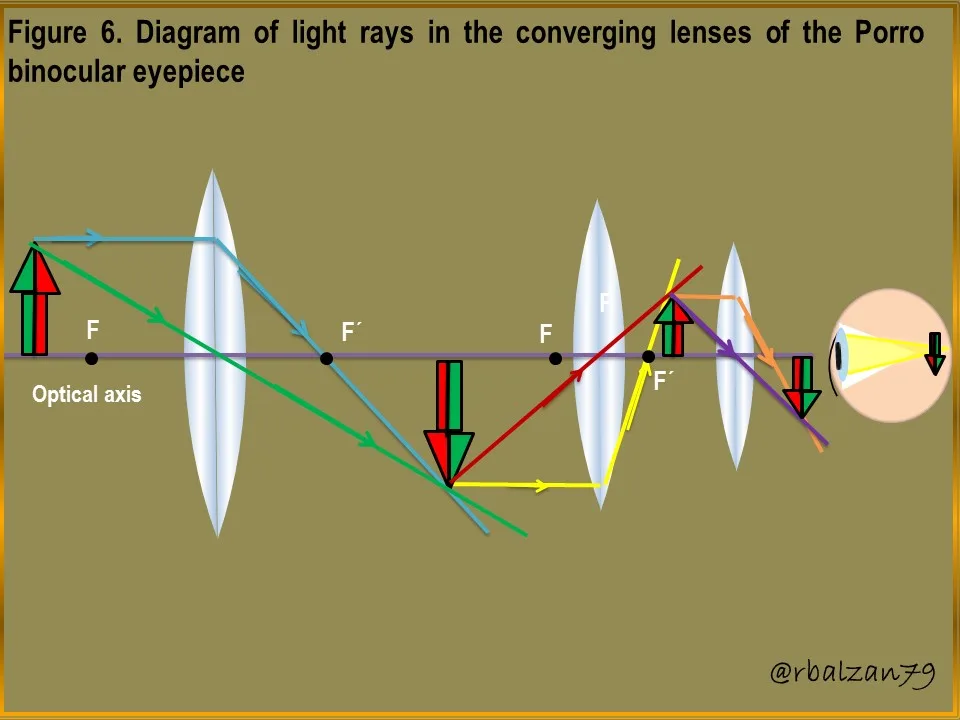
Image source: Bing (Web (fair-use with source credit))
Step 1. Light enters the objective lens. The objective lens is convex. It bends incoming light rays inward.
Parallel rays from a distant object converge at a point behind the lens. That point is the focal plane. The image formed here is real, meaning it can be projected onto a surface.
But it is upside down and reversed left to right.
Step 2. The light reaches the prism. The prism sits just behind the focal plane. In a Porro prism system, the light enters the first prism.
It hits the internal surface at an angle. That angle is steep enough that the light reflects off the surface instead of passing through. This is called total internal reflection.
The light bounces off one surface, then another. It exits the first prism going in a different direction.
Step 3. The light enters the second prism. In a Porro system, there are two prisms. The second prism is oriented at 90 degrees to the first.
The light enters the second prism and bounces again. After two reflections, the image is flipped both vertically and horizontally. It is now upright and correct left to right.
Step 4. The light passes through the eyepiece. The corrected image is now at the focal plane of the eyepiece. The eyepiece acts as a simple magnifier.
It enlarges the image and presents it to your eye. The eyepiece also has a specific distance from the focal plane. That distance is the eye relief.
Your eye needs to be at that exact distance to see the full field of view.
Step 5. Your eye receives the image. Your eye sees a magnified, upright, correctly oriented scene. Because both barrels are aligned, your brain combines the two images into a single three dimensional view.
The key insight is that the prism does not just flip the image. It also folds the light path. Without the prism, the binocular would need to be as long as the focal length of the objective lens.
That could be 200 millimeters or more. With the prism folding the light, the binocular can be less than half that length.
In a roof prism system, the light path is different. The prism is shaped like a roof. The light enters, splits, reflects off two surfaces at 90 degrees to each other, and recombines.
The result is a straight line path. That is why roof prism binoculars look like straight tubes. The tradeoff is that roof prisms are harder to manufacture to high precision.
They also need a phase correction coating to maintain image quality.
The light path is the same in principle for both types. Light enters, gets focused, gets flipped, gets magnified, and exits. The difference is how the prism arranges the reflections.
Porro vs Roof Prisms — How to Spot the Difference
These are the two main prism types in modern binoculars. They do the same job, but they do it differently. The difference affects the shape, the weight, the image quality, and the price.
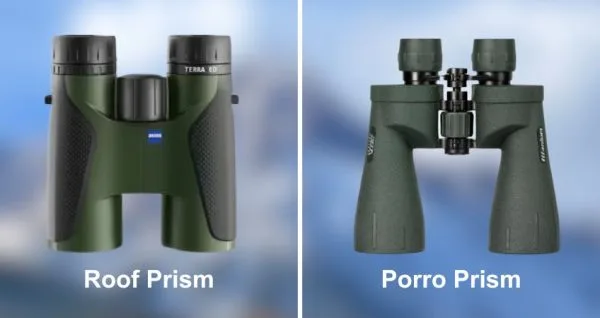
Image source: Bing (Web (fair-use with source credit))
Porro prism binoculars have that classic offset shape. The objective lenses are wider apart than the eyepieces. That shape is a direct result of how the prisms sit.
The light enters the objective, hits the first prism, bounces to the side, hits the second prism, and bounces back to the eyepiece. The offset is the physical distance the light travels sideways.
Porro prisms are easier to manufacture. They have been around since the 1850s. They deliver excellent image quality at a lower cost.
The light path is simple. The reflections are clean. There is less risk of internal glare.
The downsides are bulk and fragility. Porro binoculars are wider. They are harder to waterproof.
The prisms are mounted in a way that makes them more vulnerable to misalignment from a drop. If you drop a Porro binocular, the prisms can shift. That causes double vision.
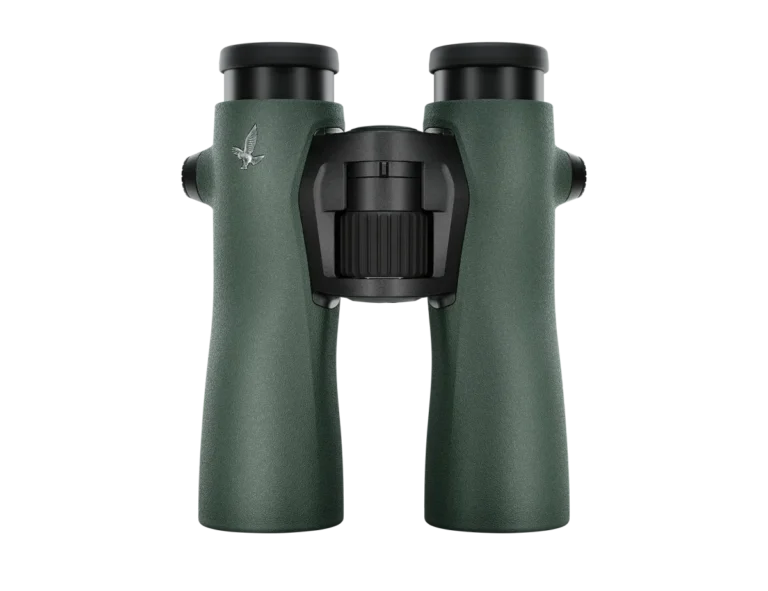
Roof prism binoculars have a straight tube. The objectives are in line with the eyepieces. That makes them more compact and easier to hold.
They are also easier to seal against moisture, which is why most waterproof binoculars are roof prism designs.
The tradeoff is complexity. Roof prisms require more precision. The light path splits and recombines.
That introduces a phase shift in the light waves. Without a phase correction coating, the image is less sharp and has lower contrast. High end roof prism binoculars have phase coatings and cost more.
Here is a comparison table.
| Factor | Porro prism | Roof prism |
|---|---|---|
| Shape | Offset, wider | Straight, compact |
| Image quality | Excellent, less complex | Excellent but requires phase coating |
| Waterproofing | Harder to seal | Easier to seal |
| Durability | Prisms can shift on impact | More robust |
| Weight | Usually heavier | Usually lighter |
| Cost | Lower for equivalent quality | Higher for equivalent quality |
| Best for | General use, birding, budget | Backpacking, hunting, wet conditions |
Which one should you choose? It depends on your priorities. If you want the best image quality for your money, get a Porro prism binocular.
If you need something compact and waterproof, get a roof prism binocular. Do not assume one is better than the other. At the same price point, a Porro prism binocular will often have better optics than a roof prism binocular.
The roof prism has to spend more of its budget on the complex prism assembly and coatings.
Both types work. Both types can produce excellent images. The difference is in the shape of the tube, the ease of sealing, and the price you pay for compactness.
What the Numbers on the Side Mean
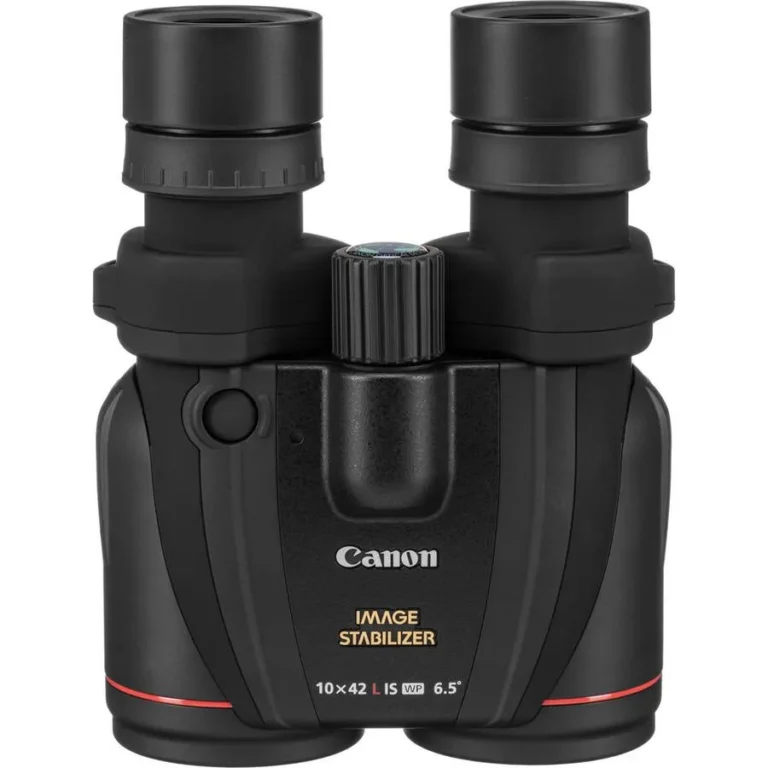
Every binocular has a pair of numbers printed on the body, like 8×42 or 10×50. Those numbers tell you exactly what the binocular will do. Once you know how to read them, you can compare any two binoculars directly.
The first number is the magnification. An 8×42 magnifies the scene eight times. A 10×42 magnifies it ten times.
Higher magnification makes distant objects appear larger. But it also makes the image shakier. At 8x, most people can hold a binocular steady.
At 10x, hand shake becomes noticeable. At 12x or higher, you really need a tripod.
The second number is the objective lens diameter in millimeters. An 8×42 has a 42mm front lens. A 10×50 has a 50mm front lens.
A larger objective collects more light. That gives you a brighter image, especially at dawn, dusk, or in deep shade. The tradeoff is weight and bulk.
A 50mm binocular is noticeably heavier than a 42mm.
The exit pupil is the diameter of the beam of light that leaves the eyepiece. You calculate it by dividing the objective diameter by the magnification. For an 8×42, that is 42 divided by 8, which equals 5.25 millimeters.
For a 10×50, it is 50 divided by 10, also 5 millimeters. A larger exit pupil gives a brighter image in low light. The human eye's pupil dilates to about 7 millimeters in the dark.
So an exit pupil of 5 to 7 millimeters is ideal for low light use.
The field of view is how wide an area you can see at a set distance. It is usually listed in feet at 1,000 yards or in meters at 1,000 meters. A wider field of view makes it easier to track moving objects like birds or sports players.
A narrow field of view feels like looking through a straw. Wide angle binoculars typically have a field of view of 350 feet or more at 1,000 yards.
Eye relief is the distance from the eyepiece to your eye where the full image is visible. If you wear glasses, you need eye relief of at least 15 millimeters. Short eye relief forces you to press your glasses against the eyepiece, which scratches the lenses and limits your view.
Twist up eyecups help you adjust the distance.
Here is a quick reference for common specs.
| Spec | 8×42 | 10×42 | 10×50 |
|---|---|---|---|
| Magnification | 8x | 10x | 10x |
| Objective diameter | 42mm | 42mm | 50mm |
| Exit pupil | 5.25mm | 4.2mm | 5mm |
| Low light performance | Good | Moderate | Excellent |
| Hand held stability | Excellent | Good | Good |
| Weight | Medium | Medium | Heavy |
The numbers tell a story. An 8×42 is the all around standard. It balances magnification, brightness, and weight.
A 10×42 gives you more reach but a dimmer image in low light. A 10×50 gives you reach and brightness but adds weight. Choose based on where and when you will use them most.
Common Visual Problems (and What They Look Like)
Binoculars are optical instruments. They can have optical problems. Knowing what these problems look like helps you identify a bad pair or a damaged pair.
Chromatic aberration shows up as color fringing around bright objects. You see a purple or green edge where a dark object meets a bright sky. It happens because different colors of light bend at slightly different angles through the lens.
Cheap binoculars have this problem. Good binoculars use special lens elements to reduce it.
Geometric distortion makes straight lines look curved. Barrel distortion makes lines bow outward. Pincushion distortion makes them bow inward.
Both are common in wide angle binoculars. Some distortion is acceptable. Extreme distortion is a sign of poor design.
Ghosting appears as faint reflections of bright lights. You see it at night when looking at streetlights or the moon. It happens when light bounces off internal surfaces.
Fully multi coated lenses reduce ghosting. Cheap coatings make it worse.
Flare is a wash of light across the image. It happens when bright light enters the binocular from an angle. It reduces contrast and makes the image look hazy.
Good lens coatings and internal baffles control flare.
Collimation error is the big one. It causes double vision. The two barrels are not aligned.
Your brain sees two images that do not merge. This causes eye strain, headaches, and nausea. It can happen from a drop or from manufacturing defects.
Testing collimation is simple. Look at a distant object with both eyes. If you see a single clear image, the collimation is good.
If you see two overlapping images, the binocular needs repair.
Blackouts happen when your eye is not centered on the exit pupil. You see a dark ring or the image cuts out. This is common with short eye relief.
It can also happen if the eyecups are set wrong. Adjust the eyecups and reposition your eye.
Blurry edges are normal in cheaper binoculars. The center of the image is sharp. The edges are soft.
That is called field curvature. Higher end binoculars use complex eyepiece designs to keep the edges sharp. If you only look at the center, edge blur does not matter.
If you scan the scene, it is annoying.
These problems are not all deal breakers. A little chromatic aberration is acceptable in a budget binocular. Double vision is not.
If you see two images, stop using the binocular and get it repaired or replaced.
How to Test Your Binoculars for Good Alignment
You can test binocular alignment at home. No special tools are needed. Just a clear view of a distant object and a few minutes of patience.
The star test. This is the most reliable method. Point the binoculars at a bright star or a distant streetlight at night. Focus until the star is a sharp point.
Now look at the star with both eyes. You should see a single point. If you see two points, the binoculars are out of collimation.
The eyelid test. Close one eye. Look through the binocular with the other eye. Focus on a distant object.
Now open the closed eye. Do not move the binocular. The image should snap into a single view.
If you see two images that drift apart, the alignment is off.
The wall test. Tape a piece of paper with a small cross on a wall. Stand 20 feet away. Focus on the cross with both eyes.
Now cover one objective lens. Look at the cross. Uncover it.
Cover the other objective. The image should remain centered. If the cross jumps to a different position when you switch eyes, the alignment is off.
The binocular test. Some binoculars have a diopter lock. Set the diopter to zero. Focus the center wheel.
Now adjust the diopter until the image is sharp in both eyes. If you need a large diopter adjustment, more than two or three clicks, the binoculars may have an alignment issue.
What to do if they fail. If the binocular fails the star test or the eyelid test, do not buy them. If you already own them and they fail, contact the manufacturer. Most binoculars have a lifetime warranty that covers alignment.
The repair is usually free.
Regular testing is not needed for most users. Test once when you buy a new binocular. Test again if you drop it.
Test again if you notice eye strain or headaches. Between those events, the alignment should stay stable.
Keeping Them Clean and Clear
Binoculars need maintenance. The lenses get dirty. The body gets dusty.
The seals can fail. A little care keeps them working for decades.
Cleaning the lenses. Use a blower to remove loose dust. Do not wipe dry lenses with a cloth. That grinds dust into the coatings.
After blowing, use a lens brush to sweep off remaining particles. Then use a microfiber cloth with a drop of lens cleaning solution. Wipe in a spiral from the center outward.
Do not use paper towels, tissue, or your shirt. Those scratch the coatings.
Cleaning the body. Wipe the body with a damp cloth. Use mild soap if needed. Do not use solvents.
Do not spray water directly into the binocular. Keep the seals dry.
Storing the binoculars. Store them in a dry place. Use the case. Keep the lens caps on.
Do not leave them in a car in summer. The heat can damage the seals and the coatings. Do not store them in a damp basement.
That can grow fungus on the lenses.
Checking the seals. If your binoculars are waterproof, the seals need to stay intact. Look for cracks in the rubber armor. Check the eyepiece and objective rings.
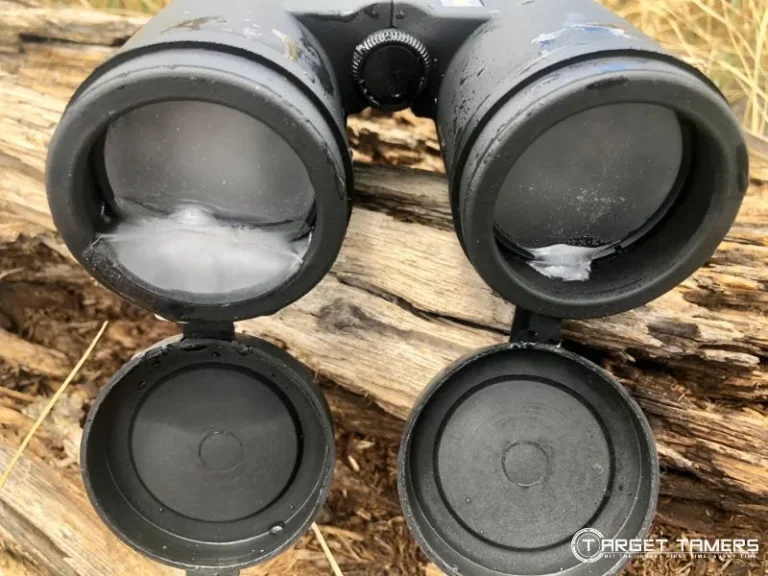
A broken seal lets moisture in. If you see fog inside the lens, the seal is broken.
Replacing the eyecups. Eyecups wear out. They get loose or cracked. Most manufacturers sell replacement eyecups.
They are easy to install. Just twist off the old one and twist on the new one.
Avoiding common mistakes. Do not store binoculars with the eyecups fully extended. They can break. Do not carry them by the strap without the strap attached to the correct loops.
Do not share them with someone who adjusts the focus roughly. Do not let children use them unsupervised.
A well maintained binocular can last 30 years or more. A neglected one can fail in two. The care is simple.
The payoff is huge.
Frequently Asked Questions
What do the numbers on binoculars mean?
The first number is magnification. The second is the objective lens diameter in millimeters. An 8×42 magnifies eight times with a 42mm front lens.
The exit pupil is the diameter divided by magnification. The field of view and eye relief are also listed in the specs.
Why do I see double when I look through binoculars?
Double vision usually means the binoculars are out of collimation. The two barrels are not aligned. This can happen from a drop or from a manufacturing defect.
Test with the star test. If you see two images, contact the manufacturer for repair.
What is the difference between Porro and roof prism binoculars?
Porro prism binoculars have an offset shape. They are wider but offer better image quality for the price. Roof prism binoculars are straight and compact.
They are easier to waterproof. Roof prism binoculars need phase correction coatings to match Porro image quality.
How do I clean binocular lenses without scratching them?
Use a blower first to remove dust. Then use a lens brush. Finally use a microfiber cloth with lens cleaning solution.
Wipe in a spiral from the center. Never wipe dry lenses. Never use paper towels or your shirt.
What is the best magnification for general use?
8x is the best all around magnification. It is steady enough to hold by hand. It gives a wide field of view.
It works well in low light. 10x is better for long distance but shakier. 12x and above need a tripod.
Can binoculars be repaired if the prism is misaligned?
Yes, most binoculars can be repaired. Many manufacturers offer lifetime warranties. Contact the manufacturer or a professional optical repair service.
Alignment repair is a precision job. Do not attempt to adjust the prisms yourself.