Can Binoculars See the Milky Way
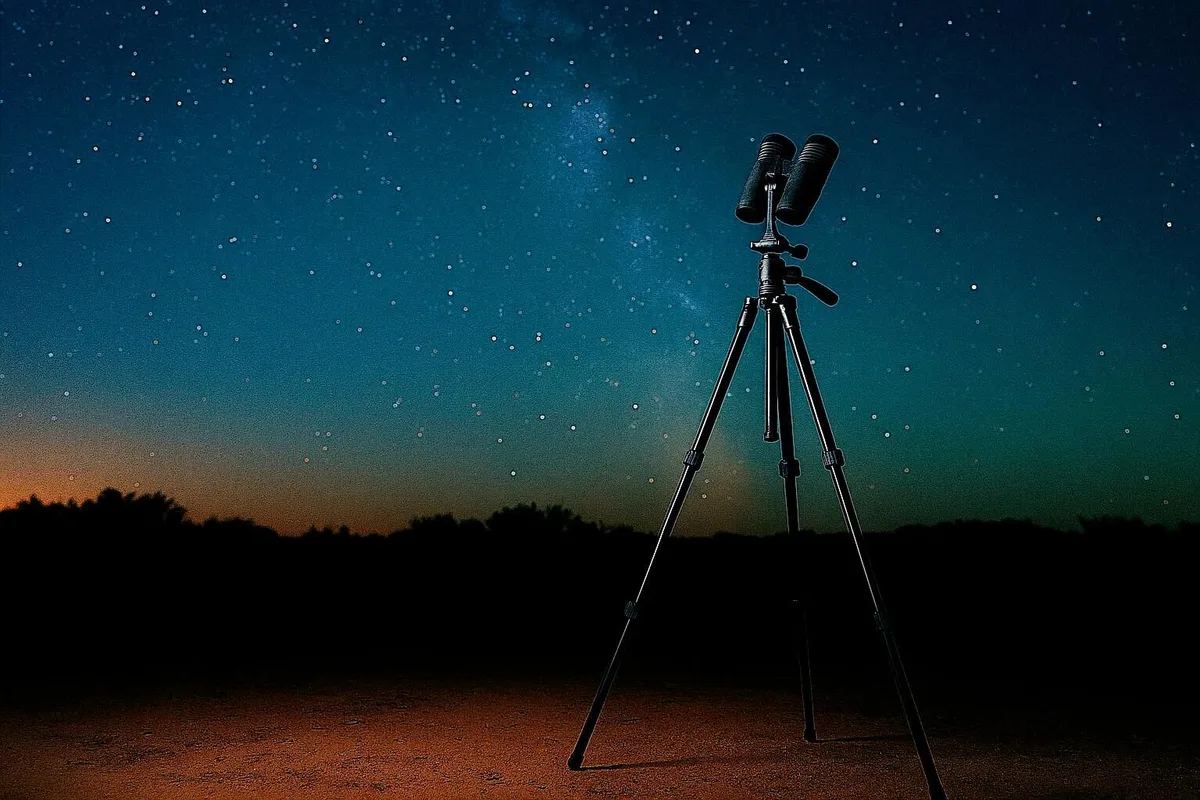
Image source: Bing (Web (fair-use with source credit))
So you want to know if binoculars can see the Milky Way. It's one of the most common questions people ask when they're getting into stargazing, and the answer is a solid "yes, but it depends." The Milky Way is absolutely visible through binoculars, but what you'll see depends on three things: where you're looking from, what binoculars you're using, and how well your eyes have adapted to the dark.
The good news is that you don't need a telescope to see the Milky Way in all its glory. Many experienced stargazers prefer binoculars over telescopes for this specific target. Binoculars give you a much wider field of view.
According to the International Dark Sky Association's Bortle scale measurements, the Milky Way's core is visible to the naked eye from Bortle class 4 or darker skies. Binoculars can reveal its structure from moderately light polluted areas that would otherwise wash it out completely. Let's walk through exactly what you need to know to make it happen.
Quick Answer
Yes, binoculars can see the Milky Way. It appears as a band of thousands of individual stars, star clouds, and dark dust lanes. You need dark skies and decent binoculars.
A 7×50 or 10×50 pair works well. The galaxy's core is best from May to September. Light pollution is the biggest obstacle.
Even from suburbs, binoculars help.
The Three Variables That Decide Everything
Before we get into the details, you need to understand that this isn't a simple yes or no question. The outcome depends on three interconnected variables. Changing any one of them can turn a disappointing view into a jaw dropping one.
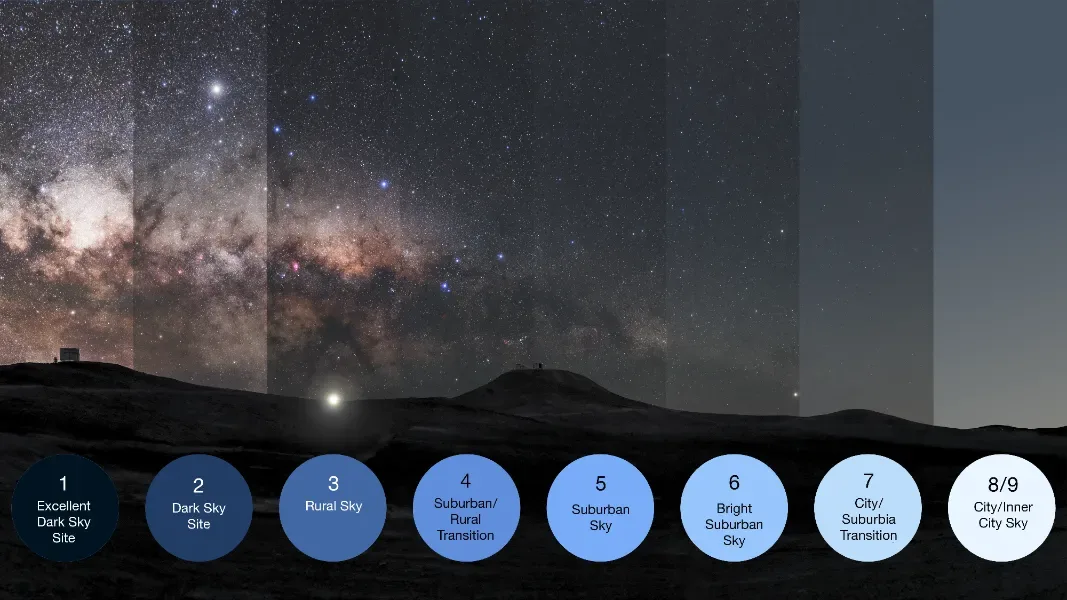
Image source: Bing (Web (fair-use with source credit))
Light Pollution: Your Biggest Obstacle
The single most important factor is how dark your sky is. Light pollution from streetlights, buildings, and parking lots creates a skyglow that washes out the faint light of the Milky Way. Astronomers use the Bortle scale to measure sky darkness.
It runs from class 1 (pristine dark) to class 9 (inner city).
Here's what that means for your chances:
| Bortle Class | Label | Milky Way Visibility with Binoculars |
|---|---|---|
| 1 | Excellent dark sky | Brilliant, detailed view with dust lanes |
| 2 | Typical dark sky | Very good, clear structure visible |
| 3 | Rural sky | Good, core visible, dust lanes faint |
| 4 | Rural/suburban transition | Visible, but dimmer, some structure lost |
| 5 | Suburban sky | Faint band, core visible with effort |
| 6 | Bright suburban | Very faint, core barely visible |
| 7 | Suburban/urban transition | Possibly visible, but disappointing |
| 8 | City sky | Usually invisible |
| 9 | Inner city | No chance |
If you're in Bortle class 5 or brighter, binoculars will not magically reveal the Milky Way like you see in photographs. They'll help, but the view will be faint. If you're in Bortle class 4 or darker, you're in for a treat.
Your Binoculars: Light Gathering Is Everything
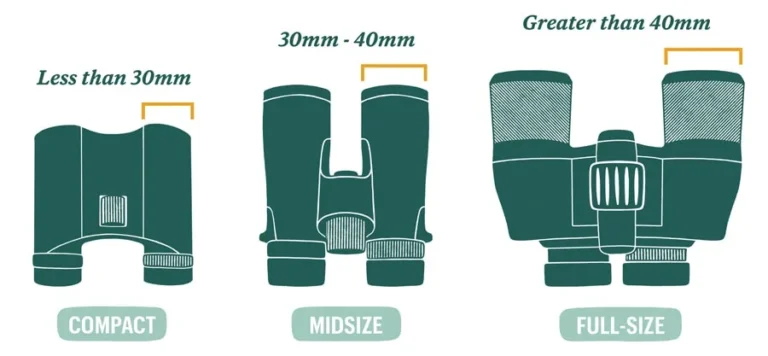
The second variable is your binoculars themselves. The key specification is the objective lens diameter, measured in millimeters. That's the second number in the binocular spec, like the "50" in 10×50.
Larger objective lenses gather more light. That makes faint objects like the Milky Way brighter and more detailed.
For Milky Way observation, aim for at least 35mm objective lenses. A 42mm pair is decent. 50mm is better. 70mm or larger is excellent but requires a tripod. The exit pupil, which is the objective lens diameter divided by the magnification, also matters.
We'll cover that in detail later.
Your Eyes: Dark Adaptation Is Non-Negotiable
This is the variable most people overlook. Your eyes need time to adjust to the dark. It takes about 20 to 30 minutes for your eyes to reach full dark adaptation.
A single glance at a phone screen or a passing car headlight resets that clock.
The human eye's pupil dilates to about 7mm in young adults. That decreases with age. A 40 year old might only dilate to 5mm.
A 60 year old might only reach 4mm. This matters because your exit pupil should match your dilated pupil size for the brightest view. If your binoculars' exit pupil is larger than your eye can accept, you're wasting light.
How to Self-Assess Your Situation
Now that you know the three variables, let's figure out where you stand. You don't need to guess. There are practical ways to assess each factor.
Step 1: Check Your Light Pollution Level
The easiest way to find your Bortle class is to use a light pollution map. Look up your location on a dark sky map online. These maps overlay satellite data showing artificial sky brightness.
You'll see a color coded overlay from black (Bortle 1) to white (Bortle 9).
If you're in a green zone or darker (Bortle 4), you're in good shape. Blue zones (Bortle 5) are workable. Yellow or orange zones (Bortle 6 or 7) are tough but not impossible.
Red or white zones (Bortle 8 or 9) are nearly hopeless for the Milky Way.
Step 2: Check Your Binocular Specs
Look at the numbers printed on your binoculars. They'll look something like 8×42, 10×50, or 7×35. The first number is the magnification.
The second is the objective lens diameter in millimeters.
Calculate the exit pupil by dividing the objective lens diameter by the magnification. A 10×50 has a 5mm exit pupil (50 divided by 10). A 7×50 has a 7.1mm exit pupil.
An 8×42 has a 5.25mm exit pupil.
Here's a quick reference table:
| Binocular Spec | Exit Pupil | Best For |
|---|---|---|
| 7×35 | 5mm | Okay for Milky Way, decent for daytime |
| 8×42 | 5.25mm | Good all rounder, works for Milky Way |
| 10×50 | 5mm | Great for Milky Way, good handheld |
| 7×50 | 7.1mm | Excellent for Milky Way, great for dark skies |
| 15×70 | 4.7mm | Excellent light grasp, requires tripod |
| 20×80 | 4mm | Maximum light, tripod mandatory |
Step 3: Check the Season and Moon Phase
The Milky Way's core is only visible during certain months. In the Northern Hemisphere, the best viewing is from May through September. July and August are peak months.
The core is in the constellation Sagittarius, which rises in the southeast during summer evenings.
The moon phase matters enormously. A full moon creates so much ambient light that it effectively turns Bortle 2 skies into Bortle 5 or worse. Plan your Milky Way observation around the new moon.
Or at least when the moon is below the horizon.
What Binocular Specs Actually Matter for the Milky Way
Let's get specific about what makes a binocular good for Milky Way viewing. Not all binoculars are created equal. The specs that matter for daytime birdwatching are different from what you need for deep sky observation.
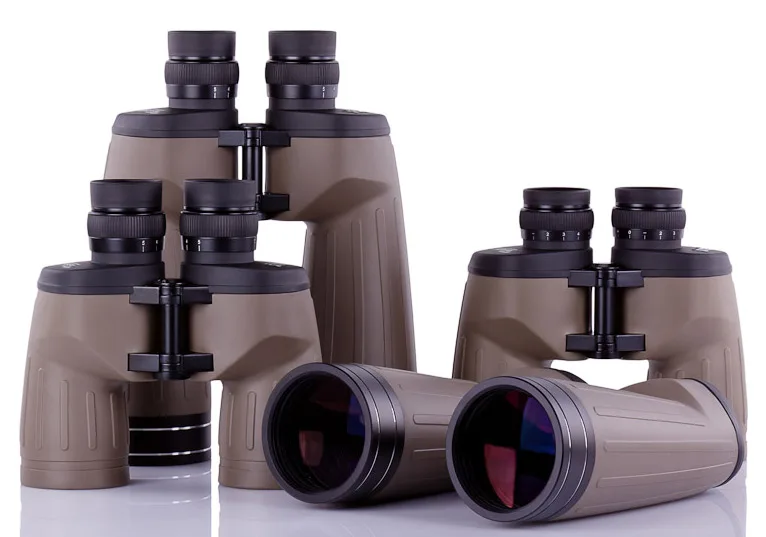
Image source: Bing (Web (fair-use with source credit))
Objective Lens Size: The Light Bucket
The objective lens is the big lens at the front of each barrel. Its diameter determines how much light the binoculars collect. Light gathering power scales with the area of the lens.
A 50mm objective collects about 40% more light than a 42mm objective. A 70mm objective collects nearly twice as much light as a 50mm.
For the Milky Way, bigger is almost always better. A 50mm binocular will show you more stars and more detail than a 42mm binocular. A 70mm binocular will blow both out of the water.
But there's a tradeoff. Larger objective lenses mean heavier, bulkier binoculars that are harder to hold steady.
Magnification: The Field of View Tradeoff
Magnification is the first number in the spec. For Milky Way viewing, lower magnification is often better. Here's why.
The Milky Way spans a huge area of the sky. The core itself is about 30 degrees wide. The full band stretches across the entire sky.
With a 7x binocular, you get a field of view of about 7 to 8 degrees. That's enough to take in large sections of the Milky Way at once. With a 10x binocular, your field of view drops to about 5 to 6 degrees.
With a 15x binocular, you're down to about 3 to 4 degrees. That feels like looking through a straw.
Higher magnification also magnifies your hand shake. At 10x, many people find it hard to hold binoculars steady without support. At 15x, a tripod is almost mandatory.
At 7x or 8x, most people can get a stable enough view to enjoy the Milky Way.
Exit Pupil: Matching Your Eye
The exit pupil is the diameter of the beam of light that leaves the eyepiece and enters your eye. If this beam is larger than your dilated pupil, you're wasting light. If it's smaller, your eye isn't fully illuminated.
For young observers with fully dark adapted pupils of 7mm, a 7×50 binocular (7.1mm exit pupil) is ideal. For older observers whose pupils only dilate to 5mm, a 10×50 (5mm exit pupil) is actually a better match. The light that would go into the 7mm exit pupil is simply blocked by the iris.
This is why 10×50 binoculars are often recommended as the best all round choice for Milky Way observation. They give a good balance of light gathering, magnification, and exit pupil that works for most adults.
Prism Quality and Coatings
The quality of the optical coatings matters a lot. Fully multi coated binoculars have anti reflective coatings on all glass surfaces. This reduces light loss and glare.
Phase coated prisms improve contrast and resolution in roof prism binoculars. These are not marketing gimmicks. They make a real difference in how bright and sharp the Milky Way appears.
Cheap binoculars with single layer coatings or no coatings at all will lose 15 to 20% of the light at each glass surface. That adds up to a lot of lost light by the time the image reaches your eye. For a faint object like the Milky Way, that lost light is the difference between seeing something and seeing nothing.
The Decision Tree: Can You See It?
Now let's put it all together. This is where you figure out your specific situation and what you'll actually see. Follow the branch that matches your conditions.
Branch 1: Dark Skies, Right Binoculars, Good Technique
This is the best case scenario. You're at Bortle class 4 or darker. You have binoculars with at least 42mm objectives, ideally 50mm or larger.
You've let your eyes adapt for 20 minutes. You're looking during a new moon in July or August.
What you'll see is breathtaking. The Milky Way appears as a bright, textured band of countless stars. You'll see star clouds, which are dense patches of unresolved stars that look like glowing mist.
You'll see dark dust lanes, like the Great Rift, cutting through the band. You'll see open clusters like the Wild Duck Cluster (M11) and the Ptolemy Cluster (M7) embedded in the Milky Way. The view is not a photograph, but it's glorious in its own way.
Branch 2: Dark Skies, Wrong Binoculars
You're at a dark site, but you're using compact 8×25 binoculars or a cheap pair with poor coatings. The light gathering is insufficient. You'll see the Milky Way as a faint band, but you won't see the detail that makes it special.
Your fix is simple. Upgrade your binoculars. Even a modest pair of 10x50s will transform the view.
You can also try using a tripod or bracing your arms against a car or tree to steady the image.
Branch 3: Suburban Skies, Decent Binoculars
You're in Bortle class 5 or 6. You have a decent pair of 10x50s or 8x42s. The Milky Way is faint, but it's there.
You'll see the core as a hazy patch of light. You might pick out a few star clouds. The dust lanes will be invisible.
Your best move is to find a darker location. Drive 30 minutes away from the city lights. Even a small improvement in sky darkness makes a huge difference.
If you can't get to darker skies, plan your observation for when the Milky Way is highest in the sky. That's around midnight in July.
Branch 4: Urban Skies, Any Binoculars
You're in Bortle class 7 or worse. You have binoculars. The Milky Way is invisible.
You will not see it, no matter what binoculars you use. The skyglow is simply too bright.
Don't give up. Pack your binoculars and drive to a darker location. A dark sky park within an hour's drive can transform your experience.
Check the International Dark Sky Association's list of certified parks.
Branch 5: Wrong Season or Moon Phase
You're in a dark sky with good binoculars, but it's February or the moon is full. The Milky Way's core is below the horizon in winter. You'll see the fainter winter Milky Way in the constellation Orion.
It's still worth looking at, but it's not as dramatic. The full moon creates so much light pollution that the Milky Way is washed out.
Wait for the right time. The new moon is your friend. Summer is your season.
What You'll Actually See
Let's manage expectations. The Milky Way through binoculars does not look like the photos you see on Instagram. Those are long exposure images that capture colors and details invisible to the human eye.
Through binoculars, the Milky Way is gray, not colorful. You won't see the pink and purple nebulae.
What you will see is a band of thousands of individual stars. They're so dense that they blend into a shimmering river of light. You'll see patches of brighter and darker areas.
The dark spots are not voids. They are dust clouds that block the light from stars behind them. You'll see star clusters that look like tiny diamonds scattered on black velvet.
The experience is more about the sense of scale and depth than about color. You're looking at the disk of our home galaxy, edge on. You're seeing the combined light of hundreds of billions of stars.
That's a humbling thing.
The Most Common Mistakes People Make
People make the same mistakes over and over. Here are the ones that cost you the view.
Not letting your eyes adapt. This is the biggest mistake. You walk outside, lift the binoculars, and immediately wonder why you can't see anything. It takes 20 to 30 minutes for your eyes to fully adapt.
If you check your phone during that time, you reset the clock.
Using the wrong magnification. High magnification sounds like a good idea, but it narrows your field of view and makes the image shaky. For the Milky Way, 7x to 10x is ideal. 15x or 20x requires a tripod and shows only a small patch of sky.
Looking at the wrong time of year. The Milky Way's core is only visible from May to September in the Northern Hemisphere. If you're looking in January, you're seeing the faint winter Milky Way. It's much less impressive.
Buying cheap binoculars with poor coatings. A $30 pair of binoculars from a department store is not going to show you the Milky Way. The optics are too dim and the coatings are poor. You need at least fully multi coated optics and decent glass.
Not steadying the binoculars. Hand shake is amplified at higher magnifications. Brace your elbows against your chest. Lean against a wall or car.
Use a tripod. A steady view reveals much more detail.
Forgetting the moon phase. A full moon ruins the view. Check the moon phase before you go. The new moon is best.
The Observation Process: Step by Step
Here's a practical sequence for a successful Milky Way observation session.
1. Pick your night. Choose a night with a new moon or a moon that sets before midnight. Check the weather forecast for clear skies and low humidity.
The best nights are usually in July and August.
2. Get to a dark spot. Drive away from city lights. A Bortle class 4 or darker site is ideal.
Dark sky parks, rural areas, and high elevations are good choices. Arrive while it's still light to set up and let your eyes start adapting.
3. Let your eyes adapt. Turn off all lights. Put your phone away.
Do not look at it. It takes 20 to 30 minutes. Use a red flashlight if you need light.
Red light preserves your night vision.
4. Find the Milky Way. Use an astronomy app in night mode to locate the Milky Way band. The core is in the constellation Sagittarius, which looks like a teapot.
The Milky Way rises from the spout. Apps like Stellarium or SkySafari show you exactly where to look for your location and time.
5. Steady your binoculars. Hold them with both hands. Tuck your elbows into your chest.
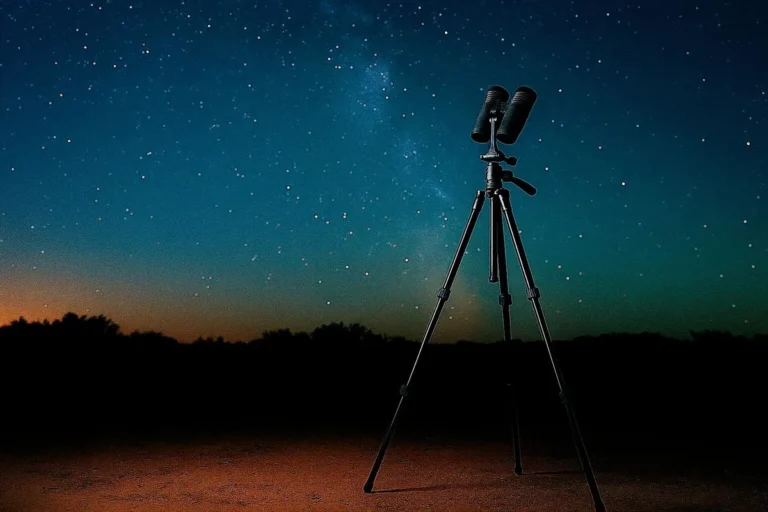
Lean against a solid object. Better yet, use a tripod with a binocular adapter. A steady view is essential.
A red flashlight, a lawn chair, and a blanket all make the session more comfortable and productive.
6. Use averted vision. Look slightly to the side of the object you're focusing on. The edge of your retina is more sensitive to faint light.
This technique reveals details that disappear when you look directly at them.
7. Scan slowly. Move the binoculars slowly along the Milky Way band. Take your time.
Let your eyes adjust to each new field of view. The best views are often the ones you find by accident.
Troubleshooting a Disappointing View
If you look through your binoculars and see nothing, check the obvious things first. Make sure the lens caps are off. Check that the focus is correct.
Turn the focus wheel until stars are sharp pinpoints, not fuzzy disks.
If you still see nothing, your eyes might not be adapted. Wait 20 minutes without looking at any light. Then try again.
Use averted vision. Look slightly to the side of where you expect the Milky Way to be.
If the sky looks washed out, light pollution is the problem. Check the moon phase. A full moon ruins the view.
Check the weather. High humidity or thin clouds can scatter light and make the sky glow.
If your binoculars show a double image, they might be out of collimation. This means the two barrels are not aligned. Collimation can be fixed by a professional.
If your binoculars are cheap, replacement might be cheaper than repair.
The Recommended Binoculars for Each Situation
Not everyone needs the same binoculars. Here's what works for different scenarios.
City dweller on a budget. You're in Bortle class 6 or 7. You don't have dark skies at home, but you want to try from your backyard. Get a pair of 8×42 binoculars.
They're versatile for daytime use and light enough to travel to darker sites.
Casual stargazer with dark sky access. You can drive to a dark site a few times a year. Get a pair of 10x50s. They're the classic choice for a reason.
They gather enough light for the Milky Way, and they're still portable enough to carry on a hike.
Dedicated observer wanting the best handheld view. You're serious about this. You have dark skies nearby. Get a pair of 7x50s.
They have the largest exit pupil, which is ideal for young observers with fully dilated pupils. The low magnification gives a wide field of view and a steady image.
Tripod mounted setup for serious Milky Way hunting. You want the best possible view. Get a pair of 15x70s or 20x80s. These are heavy and require a sturdy tripod.
But the light gathering is phenomenal. You'll see more stars, more detail, and more structure than any handheld binocular can show.
What to Explore After You've Seen the Milky Way
Once you've seen the Milky Way band, you'll want to explore deeper. The Milky Way is packed with fascinating objects that are easy to find with binoculars.
Open clusters are scattered throughout the band. The Wild Duck Cluster (M11) and the Ptolemy Cluster (M7) are bright and easy. The Double Cluster in Perseus is a stunning pair of clusters visible in the winter Milky Way.
Globular clusters are dense balls of ancient stars. M13 in Hercules and M22 in Sagittarius are visible in binoculars. They look like fuzzy cotton balls.
Dark nebulae are dust clouds that block starlight. The Great Rift is the most prominent. It splits the Milky Way band in half.
Star clouds are dense patches of stars that look like glowing mist. The Scutum Star Cloud is a standout. With binoculars, you can resolve dozens of stars in these clouds.
Each one is a sun like our own.
Frequently Asked Questions
Can I see the Milky Way from a city with binoculars?
No. Even the best binoculars cannot overcome heavy light pollution. You need at least Bortle class 5 or darker to see the Milky Way at all.
Drive to darker skies.
What's the minimum binocular size for the Milky Way?
An objective lens of at least 35mm is the minimum. A 42mm is better. 50mm is ideal. Anything smaller than 35mm will not gather enough light to show the Milky Way clearly.
Is 10×50 or 7×50 better for the Milky Way?
It depends on your age. For younger observers with fully dilated pupils (7mm), the 7×50 is better because it matches the pupil size. For older observers with smaller pupils, the 10×50 is better because the 5mm exit pupil matches the eye.
Do I need a tripod?
For 10x and below, you can handhold with proper technique. For 15x and above, a tripod is mandatory. Even for 10x, a tripod improves the view significantly.
Can I see the Milky Way in binoculars during a full moon?
No. The full moon creates so much ambient light that it washes out the Milky Way. Wait for a new moon.
How do I know if my binoculars are good enough?
Check the coatings. Look for "fully multi coated" in the specs. Check the objective lens size.
At least 42mm. If you can, test them on a dark night. If you can see the Milky Way band, they're good enough.
Final Decision Guide: Your Next Step
You now have everything you need to know. The only remaining question is what you do next.
| Your Situation | Next Step |
|---|---|
| Bortle 4 or darker, no binoculars | Buy 10x50s or 7x50s |
| Bortle 4 or darker, have binoculars | Go out tonight and look |
| Bortle 5 or 6, have binoculars | Drive to darker skies |
| Bortle 7 or worse, have binoculars | Drive to darker skies, plan a trip |
| Bortle 5 or worse, no binoculars | Buy 8x42s for versatility, drive to dark skies |
| Wrong season | Wait for summer, learn the winter Milky Way |
If you own binoculars already, check their specs against what we covered. If the objective lens is 42mm or larger and the exit pupil is between 5mm and 7mm, you're ready. Go find a dark sky and try tonight.
If you need to buy binoculars, start with 10x50s. They are the most versatile choice for Milky Way observation. They work well for most adults and handle light pollution better than 7x50s.
If you have young eyes and access to pristine dark skies, 7x50s give you the widest, brightest view.
If light pollution is your problem, plan a trip to a dark sky park. The International Dark Sky Association maintains a list of certified locations. Many are within a few hours of major cities.
A single night under Bortle class 2 or 3 skies will change how you see the universe.
The Milky Way is not a photograph. It's a real physical thing. With the right conditions and the right binoculars, you can see the glow of our home galaxy with your own two eyes.
That never gets old.