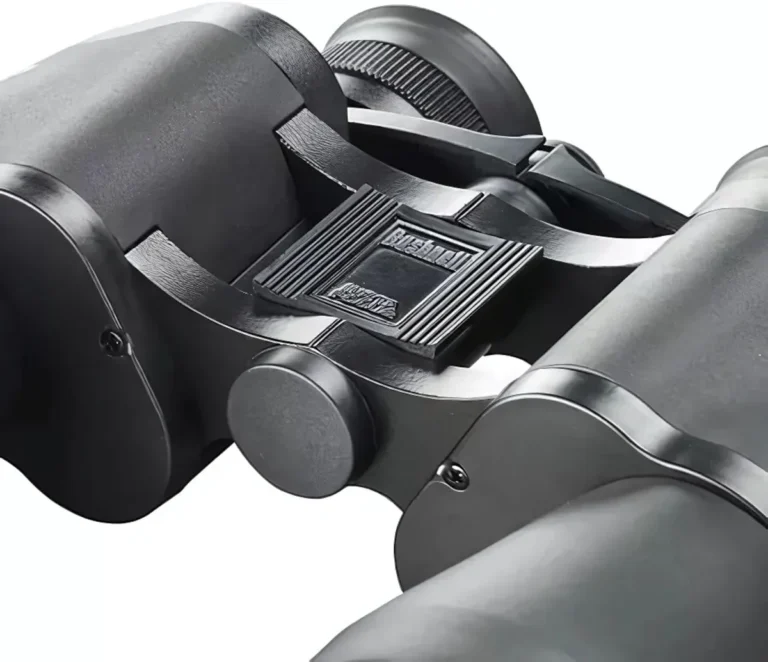
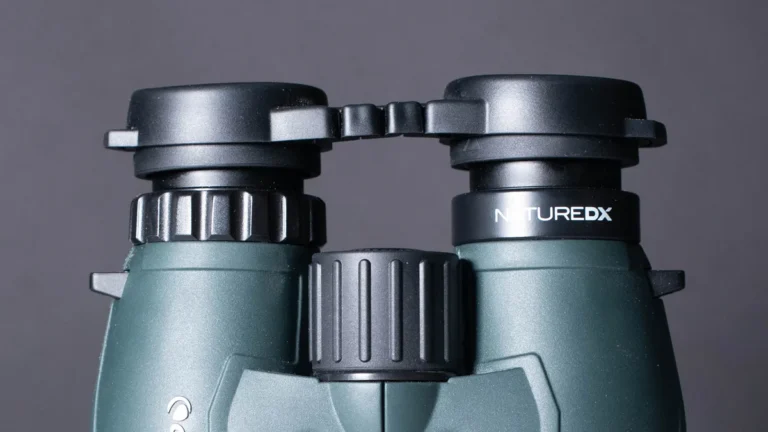
What Are Roof Prism Binoculars
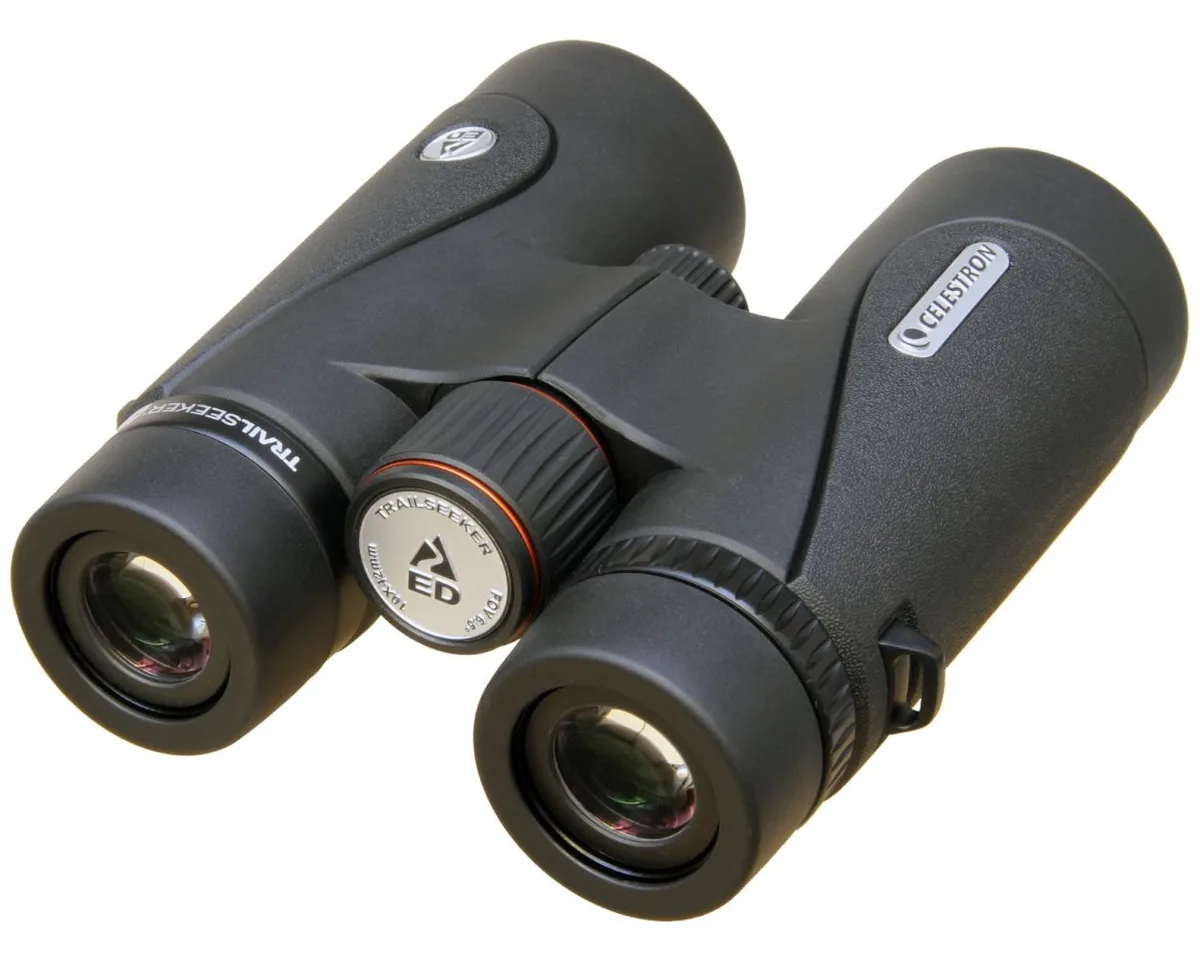
Image source: Bing (Web (fair-use with source credit))
What Exactly Are Roof Prism Binoculars? (The Quick Visual Answer)
Roof prism binoculars are a compact binocular design. They use two prisms in a roof-like arrangement. This creates a straight-through light path.
The barrels stay aligned with the eyepieces. The result is a slim, streamlined body. It's the most common binocular design today.
Most roof prisms need phase coating for good image quality. Without it, the image looks dim and soft.
The name "roof prism" comes from the prism shape itself. The two prism halves meet at a ridge, like the roof of a house. This ridge is what makes the straight-through design possible.
It's also what introduces the phase shift problem that requires special coatings.
There are two main roof prism designs. The Schmidt-Pechan prism is the most common. You'll find it in most mid-range and high-end binoculars.
The Abbe-Koenig prism is less common. It's used in some premium European models. Both designs achieve the same goal: a straight, compact body.
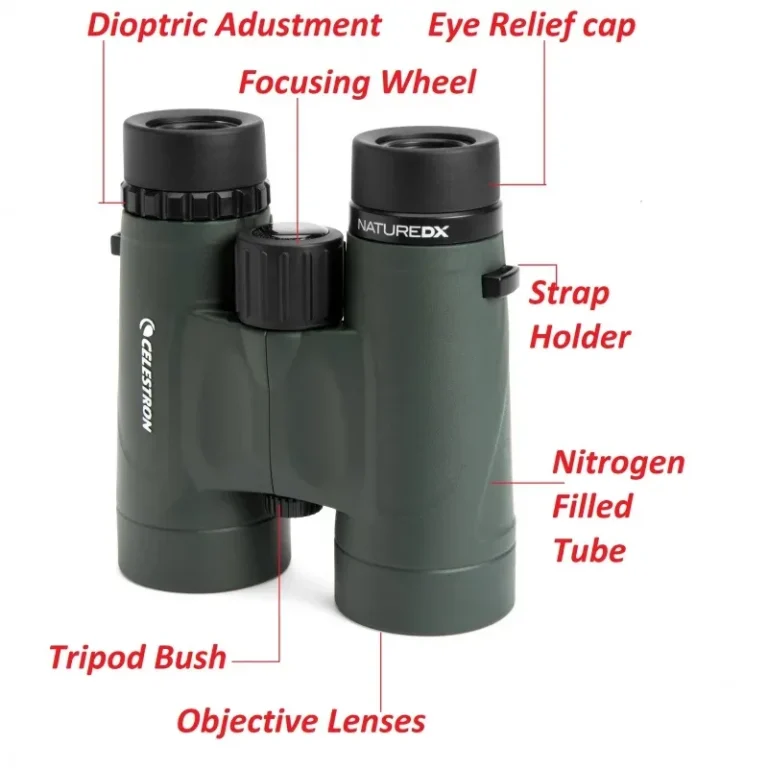
You can spot a roof prism binocular from across the room. The barrels are straight and parallel. There's no offset or kink in the body.
This makes them easy to pack and comfortable to hold. Most binoculars you see at birding sites or sporting events are roof prisms. As of 2026, roof prisms make up the vast majority of binoculars sold.
They're the standard design for most manufacturers. The only exception is budget models, where Porro prisms still dominate due to lower manufacturing costs.
The key visual identifier is simple. If the objective lenses and eyepieces form a straight line, you're looking at a roof prism binocular. If the objective lenses are wider apart than the eyepieces, that's a Porro prism.
That difference in shape is the fastest way to tell them apart without reading a spec sheet.
How Roof Prism Binoculars Work (And Why the Light Path Matters)
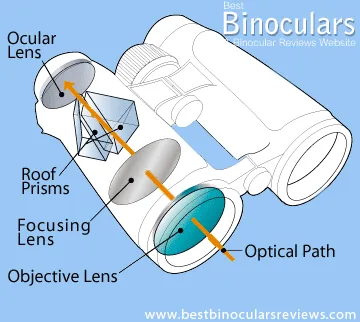
Image source: Bing (Web (fair-use with source credit))
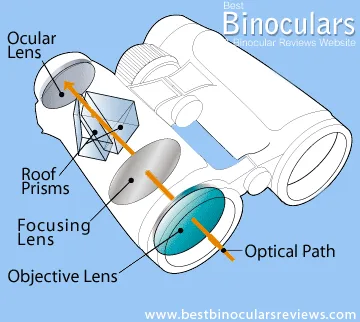
Light travels in a straight line through the objective lens. It then hits the first roof prism. The prism reflects the light internally, flipping the image right-side up.
The light then passes through the second prism. It exits through the eyepiece into your eye. All of this happens inside a body that's barely wider than the lenses themselves.
The magic of the roof prism is the roof ridge itself. The ridge creates a "folding" of the light path. This is what allows the barrels to stay straight.
In a Porro prism, the prisms offset the light path. That's why Porro binoculars have that zigzag shape. In a roof prism, the light path is folded back on itself.
The result is a straight, narrow body.
The Schmidt-Pechan design uses two prisms. One is a Schmidt prism. The other is a Pechan prism.
They work together to correct the image orientation. This design is compact and efficient. It's used in most modern roof prism binoculars.
The Abbe-Koenig design uses a different approach. It uses two prisms that are joined together. This design doesn't need a phase coating.
But it requires longer prisms. This makes the binoculars slightly longer than Schmidt-Pechan models. You'll find Abbe-Koenig prisms in some high-end European brands.
The phase shift problem is unique to roof prisms. The roof ridge splits the light into two beams. These beams interfere with each other.
This causes a loss of contrast and sharpness. Phase coating corrects this interference. Without it, the image looks soft and flat.
That's why phase coating is the single most important feature in a roof prism binocular.
What's Inside a Roof Prism Binocular? Key Components to Look For
The prism material matters more than most people think. BaK-4 glass is the standard for quality roof prisms. It has a higher refractive index than BK-7 glass.
This means it reflects more light internally. The result is a brighter, sharper image. BK-7 glass is cheaper but produces darker edges.
You can test this yourself. Hold the binoculars at arm's length. Look at the exit pupil.
If it's perfectly round, you have BaK-4. If it's square or has cut-off edges, it's BK-7.
Phase coating is the biggest quality differentiator. A roof prism binocular without phase coating will look dim and soft. It will have poor contrast.
The image will look like you're looking through a dirty window. Phase coating restores the contrast and sharpness. Look for "phase-corrected" or "P-coating" in the specs.
Any roof prism binocular worth buying will have this.
Dielectric coating is the next step up. It's a multi-layer coating on the prism surfaces. It reflects over 99 percent of the light.
This dramatically improves brightness. Silver coating is an older alternative. It reflects about 95 to 98 percent of the light.
Dielectric coating is better. It produces more accurate color. It's common in mid-range and high-end binoculars.
Waterproofing and fog-proofing are standard in modern roof prisms. The body is sealed with O-rings. The interior is purged with nitrogen or argon gas.
This prevents internal fogging from temperature changes. Look for a waterproof rating of at least 1 meter for 30 minutes. This is the IPX7 standard.
Some models are rated for deeper submersion.
Lens coatings also matter. Fully multi-coated lenses are the minimum for good performance. This means every air-to-glass surface has multiple anti-reflective coatings.
Single-coated lenses lose too much light. Uncoated lenses are basically unusable for serious use. Your roof prism binocular should be fully multi-coated.
The Real Pros and Cons of Roof Prism Binoculars
| Pros | Cons |
|---|---|
| Compact and lightweight design | Higher cost than equivalent Porro |
| Streamlined, easy to pack | Need phase coating for good image |
| Fully waterproof and fog-proof | Narrower field of view |
| Durable, rigid chassis | Harder to collimate if dropped |
| Better for glasses wearers | More complex internal design |
| Low profile, less snagging | Image quality varies wildly by price |
The compact advantage is real. A roof prism binocular is about 30 percent narrower than a Porro of the same magnification. It fits in a daypack or carry-on bag.
It's easier to hold for long periods. The ergonomics are better for most people.
The sealing advantage is also significant. Most roof prism binoculars are fully waterproof. Porro prisms are harder to seal because of their offset barrels.
This makes roof prisms better for wet conditions. They're the standard choice for marine use, rain forest birding, and winter hunting.
The cost trade-off is the biggest downside. A $200 roof prism binocular might perform like a $100 Porro. You're paying for the complex manufacturing.
The prisms need precise alignment. The coatings add cost. The sealed body adds cost.
You get what you pay for.
The field of view is another trade-off. Porro prisms typically offer a wider field of view at the same magnification. This is because the offset barrels allow for larger prisms.
Roof prisms are more restricted. The difference is usually 10 to 20 percent narrower. For wide-field birding, a Porro might be better.
Roof Prism vs. Porro Prism: Which Design Wins for You?
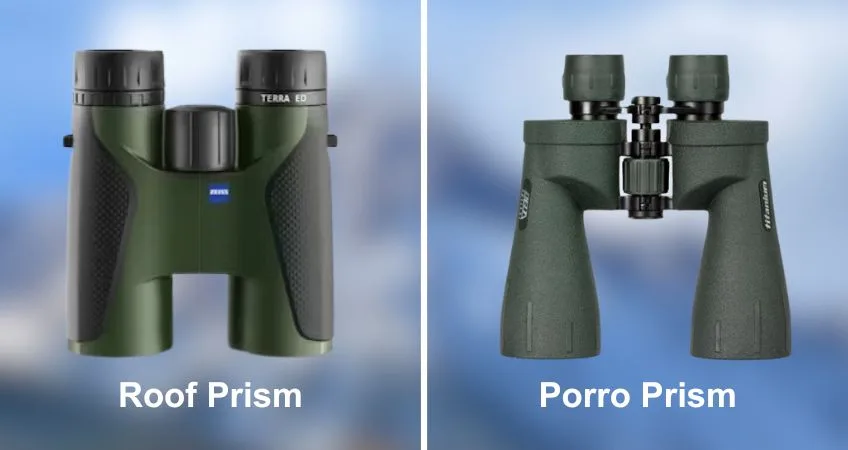
Image source: Bing (Web (fair-use with source credit))
The shape difference tells you everything. Roof prisms are straight and slim. Porro prisms are angled and bulky.
But the real difference is in how they perform. Let's compare them side by side.
| Feature | Roof Prism | Porro Prism |
|---|---|---|
| Body shape | Straight, compact | Angled, offset |
| Weight | Lighter (typically) | Heavier (typically) |
| Waterproofing | Easy to seal | Harder to seal |
| Cost | Higher for same quality | Lower for same quality |
| Field of view | Narrower | Wider |
| Image quality | Excellent with coatings | Good without coatings |
| Portability | Excellent | Good |
| Durability | Very good | Good |
Image quality at the same price point is the key question. A $200 Porro will usually outperform a $200 roof prism. The Porro has simpler optics.
It doesn't need phase coating. It has a wider field of view. The roof prism at the same price might have poor coatings or BK-7 glass.
But at higher price points, the roof prism pulls ahead. A $500 roof prism with phase coating, dielectric coating, and BaK-4 glass will outperform a $500 Porro. The roof prism has better light transmission.
It's more compact. It's better sealed. The coatings make up for the optical complexity.
Portability is where roof prisms win decisively. A roof prism binocular is easier to pack. It's easier to carry on a neck strap.
It doesn't snag on branches. It fits in a jacket pocket or hip pack. For hikers and travelers, this is the deciding factor.
The decision comes down to your priorities. If you need the best image quality for the lowest price, buy a Porro. If you need compactness, waterproofing, and durability, buy a roof prism.
If you're spending under $200, a Porro is usually the better choice. If you're spending over $400, a roof prism is almost always the right call.
Who Should Buy Roof Prism Binoculars? Best Uses for the Design
Roof prism binoculars are the default choice for most outdoor enthusiasts. They offer a compact, streamlined package that works well in a wide range of conditions. The straight-through design makes them easy to pack and comfortable to hold for extended periods.
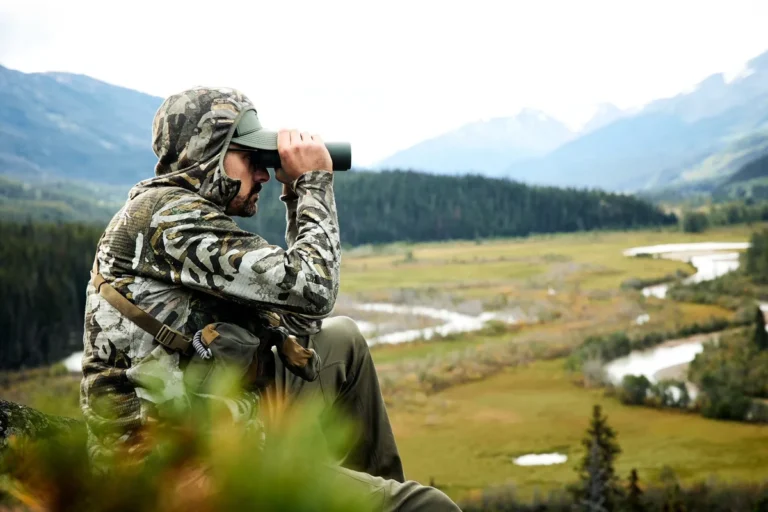
Birdwatchers are the most common users of roof prism binoculars. The compact body lets you bring them to your eyes quickly. Waterproofing is essential for rainy or humid conditions.
Many models also offer a close focus distance of 6 to 8 feet, which is great for spotting nearby birds. Phase coating is critical here. Without it, the feather detail and color contrast will look flat and washed out.
Hikers and backpackers appreciate the weight and bulk advantage. A roof prism binocular is about 30 percent narrower than a Porro of the same specs. It fits easily in a daypack or hip pack.
The durable, sealed body can handle bumps and rough handling on the trail. For long-distance hikes, every ounce matters. Roof prisms typically weigh less than their Porro counterparts.
Concert and event goers choose roof prism binoculars for their low profile. The slim design is discreet and doesn't draw attention. It's easy to slip into a small bag or jacket pocket.
The straight barrels also make them easier to hold steady for long periods. You won't look like you're carrying a pair of giant binoculars.
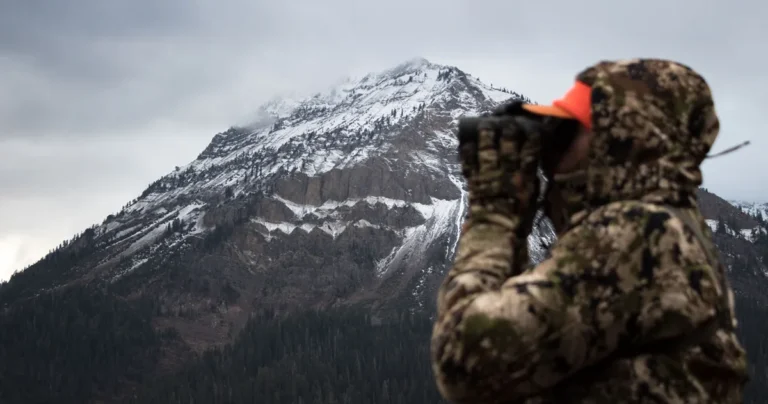
Hunters rely on roof prism binoculars for their ruggedness. The sealed body is fog-proof and waterproof. This is critical in wet, cold, or humid conditions.
The durable construction can handle drops and rough use in the field. Many hunting models also feature rubber armor for extra grip and shock absorption.
Travelers prefer roof prism binoculars for their compact size. They fit easily in a carry-on bag or daypack. The streamlined shape doesn't snag on straps or pocket openings.
Many models are light enough to wear around your neck all day without fatigue. Some compact roof prisms are small enough to fit in a large jacket pocket.
5 Common Mistakes People Make with Roof Prism Binoculars (And How to Avoid Them)
Buying a cheap model without phase coating. This is the most common mistake. A roof prism binocular without phase coating looks dim and soft. The image lacks contrast.
You are paying for the compact design without getting the optical performance. Always check the spec sheet for "phase-corrected" or "P-coating" before buying. Per ISO 14132-1:2015, the international standard for binocular vocabulary, phase coating is not a requirement for the definition of a roof prism, but it is a requirement for good image quality in practice.
Ignoring the prism material. BK-7 glass is cheaper than BaK-4. But it produces darker edges and a smaller exit pupil. The image looks cut off around the edges.
You can test this yourself. Hold the binoculars at arm's length and look at the exit pupil. If it is perfectly round, you have BaK-4.
If it is square or has cut-off edges, it is BK-7.
Assuming all waterproofing is equal. Not all waterproof roof prisms are the same. Some are rated IPX7, meaning they can be submerged for 30 minutes at 1 meter. Others are only splashproof.
If you plan to use them in wet conditions, look for a clear waterproof rating. Do not rely on vague marketing claims like "water resistant."
Picking the wrong magnification for the compact body. A 10x magnification in a compact roof prism can be shaky. The smaller body makes it harder to hold steady. An 8x magnification is more stable.
It offers a wider field of view. For most general use, 8x is the better choice. Save 10x for tripod-mounted or large objective models.
Forgetting to check eye relief for glasses wearers. Short eye relief makes it hard to see the full field of view. If you wear glasses, look for eye relief of 15 to 20 millimeters. This ensures you can see the entire image without pressing your glasses against the eyecups.
Some models offer twist-up eyecups that help with this.
What to Look for When Buying Roof Prism Binoculars: Pro Advice
Look for phase coating, BaK-4 prisms, and fully multi-coated lenses as the minimum specs for a decent roof prism binocular. These three features ensure good image quality. Without them, you are better off with a Porro prism at the same price.
How to test phase coating yourself. The reflection test is simple. Hold the binoculars at arm's length. Look at the reflection in the objective lens.
A good phase coating produces a sharp, bright reflection. A poor one looks dim or blurry. This test works best in bright light.
Why a $200 roof prism can be better than a $500 Porro. It depends on the coatings. A $200 roof prism with phase coating, dielectric coating, and BaK-4 glass can outperform a $500 Porro with basic coatings. But a $200 roof prism without phase coating will look worse than a $100 Porro.
The coatings make the difference.
The hold test. Hold the binoculars to your eyes. Do they feel balanced? Are the controls easy to reach?
If they feel awkward, they will not be comfortable to use. Binoculars that do not fit your hands will end up sitting in a drawer. Your fingers should naturally fall on the focus wheel and diopter adjustment.
Warranty and customer support. A good warranty is important for a sealed optic. Look for a lifetime warranty or at least a 10-year warranty. Some manufacturers offer no-fault coverage.
This is worth paying extra for. You will appreciate it if the binoculars ever need repair.
Frequently Asked Questions About Roof Prism Binoculars
Are roof prism binoculars better than Porro prism binoculars?
It depends on your needs. Roof prisms are more compact and easier to seal. They are better for portability and waterproofing.
Porro prisms offer a wider field of view and lower cost for the same optical quality. Neither is universally better.
Do I really need phase coating on roof prism binoculars?
Yes, absolutely. Without phase coating, a roof prism binocular produces a dim, soft, and low-contrast image. The phase coating corrects the light interference inside the prism.
It is the single most important feature for image quality in a roof prism design.
Why are roof prism binoculars more expensive?
Roof prism binoculars require more complex manufacturing. The prisms need precise alignment and special coatings. The sealed body requires more engineering.
These factors increase the cost compared to Porro prism designs of equivalent optical quality.
Can I use roof prism binoculars for astronomy?
Yes, but choose carefully. You need a larger objective lens, typically 42mm or 50mm, for good light gathering. The binoculars should have phase coating and dielectric coating for maximum brightness.
A 10×50 roof prism is a good choice for stargazing.
How do I clean and maintain roof prism binoculars?
Use a lens pen or microfiber cloth for the lenses. Never use paper towels or household cleaners. Store the binoculars in a dry, moderate temperature environment.
Keep the lens caps on when not in use. Check the seals annually for signs of wear.
The Bottom Line: Are Roof Prism Binoculars Right for You?
Roof prism binoculars are the best choice if you need compactness, waterproofing, and durability. They are ideal for outdoor activities like birding, hiking, and hunting. They are also great for travel and events.
| Use Case | Recommended Choice | Key Reason |
|---|---|---|
| Birding | Roof prism | Waterproof, compact, close focus |
| Hiking | Roof prism | Lightweight, easy to pack |
| Events | Roof prism | Low profile, discreet |
| Hunting | Roof prism | Rugged, fog-proof |
| General outdoor use | Roof prism | Versatile, durable |
| Budget under $200 | Porro prism | Better image for the price |
| Astronomy | Roof prism (10×50) | Good light gathering with coatings |
Choose a roof prism if you prioritize portability and sealing. Choose a Porro prism if you need the best image quality for the lowest price. If you are spending over $400, a roof prism is almost always the right call.
If you are spending under $200, a Porro is usually better.
One sentence summary: Roof prism binoculars are the standard for modern outdoor optics, offering a compact, durable, and waterproof design that excels in most real-world conditions.