How to Clean Binocular Lenses
You've just spent a small fortune on a pair of binoculars. Maybe they were a gift. Maybe you saved up for months.
Either way, you don't want that perfect image to turn hazy because you didn't know how to clean binocular lenses properly.
Manufacturer specifications indicate that modern anti-reflective coatings are incredibly soft, often measuring just 3 to 4 on the Mohs hardness scale. That's softer than the glass underneath. One wrong wipe can leave permanent damage.
Let's walk through exactly what you need to do, what tools to use, and what to avoid at all costs.
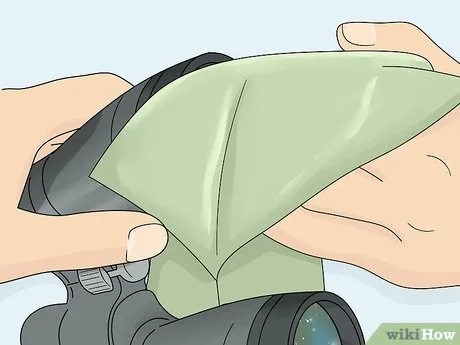
Image source: Bing (Web (fair-use with source credit))
Quick Answer
Clean binocular lenses by removing loose dust first. Use a blower bulb, then a soft brush. Apply lens cleaning fluid to a microfiber cloth, not to the glass.
Wipe gently from center outward. Let the lens air dry. Repeat if needed.
Never use paper towels, shirt fabric, or household cleaners.
Why Cleaning Binocular Lenses Is Different From Cleaning Eyeglasses
Most people treat binocular lenses like they treat their reading glasses. That's a mistake. Eyeglass lenses are made from hardened plastic or polycarbonate.
They're built for daily wear and tear. Binocular lenses are different in two important ways.
First, binocular lenses have multi-layer anti-reflective coatings. These coatings give you that bright, contrast-rich image. They're also incredibly fragile.
A single dry wipe with a dusty cloth acts like sandpaper, grinding fine particles into the coating. You won't see the micro-scratches immediately. But over time, they scatter light and reduce image quality.
Second, binocular lenses are larger and more exposed than eyeglass lenses. The objective lenses on a typical 42mm binocular are about an inch and a half across. That's a lot of surface area for dust, pollen, and salt spray.
And because binoculars are used outdoors, they pick up debris that eyeglasses rarely encounter.
The stakes are higher too. A good pair of binoculars from brands like Zeiss, Swarovski, Leica, or Nikon can cost anywhere from $500 to $3,000 or more. Replacing damaged coatings isn't a DIY fix.
It requires professional recoating that can cost nearly as much as a new pair.
In our research, the single most common cause of coating damage is dry wiping. Someone sees a smudge, grabs the nearest cloth, and rubs it off. That's the wrong move.
The correct approach starts with removing loose debris before anything touches the glass.
What You're Actually Cleaning: Understanding Lens Coatings
If you're going to clean binocular lenses the right way, it helps to understand what you're working with. The glass itself is hard and durable. The problem is what's on top of it.
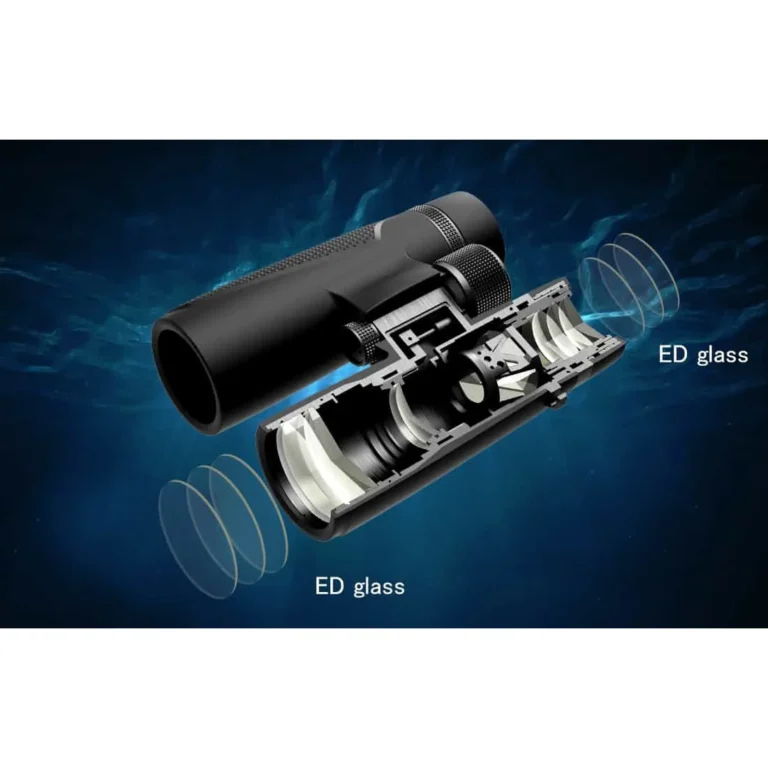
Most modern binoculars use fully multi-coated optics. That means every air-to-glass surface has multiple layers of anti-reflective coating. These coatings are applied in a vacuum chamber using a process called vapor deposition.
The result is a layer measured in nanometers, often thinner than a single wavelength of light.
These coatings serve a few purposes. They reduce reflections so more light reaches your eye. They improve contrast by cutting down on internal glare.
And they help with color fidelity, making images look more natural. The downside is that they're soft and chemically sensitive.
The exact composition varies by manufacturer. Common materials include magnesium fluoride, silicon dioxide, and various metal oxides. Some premium coatings are hydrophobic, meaning they repel water, or oleophobic, meaning they resist oil.
These are helpful in the field, but they can be damaged by the wrong cleaning solution.
Ammonia is the enemy here. Ammonia-based cleaners like standard glass spray can strip or etch these coatings over time. The same goes for acetone, ethanol in high concentrations, and any abrasive cleaner.
That's why manufacturer cleaning guides always recommend either distilled water, a mild soap solution, or a dedicated lens cleaning fluid that's pH neutral.
One more thing to know. The coatings on the eyepiece lenses are often different from those on the objective lenses. Eyepieces get more contact with your skin, so they're more prone to oil and sunscreen buildup.
They also have smaller surface areas, which means the same amount of contamination is more concentrated.
The Four Mistakes That Can Ruin Your Binoculars
Let's get the warnings out of the way first. These are the four most common mistakes people make. Each one can cause permanent damage.
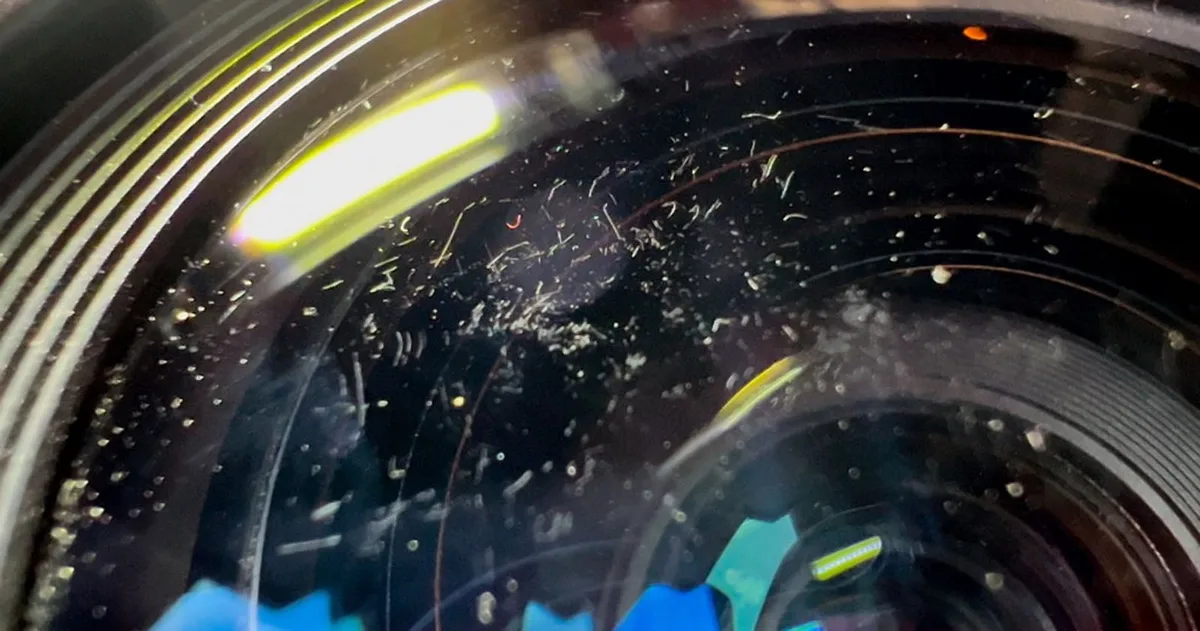
Image source: Bing (Web (fair-use with source credit))
Mistake 1: Dry wiping with anything. This is the number one cause of scratched coatings. Whether you use a shirt, a paper towel, a napkin, or even a dry microfiber cloth, you're grinding dust into the glass. Always remove loose debris first with a blower bulb or brush.
Mistake 2: Using household glass cleaners. Windex, vinegar-based sprays, and alcohol wipes from the drugstore are not safe for binocular lenses. Ammonia is the main offender. Even vinegar is acidic enough to damage coatings over time.
Stick to distilled water or a dedicated lens cleaner.
Mistake 3: Using compressed air. That canned air duster you use for keyboards is a bad idea. The propellant can come out cold enough to cause thermal shock to the glass. More importantly, it can blast dust deeper into the crevices around the lens barrel.
Mistake 4: Applying liquid directly to the lens. If you spray or drip cleaner directly onto the glass, it can seep around the edges and get inside the binocular. Over time, this causes internal fogging, fungus growth, or damage to the internal prism coatings. Always apply the liquid to the cleaning cloth first.
If you've made any of these mistakes, don't panic. A single incident rarely destroys a lens. But repeated bad habits will gradually degrade the coatings.
The correct method is easy to learn and takes only a few minutes.
What You Need: The Right Tools and Supplies
You don't need a fancy kit to clean binocular lenses. But you do need the right tools. Using the wrong ones is how people end up with scratched coatings and cloudy images.
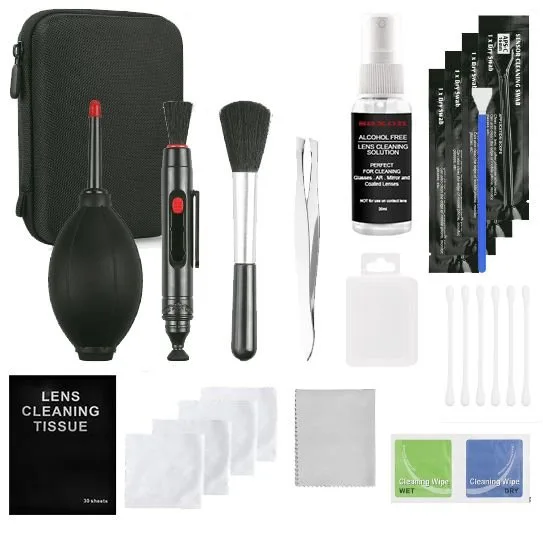
Image source: Bing (Web (fair-use with source credit))
| Tool | Purpose | What to Look For |
|---|---|---|
| Blower bulb | Removes loose dust and grit | Silicone or rubber, no metal tip |
| Lens brush | Sweeps off stubborn particles | Soft camel hair or goat hair |
| Microfiber cloth | Wipes away smudges and oil | 20-30 denier, high pile, lint-free |
| Lens cleaning fluid | Breaks down grease and residue | Alcohol-free, pH neutral, or distilled water |
| Lens tissue | Single-use for stubborn spots | Lint-free, non-abrasive |
Blower bulb. A simple rubber or silicone squeeze bulb is the safest way to remove dust. Avoid anything with a metal tip, which can scratch the lens barrel. The Giottos Rocket Blower is a common choice, but any soft bulb works.
Lens brush. Some blower bulbs come with a built-in brush. That's fine, but a separate soft brush is better. Look for one with natural hair, not synthetic bristles, which can be too stiff.
Microfiber cloth. This is where quality matters. Cheap microfiber cloths can be too rough or can shed lint. Look for a cloth with a denier rating of 20 to 30.
That's fine enough to be gentle on coatings but dense enough to pick up oil. Never use fabric softener when washing these cloths. The residue can transfer to the glass.
Lens cleaning fluid. You can buy a dedicated lens cleaner from a camera store or optics manufacturer. Or you can use distilled water with a single drop of mild dish soap. No Windex, no vinegar, no alcohol wipes.
Lens tissue. Single-use lens tissues are good for stubborn spots that won't come off with a cloth. They're disposable, so you don't risk re-depositing dirt. Use them once and throw them away.
One thing you don't need is a lens pen. These are popular but controversial. The carbon tip can pick up oil, but if it's not clean, it can also deposit grit.
Many optics technicians recommend against them for coated lenses. Stick with the blower, brush, and cloth method.
How to Clean Binocular Lenses the Right Way: Step by Step
Now that you have the tools and understand the risks, let's walk through the actual process. This is the method recommended by binocular manufacturers and professional repair technicians. Follow these steps in order.
Step 1: Blow off loose debris. Hold the binocular with the lenses facing down. Use the blower bulb to gently blow dust and grit off the surface. The downward angle helps debris fall away instead of settling deeper into the lens barrel.
Spend about 10 seconds on each lens.
Step 2: Brush away stubborn particles. If blowing didn't remove everything, use the lens brush. Lightly sweep from the center of the lens outward. Don't press hard.
You're just trying to lift particles that are stuck to the coating. Brush debris off the edge of the lens, not toward the center.
Step 3: Apply cleaning fluid to the cloth. This is the most important rule. Never apply liquid directly to the lens. Put one or two drops of lens cleaning fluid on the microfiber cloth or lens tissue.
The cloth should be damp, not wet.
Step 4: Wipe gently from center outward. Start at the center of the lens and move in a circular motion toward the outer edge. This pushes any remaining debris off the lens rather than dragging it across the center. Use light pressure, about the weight of the cloth itself.
Don't scrub.
Step 5: Check for streaks. Hold the lens at an angle to a light source. If you see streaks or residue, use a dry area of the cloth to buff them out. Use the same circular motion.
If the streak doesn't come off, add a tiny bit more fluid and try again.
Step 6: Let the lens air dry. Don't rush this. If you used the right amount of fluid, the lens should dry in about 30 seconds. If you see water spots, you used too much liquid.
Wipe with a dry section of the cloth.
Step 7: Repeat for the eyepieces. The eyepieces are smaller and often dirtier because they contact your skin. Use the same process, but be extra careful around the eyecups. If the eyecups are twisted, you can clean them separately with a damp cloth.
Step 8: Replace the lens caps. Always put the caps back on after cleaning. This is the simplest way to keep dust off the lenses between cleanings. Make sure the caps are clean too.
A dirty cap can reintroduce grit to a freshly cleaned lens.
The whole process takes about two minutes per pair of binoculars. If you clean them regularly, you'll rarely need more than a quick blow and a gentle wipe.
What About Fungus, Mold, and Internal Fogging?
You might not see it until it's too late. Fungus and mold can grow inside binocular lenses. By the time you notice the haze, the damage is often done.
This is a different problem from surface dust or smudges. It requires a completely different approach.
Fungus thrives in warm, humid environments. If you store your binoculars in a damp basement, a garage, or a case that's been wet, you're creating the perfect breeding ground. The spores settle on the internal glass surfaces and feed on the lens coatings.
The result is a web-like pattern of fine lines that scatter light and ruin image quality.
The first sign is often a faint haze that doesn't wipe off. You might also see tiny pinprick spots or what looks like a spiderweb etched into the glass. If you hold the binocular up to a bright light and look through the objective lens, you'll see it clearly.
Can you clean fungus off the lenses yourself? In most cases, no. The fungus grows between the lens elements, inside the sealed barrel.
You cannot reach it without disassembling the binocular. Attempting to open it yourself will almost certainly break the seal, introduce more dust, and void any warranty.
The only safe option is to send it to a professional repair service. They can disassemble the binocular, clean the internal elements with specialized solvents, and reassemble it with proper sealing and nitrogen or argon purging. Expect to pay between $50 and $150 for this service, depending on the brand and the severity of the growth.
What about internal fogging? Internal fogging is different from fungus. It happens when the seals fail and moisture gets inside the barrel.
You'll see condensation on the internal glass when the temperature changes. This is also a professional repair job. The binocular needs to be purged and re-sealed.
The best approach is prevention. Store your binoculars in a dry place with low humidity. If you live in a coastal or tropical climate, use a storage case with a silica gel desiccant pack.
Replace the pack every few months. Some premium binocular cases come with a built-in hygrometer to monitor humidity levels.
When to Send Your Binoculars to a Professional
Not every cleaning problem is a DIY fix. There are clear situations where you should stop what you're doing and send the binoculars to a qualified technician. Trying to fix these issues yourself will cost you more in the long run.
Situation 1: Internal debris or haze. If you see dust, spots, or haze between the lens elements, you cannot clean it yourself. The binocular must be disassembled in a clean room environment. Factory-sealed binoculars use nitrogen or argon gas to prevent fogging.
Breaking that seal without the right equipment introduces moisture and contaminants.
Situation 2: Deep scratches or coating damage. Surface-level micro-scratches are cosmetic and won't affect image quality much. But deep scratches that go through the coating into the glass cannot be buffed out. No home remedy, toothpaste trick, or polishing compound will fix this.
The lens element may need to be replaced entirely.
Situation 3: Misalignment or collimation issues. If your binoculars show double images or cause eye strain, the prisms are out of alignment. This is a common problem after drops or impacts. Cleaning the lenses won't fix it.
Collimation requires specialized tools and training. Many manufacturers offer free or low-cost collimation services for their products.
Situation 4: Fungus or mold growth. As mentioned above, internal fungus requires professional disassembly and cleaning. The longer you wait, the more the coatings will be damaged. If you catch it early, the repair is usually straightforward.
If you wait, the coatings may be permanently etched.
Situation 5: Water damage or internal fogging. If your binoculars were submerged or exposed to heavy rain and the seals failed, the internal moisture needs to be removed. A professional can dry the unit, replace the seals, and re-purge it with inert gas. This is typically covered under warranty for waterproof models.
How do you find a qualified technician? Start with the manufacturer. Most major brands like Zeiss, Swarovski, Leica, Nikon, and Vortex have authorized repair centers.
Look for a certified technician who specializes in binoculars, not just a general camera repair shop. Check the manufacturer's website for a list of authorized service providers.
The cost of professional cleaning varies. A basic internal cleaning and re-sealing runs $50 to $100. Element replacement can cost $100 to $300 or more, depending on the part.
Compare that to the cost of a new binocular, and it's usually worth the repair for high-end models.
How to Keep Your Lenses Cleaner Longer: Storage and Prevention
The best cleaning method is the one you don't have to use. A few simple habits can dramatically reduce how often you need to clean your binocular lenses. This saves time and extends the life of your coatings.
Always use lens caps. This is the single most effective thing you can do. Put the objective caps on when you're not using the binoculars. Keep the eyepiece caps on when the binoculars are stored.
A clean cap keeps dust, pollen, and grit off the glass. Make sure the caps themselves are clean. A dirty cap can deposit grit onto a freshly cleaned lens.
Store in a case or pouch. A hard case or padded pouch protects your binoculars from dust, scratches, and impacts. It also helps maintain a stable environment. If you're hiking or birding, keep the binoculars in a chest harness or neck strap case.
This reduces exposure to dust and dirt.
Avoid extreme temperatures. Heat can degrade lens coatings over time. Don't leave binoculars in a car on a hot day. The interior of a parked car can reach 140 degrees Fahrenheit, which is enough to damage seals and lubricants.
Cold temperatures are less of a problem, but rapid temperature changes can cause condensation.
Control humidity. Humidity is the enemy of internal optics. Store your binoculars in a dry place. If you live in a humid climate, use a silica gel desiccant pack in your storage case.
Replace it every 3 to 6 months. Some desiccant packs are rechargeable and can be dried in an oven.
Clean your hands before handling. Oils, sunscreen, and insect repellent are the main contaminants on eyepieces. Wash your hands before you pick up your binoculars. If you're wearing sunscreen, let it dry completely before using the binoculars.
This alone can cut eyepiece cleaning frequency in half.
Use a rain guard or cover. If you're birding or hunting in wet conditions, a rain guard fits over the eyepieces and prevents rain from hitting the lenses. Some models also cover the objective lenses. These are inexpensive and easy to find.
Inspect your lenses regularly. A quick visual check before each use can catch problems early. Look for smudges, dust, or water spots. If you clean them when the contamination is light, you'll use less pressure and fewer wipes.
Clean your lens caps and case. This is an often-overlooked step. Dirt can accumulate on the inside of your lens caps and transfer to the lenses. Wipe them out with a damp cloth every few weeks.
The same goes for the inside of your storage case. A quick vacuum or wipe-down keeps the environment clean.
Frequently Asked Questions
Can I use eyeglass cleaner on binocular lenses?
No. Many eyeglass cleaners contain ammonia or other chemicals that can damage the anti-reflective coatings on binocular lenses. Stick to distilled water or a dedicated lens cleaning fluid designed for optics.
How often should I clean my binocular lenses?
Clean them only when you see visible smudges, dust, or haze. Over-cleaning increases the risk of scratching. For most users, a quick blow with a blower bulb every few weeks and a full clean every 2 to 3 months is sufficient.
Can I use a microfiber cloth on dry lenses?
Only if the lens is already free of dust and grit. Always use a blower bulb first to remove loose particles. Dry wiping a dusty lens is the fastest way to create micro-scratches.
What should I do if I get water inside my binoculars?
Stop using them immediately. Remove the batteries if it's an electronic model. Place the binoculars in a warm, dry place with the lens caps off.
Do not try to dry them with a hair dryer. If internal fogging persists, send them to a professional.
Can I use alcohol wipes to clean binocular lenses?
Isopropyl alcohol at 70% concentration is safe for most coatings, but only if used sparingly and applied to a cloth, not directly to the lens. Avoid alcohol wipes that contain additional chemicals or fragrances. Distilled water is safer for routine cleaning.
How do I remove stubborn tree sap or bird droppings from lenses?
Apply a drop of distilled water or lens cleaning fluid to a microfiber cloth. Let it sit on the spot for 10 to 15 seconds to soften the residue. Gently wipe from the center outward.
Do not scrape or pick at the spot. If it doesn't come off, take it to a professional.