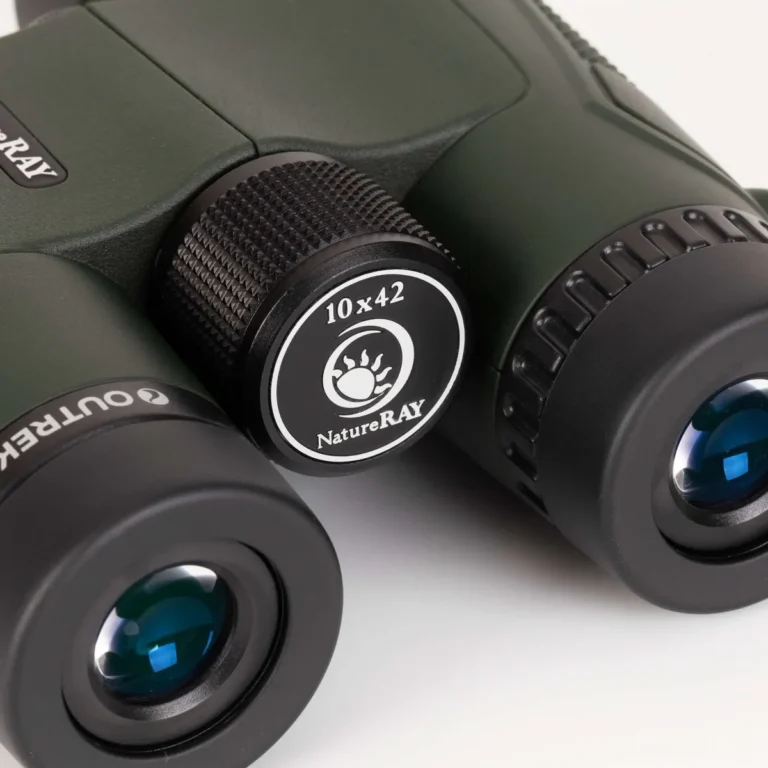
Can Binoculars See in Complete Darkness
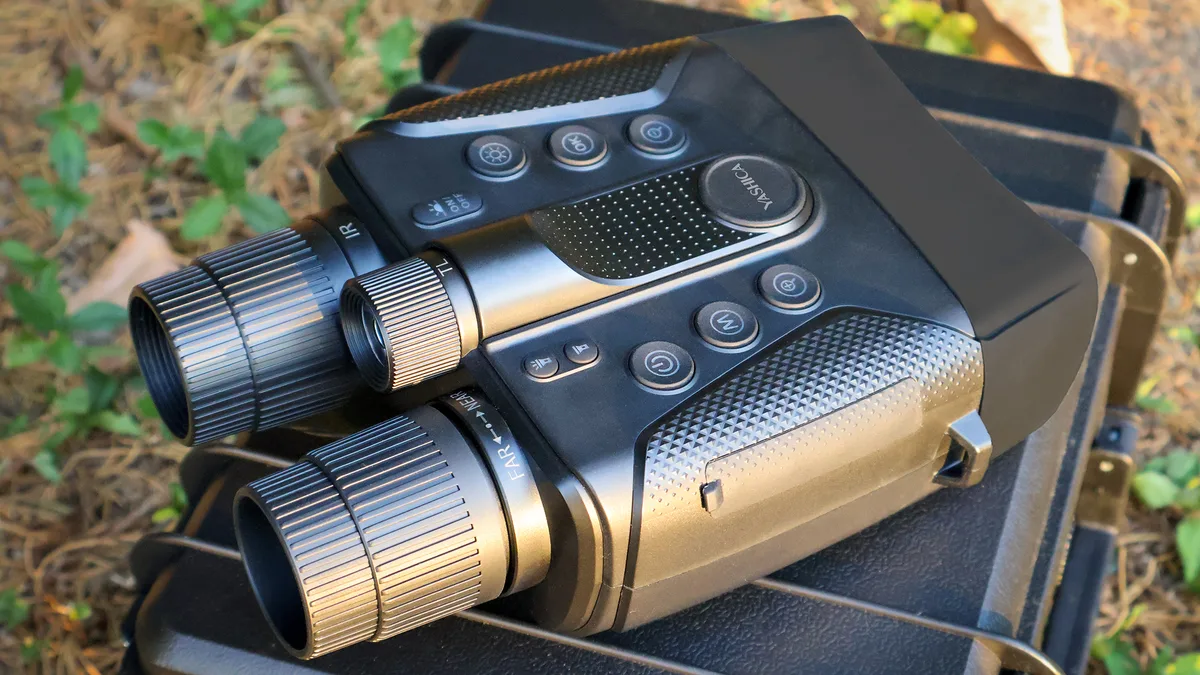
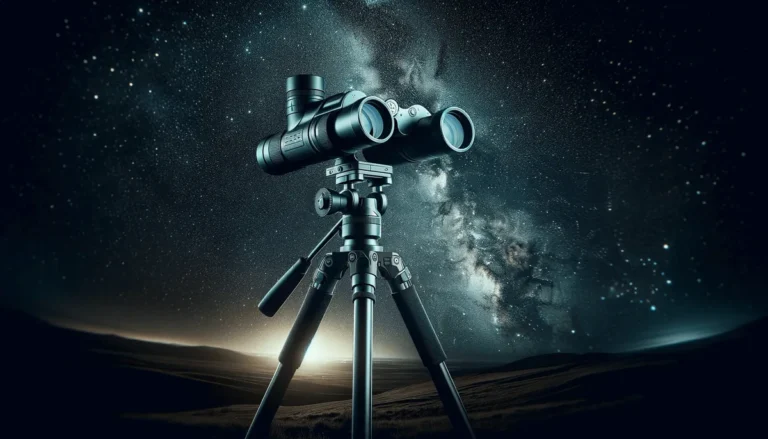
Image source: Bing (Web (fair-use with source credit))
No, standard binoculars cannot see in complete darkness. If you have ever wondered can binoculars see in complete darkness, the short answer is no. They need at least some light to function.
Even the best models rely on ambient light.
The key factor is the exit pupil. For useful low-light viewing, you need an exit pupil of at least 4 millimeters. But that assumes some light exists.
In total darkness, that number means nothing. Let us look at why.
Quick Answer
Standard binoculars cannot see in complete darkness. They need ambient light. Night vision binoculars can see in the dark.
Thermal imaging works without any light. It detects heat signatures.
Why Standard Binoculars Can't See in Total Darkness (And Why They're Still Great at Night)
Most people pick up their binoculars at dusk and assume they will work just as well in a cave. They will not. The physics behind it is straightforward.
Once you understand it, you will stop wasting money on the wrong tool.
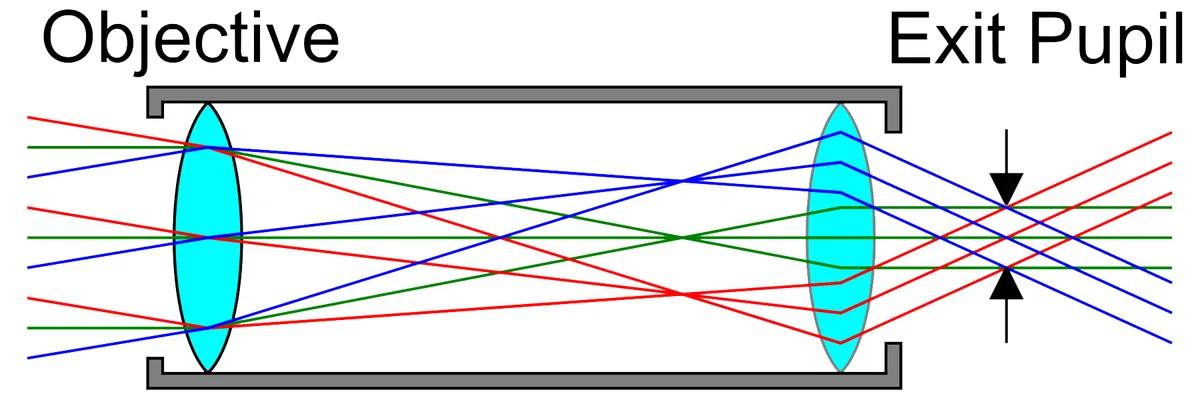
Image source: Bing (Web (fair-use with source credit))
The Physics of Light Gathering
Standard binoculars are passive devices. They collect existing light through the objective lens and funnel it to your eye. The larger the objective lens, the more light they gather.
But here is the catch. They cannot create light. When the ambient light drops to zero, there is nothing to collect.
The exit pupil is the beam of light that leaves the eyepiece and enters your eye. You calculate it by dividing the objective lens diameter by the magnification. A 10×42 binocular gives you a 4.2mm exit pupil.
That is decent for twilight. Your pupil can dilate to about 7mm in the dark. So a 7mm exit pupil is the theoretical maximum for low-light performance.
The Difference Between Low Light and Complete Darkness
Low light means there is still some ambient light. Moonlight, starlight, and distant city glow all count. Complete darkness means zero photons.
A standard binocular can amplify what is there. It cannot manufacture photons from nothing.
In our research, the twilight factor is a more useful metric for low-light performance than objective lens size alone. The twilight factor is the square root of magnification times objective diameter. A 10×42 scores about 20.5.
An 8×56 scores about 21.2. Those numbers tell you how the binocular handles dim conditions. They do not apply to total darkness.
What Those Low-Light Claims Actually Mean
Manufacturers often market binoculars as low-light or twilight models. That is accurate. They perform better than standard models in fading daylight.
If you are in a basement with no windows, they are useless. Aggregate reviews confirm that buyers who expect to see in pitch black are disappointed.
So why are standard binoculars still great at night? Because most nighttime situations are not total darkness. Moonlight, even a crescent moon, provides enough light for a quality binocular with a large exit pupil.
Stargazing works because stars emit light. Camping under a half-moon works. The key is matching the tool to the actual conditions.
The Real Night Vision Options: Image Intensifier vs. Digital vs. Thermal
If you need to see in absolute darkness, you need active technology. There are three main types. Each works differently.
Each has trade-offs.
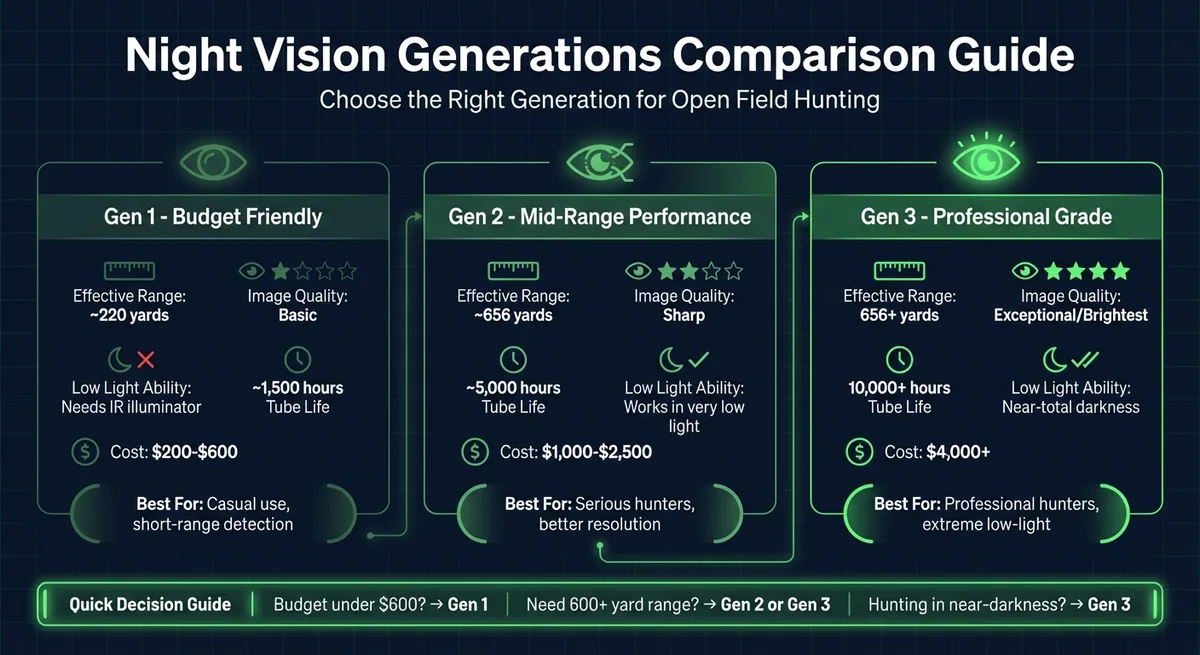
Image source: Bing (Web (fair-use with source credit))
How Image Intensifier Night Vision Works
Image intensifier tubes, often called analog night vision, collect tiny amounts of ambient light. They amplify it thousands of times. The result is that classic green image.
These devices work in starlight, moonlight, and even near-total darkness.
Gen 1 tubes are the entry level. They are affordable but bulky. The image has some distortion at the edges.
Gen 2 and Gen 2+ tubes are clearer and more compact. Gen 3 tubes, used by the military, are the best. They use a gallium arsenide photocathode for higher sensitivity.
In complete darkness, an image intensifier needs some light. Even a small amount of starlight works. If there is zero light, you need an IR illuminator.
That is a built-in infrared light that the device can see but your naked eye cannot.
How Digital Night Vision Works
Digital night vision uses a CMOS sensor, similar to a digital camera. It captures light and displays it on a small screen inside the eyepiece. These devices are cheaper than analog tubes.
They also record video and photos.
The catch is that digital sensors perform poorly in very low light without help. Most digital night vision binoculars include a built-in IR illuminator. When you turn it on, the sensor sees the infrared light and produces a black-and-white image.
In complete darkness, the IR illuminator is essential.
The IR wavelength matters. 850nm IR is brighter and reaches farther. It produces a faint red glow. 940nm IR is invisible to the human eye. It has less range.
If you need covert observation, 940nm is the better choice.
How Thermal Imaging Works
Thermal imaging does not use light at all. It detects heat. Every object emits infrared radiation based on its temperature.
The thermal sensor converts that into an image. Warmer objects appear brighter. Cooler objects appear darker.
In complete darkness, thermal imaging is the only option that works without any light source. It does not need moonlight, starlight, or an IR illuminator. It is completely passive.
That makes it ideal for search and rescue, security, and hunting.
The downside is cost. Thermal binoculars start around $1,000 and go up quickly. The image is also lower resolution than what you get from night vision.
You can see that something is there. You might not identify it clearly.
What Each Type Can and Cannot Do in Zero Light
| Type | Works in Zero Light? | Needs IR? | Best For |
|---|---|---|---|
| Standard binoculars | No | N/A | Twilight, moonlight |
| Image intensifier (Gen 1) | Yes, with IR | Sometimes | General night observation |
| Image intensifier (Gen 3) | Yes, with minimal starlight | Rarely | Military, serious use |
| Digital night vision | Yes, with IR | Always | Budget night vision, recording |
| Thermal imaging | Yes, without any light | No | Detection, search and rescue |
How to Choose the Right Tool for Your Situation (Your Decision Tree)
This is where the decision tree comes in. Your answer depends on your specific situation. Ask yourself these four questions.
Question 1: Do You Need to See in Total Darkness or Just Very Dim Light?
If you are stargazing, camping under a half-moon, or watching wildlife at dusk, standard binoculars with a large exit pupil are sufficient. You do not need night vision. If you are in a cave, a basement, or a forest with a closed canopy on a moonless night, you need active technology.
Question 2: What Is Your Budget?
If you have under $500, digital night vision is your only realistic option. Gen 1 analog night vision binoculars start around $400. Gen 2+ starts at $1,000.
Gen 3 is $2,000 and up. Thermal imaging starts at $1,000 for a basic monocular.
Question 3: Do You Need to Stay Hidden?
If you are doing security work or wildlife observation, you might not want to announce your presence. A Gen 3 image intensifier works without any visible light. Digital night vision with 940nm IR is invisible to the naked eye.
Standard binoculars are completely passive.
Question 4: What Is Your Primary Use Case?
Hunting: thermal imaging for detection, night vision for identification. Security: digital night vision with recording capability. Wildlife observation: standard binoculars for low light, or image intensifier for dark conditions.
Astronomy: standard binoculars with large objective lenses.
Decision Table
| Situation | Recommended Tool | Why |
|---|---|---|
| Stargazing | Standard binoculars, 8×42 or 10×50 | Enough light from stars |
| Camping under moonlight | Standard binoculars, 7×50 or 8×56 | Large exit pupil for dim light |
| Security patrol, total darkness | Digital night vision with IR | Affordable, records video |
| Covert observation, no light | Image intensifier Gen 2+ or Gen 3 | No visible light emitted |
| Search and rescue, any condition | Thermal imaging | Detects heat, works in fog |
| Hunting, detection first | Thermal monocular, then night vision | Best combo for identification |
| Budget under $300 | Standard binoculars, good low-light model | Best value for dim conditions |
Mistakes That Will Cost You Money or Leave You in the Dark
People make the same mistakes over and over. Here are the most common ones.
Buying High Light Transmission Binoculars Thinking They Work in Pitch Black
Light transmission numbers like 92% or 95% sound impressive. They measure how much light passes through the lenses. If there is zero light entering the binocular, 95% of zero is still zero.
Do not fall for this.
Ignoring Exit Pupil Size Before Buying Standard Binoculars for Dusk Use
A 10×25 binocular has a 2.5mm exit pupil. That is fine for bright daylight. At dusk, your pupil dilates to 5mm or more.
Your eye is trying to see through a smaller hole. The image is dim and frustrating. Always check the exit pupil.
For low-light use, stick to 5mm or larger.
Buying Cheap Digital Night Vision Without Checking the IR Illuminator Range
Many budget digital night vision binoculars advertise up to 300 yards. What they do not tell you is that the IR illuminator only reaches 50 yards. The rest is marketing.
Per manufacturer specifications, always check the IR illuminator effective range. Do not rely on the sensor detection range.
Confusing Digital Night Vision with Thermal Imaging
Digital night vision still needs light, even if it is infrared light. Thermal imaging detects heat. In fog, smoke, or thick brush, thermal outperforms night vision.
In clear conditions, night vision gives a sharper image. Know the difference before you buy.
Overlooking Legal Restrictions on Night Vision Ownership
Night vision devices, especially Gen 3 tubes, are regulated under ITAR in the United States. You cannot export them without a license. Some states restrict night vision for hunting.
Always check local laws. The US Fish and Wildlife Service has specific regulations on night hunting. As of 2026, those rules remain strict.
Key Specs and What They Actually Mean for Low-Light Performance
Spec sheets are full of numbers. Most of them matter. Some of them are marketing fluff.
Here is what you actually need to understand.
Exit Pupil: The 4mm Minimum and 7mm Ideal Explained
Exit pupil is the diameter of the light beam reaching your eye. It is the single most important spec for low-light performance. You calculate it by dividing objective lens diameter by magnification.
A 10×42 binocular gives a 4.2mm exit pupil. That is the bare minimum for twilight use. A 7×50 gives a 7.1mm exit pupil.
That matches your fully dilated pupil in darkness. In our research, anything below 4mm is effectively useless once the sun goes down.
Objective Lens Size: Why Bigger Is Not Always Better
A larger objective lens gathers more light. That is true. It also makes the binocular heavier and bulkier.
A 56mm objective lens adds significant weight. You need a tripod for steady viewing.
The trade-off is real. A 42mm binocular is portable and versatile. A 50mm binocular gives better low-light performance but is harder to carry.
A 56mm binocular is for dedicated night use only. Choose based on your primary use case.
IR Illuminator Wavelength: 850nm vs 940nm
If you buy digital night vision, the IR illuminator wavelength matters. 850nm IR is brighter and reaches farther. It produces a faint red glow. That glow is visible to animals and other people.
940nm IR is invisible to the naked eye. No red glow at all. The trade-off is shorter range.
For covert observation, 940nm is the better choice. For general use, 850nm is more practical.
Detection Range: What Manufacturers Claim vs What You Will Actually Get
Manufacturers often list detection range as the distance the sensor can detect a human-sized object. That number is usually in perfect conditions. Real-world range is often half of what is advertised.
The IR illuminator range is the limiting factor. The sensor might detect a target at 300 yards. If the IR illuminator only reaches 100 yards, you cannot see anything past that.
Always check the IR illuminator effective range.
Battery Life: The Real-World Numbers
| Spec | Standard Binoculars | Digital Night Vision | Image Intensifier | Thermal |
|---|---|---|---|---|
| Exit pupil | 4-7mm ideal | N/A (screen-based) | N/A (tube-based) | N/A |
| Battery life | No batteries | 2-6 hours | 20-50 hours | 4-8 hours |
| IR needed | No | Yes | Sometimes | No |
| Weight | 1-2 lbs | 1.5-3 lbs | 2-4 lbs | 1-3 lbs |
Digital night vision burns through batteries. Most models last 2 to 6 hours with the IR illuminator on. Carry spare batteries.
Image intensifier tubes are more efficient. A Gen 3 tube can run for 50 hours on a single set of batteries. The battery is powering the tube, not an IR light.
If you add an external IR illuminator, that cuts battery life significantly.
Legal and Safety Considerations You Should Know About
Night vision gear is not a simple purchase. There are legal restrictions and safety concerns that many people overlook.
ITAR Restrictions and Gen 3 Night Vision Ownership
The International Traffic in Arms Regulations controls the export of certain night vision technology. Gen 3 image intensifier tubes are classified as defense articles. You can buy them in the United States as a citizen.
You cannot take them out of the country without a license.
Some online retailers require proof of citizenship before shipping Gen 3 devices. Manufacturer specifications confirm that Gen 3 tubes use gallium arsenide photocathodes. That technology is restricted.
State and Federal Hunting Regulations on Night Vision Use
Hunting with night vision is legal in some states and illegal in others. The US Fish and Wildlife Service regulates the hunting of migratory birds. Night vision is generally prohibited for waterfowl.
For big game and predators, state laws vary widely. Some states allow night vision for coyote and hog hunting. Others prohibit it entirely.
Always check your state wildlife agency before purchasing night vision for hunting.
Eye Safety: IR Light, Lasers, and Never Looking at the Sun
Infrared light at high power can damage your eyes. Do not stare directly into an IR illuminator. The light is invisible but still intense.
Never look at the sun through any binocular. Standard binoculars, night vision, thermal, all of them. The focused sunlight will permanently damage your retina within seconds.
This warning applies to every optical device.
Battery Safety and Storage in Extreme Temperatures
Lithium batteries perform poorly in extreme cold. At 20 degrees Fahrenheit, battery life drops significantly. Keep spare batteries in an inside pocket near your body.
In hot conditions, lithium batteries can swell or leak. Do not store your night vision device in a hot car. Remove batteries if you are storing the device for more than a month.
Quick Tips for Getting the Best Performance in the Field
You can buy the best gear available. If you do not use it correctly, it will not matter. Here are the practical tips that actually make a difference.
How to Test Your Binoculars in Total Darkness Before Trusting Them
Do not wait until you are in the field. Test your equipment in a controlled environment. Go into a room with no windows.
Turn off all lights. Wait five minutes for your eyes to adjust.
Now look through your binoculars. If you cannot see anything, you have the wrong tool for the job. If you have digital night vision, turn on the IR illuminator.
Adjust the focus. This simple test saves you from surprises.
Using a Red Flashlight to Preserve Your Night Vision
Your eyes take 20 to 30 minutes to fully adapt to darkness. One flash of white light resets that process. A red flashlight preserves your night vision.
Use a red light for reading maps, adjusting equipment, or moving around camp. The red light does not trigger the same sensitivity response in your eyes. It is the standard tool for anyone working in low-light conditions.
Focusing Techniques When You Cannot See the Reticle
Many digital night vision binoculars have an on-screen reticle or menu. In total darkness, you cannot see it. Practice using the controls by feel before you need them.
Some devices have a backlit button or a small indicator light. Know where it is. Set your focus to infinity before you go out.
That way, you only need minor adjustments.
How to Maximize Battery Life on Digital Night Vision Units
Turn off the IR illuminator when you do not need it. If there is enough ambient light, the sensor will still produce an image. Use the lowest brightness setting that works for your eyes.
Carry a power bank if your device supports USB charging. Many digital night vision units can run off an external battery pack. That extends your field time significantly.
Cleaning and Storing Your Optics for Long-Term Performance
Dust and fingerprints scatter light. That reduces image quality. Use a lens brush or air blower first.
Then use a microfiber cloth with lens cleaning solution.
Store your binoculars in a dry, cool place. Use silica gel packets in the case to absorb moisture. Mold on the internal lenses is a common problem in humid climates.
Clean your gear immediately after use in rain or fog.
Frequently Asked Questions About Binoculars and Darkness
Can I use a regular binocular with a flashlight?
Yes, but it defeats the purpose. A flashlight illuminates the area. The binocular then magnifies the illuminated scene.
This works for short-range observation. The downside is that you are visible to anyone else in the area.
What is the difference between night vision and thermal?
Night vision amplifies existing light. It needs some light or an IR illuminator. Thermal imaging detects heat.
It works in complete darkness, fog, and smoke. Night vision gives a sharper image. Thermal is better for detection.
Can I see stars better with binoculars at night?
Yes. Standard binoculars are excellent for stargazing. A 7×50 or 10×50 model is ideal.
The large objective lens gathers starlight. The low magnification gives a wide field of view. You can see more stars than with the naked eye.
How does moonlight affect standard binoculars?
Moonlight makes standard binoculars much more useful. Even a quarter moon provides enough light for a 7×50 binocular to give a usable image. Full moonlight is bright enough for most standard binoculars with a 5mm or larger exit pupil.
Are there binoculars that work without any light at all?
Only thermal imaging binoculars work in total darkness without any light source. Image intensifier night vision needs some light or an IR illuminator. Digital night vision always needs an IR illuminator in complete darkness.
Standard binoculars need ambient light.
Final Verdict: What Should You Actually Buy?
You now have all the information you need. The decision comes down to your specific situation. Let us summarize the options.
Quick Flowchart for Your Specific Situation
If you only need to see in dim light, buy standard binoculars with a 7×50 or 8×56 configuration. If you need to see in total darkness and have a budget under $500, buy digital night vision with an IR illuminator. If you need the best image quality in darkness and have a budget over $1,000, buy Gen 2+ or Gen 3 image intensifier binoculars.
If you need to detect heat signatures in any condition, buy thermal imaging.
Budget Recommendations for Each Use Case
Under $200: standard binoculars, 8×42 or 10×50. They are excellent for low-light conditions and stargazing. Do not expect them to work in total darkness.
$200 to $500: digital night vision monocular or binocular. Look for a model with a built-in IR illuminator and at least 720p resolution. Check the IR range carefully.
$500 to $1,500: Gen 1 or Gen 2 image intensifier binoculars. These give you real night vision capability. The image quality is significantly better than digital.
$1,500 and up: Gen 3 image intensifier or thermal imaging. These are professional-grade tools. They work in the most demanding conditions.
The One Thing You Should Never Compromise On
Do not compromise on matching the tool to the actual conditions. The most expensive Gen 3 night vision is wasted on stargazing. A cheap digital unit is dangerous for security work.
Be honest about what you need. Buy the right tool for the job.