What Binoculars Are Best for Beginners
If you've ever tried to figure out what binoculars are best for beginners, you know how many options exist. The specs can feel overwhelming. The truth is simple.
The right pair depends entirely on what you plan to use them for.
Manufacturer specifications indicate that the 8×42 configuration is the most common all-around recommendation for new users. Aggregate reviews consistently show that 8×42 models receive the highest satisfaction ratings across birding, hiking, and general wildlife viewing. The key is to match the binocular to your specific use case, not the other way around.
Quick Answer
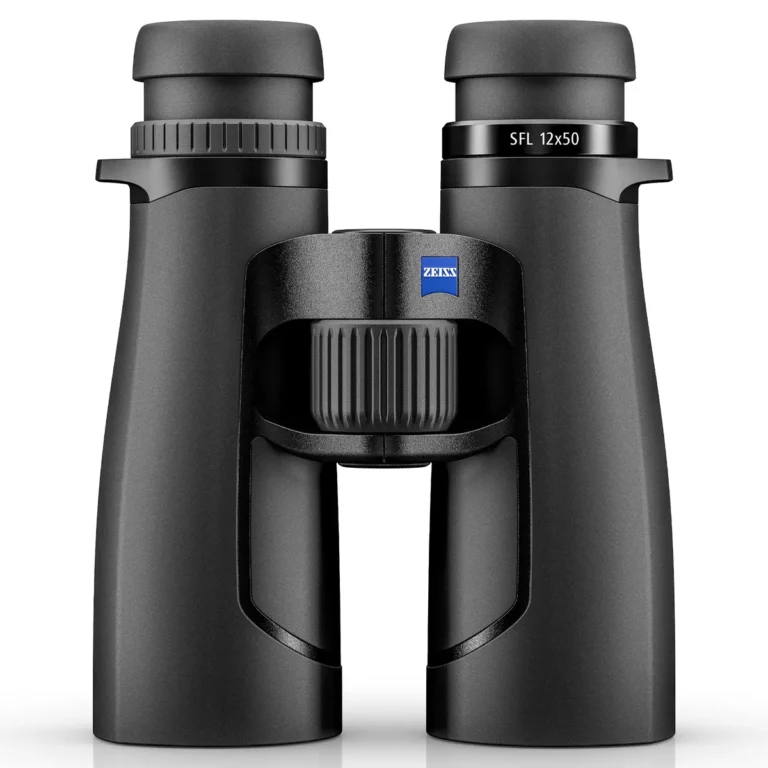
The best binoculars for beginners are 8×42 models. They balance magnification and light gathering. They work for birding, hiking, and stargazing.
A good pair costs between $75 and $150. This combination offers the best value for new users.
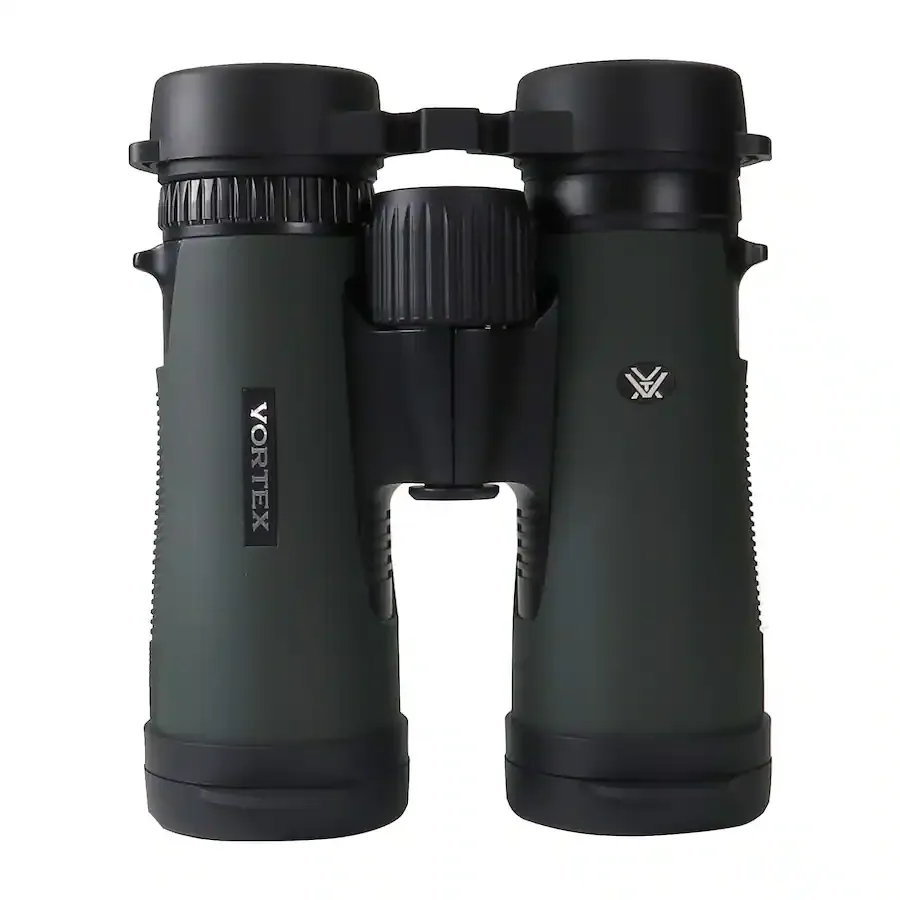
Image source: Bing (Web (fair-use with source credit))
The Problem: Why Choosing Binoculars Feels Overwhelming
As of 2026, a typical outdoor retailer carries over 200 binocular models. Each one has a different combination of magnification, lens size, prism type, weight, and price. For a beginner, it feels like a foreign language.
Conflicting advice makes it worse. Some sources say 10x magnification is better. Others say 8x is the sweet spot.
Some recommend roof prisms. Others say porro prisms offer better value. Analysis paralysis sets in quickly.
The fix is a decision tree. Instead of starting with "which binocular is best," start with "what will I use it for." Each question eliminates wrong options. After four or five questions, the right choice becomes clear.
Why Getting It Wrong Hurts
Buying the wrong binoculars is frustrating. It leads to eye strain, shaky images, and a poor experience. Many beginners give up on birding or stargazing because their first pair was uncomfortable.
The right pair makes all the difference.
How the Decision Tree Works
First, choose between 8x and 10x magnification. Second, choose the objective lens size. Third, match your use case.
Fourth, set your budget. Fifth, check for key features like eye relief and field of view. Each step narrows the options.
This guide follows that logic. We begin with the first and most important fork. Then we move to use cases.
Then budget. Then common mistakes. By the end, you will have a clear path to your first pair.
The First Fork: 8×42 vs 10×42
This is the single most important decision for a beginner. The choice between 8×42 and 10×42 determines the entire experience. Get it right, and you will enjoy using your binoculars.
Get it wrong, and you will struggle with shaky images and a narrow view.
What the Numbers Actually Mean
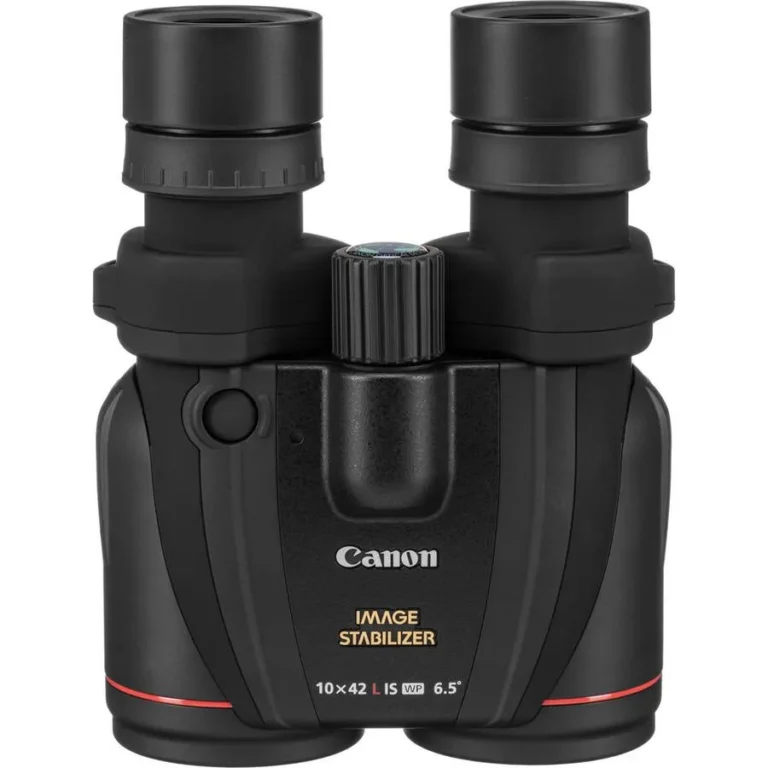
The first number is magnification. An 8×42 binocular makes objects appear 8 times closer. A 10×42 makes them appear 10 times closer.
The second number is the objective lens diameter in millimeters. The 42mm lens gathers light. A larger lens collects more light for brighter images.
The 8×42 has a magnification of 8x. A bird at 80 feet looks like it is 10 feet away. The 10×42 brings that same bird to 8 feet away.
That extra reach seems appealing. But it comes with trade-offs.
Why 8x Wins for Most Beginners
8x magnification is the standard recommendation for beginners. It offers a wider field of view. It is easier to hold steady.
At 10x, hand shake becomes noticeable. Many users report that 10x images look shaky without a tripod.
Field of view is a critical difference. An 8×42 typically offers 340 to 400 feet at 1000 yards. A 10×42 offers 300 to 340 feet.
That wider field makes it easier to find birds in flight. It also makes it easier to track moving objects.
Exit pupil is another factor. The 8×42 has a 5.25mm exit pupil. The 10×42 has a 4.2mm exit pupil.
The larger exit pupil in 8×42 is better for low light. It also works better for people who wear glasses.
When 10x Makes Sense
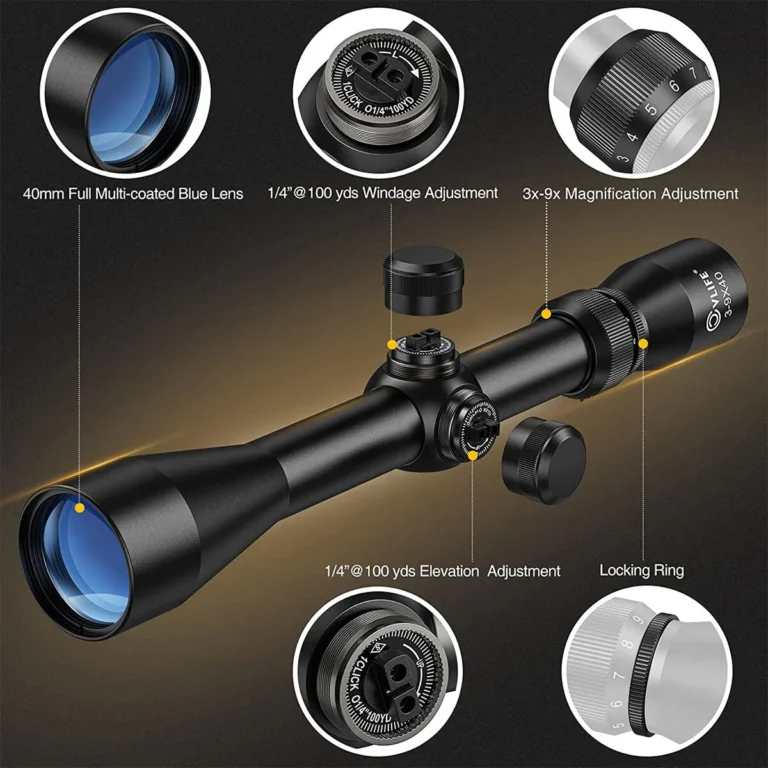
10x magnification is better for long-distance viewing. It works well for open fields, mountains, and some stargazing. But it narrows the field of view.
It amplifies movement.
For beginners, 10x is often a mistake. Start with 8x and upgrade later. The 8x is more forgiving.
It is easier to use. It provides a more comfortable viewing experience.
Here is a comparison table:
| Feature | 8×42 | 10×42 |
|---|---|---|
| Magnification | 8x | 10x |
| Field of view at 1000 yards | 340-400 ft | 300-340 ft |
| Exit pupil | 5.25mm | 4.2mm |
| Hand-hold stability | Excellent | Moderate |
| Low-light performance | Very good | Good |
| Best for | All-around use | Long-distance |
The 8×42 is the clear winner for most beginners. It offers a better balance of features. It is more versatile.
It is easier to use. Stick with 8×42 for your first pair.
Match Your Use Case to the Right Binocular
Now that you understand the numbers, match your specific use case. The 8×42 is a great all-around choice. But different activities have different needs.
Bird Watching: The All-Around Standard
Bird watching is the most common use for beginner binoculars. The 8×42 is the gold standard for birding. It offers a wide field of view for finding birds.
It provides enough magnification to see details. It works well in low light conditions like dawn and dusk.
Look for a close focus distance of 6 to 10 feet. This allows you to see birds at close range. Many feeders attract birds within 10 feet.
A binocular that can focus at 6 feet is ideal.
Eye relief is also important for birding. If you wear glasses, you need at least 15mm of eye relief. Many birders prefer 17mm or more.
This allows you to see the full field of view with glasses on.
Stargazing: Why You Want More Light
Stargazing requires a different approach. The goal is to gather as much light as possible. More light means brighter stars and more detail.
For stargazing, consider a 7×50 or 8×56 binocular.
The 7×50 has a 7mm exit pupil. This matches the average human pupil in darkness. It provides the brightest possible image for night viewing.
The 8×56 has a 7mm exit pupil as well. It offers slightly more magnification.
Avoid 10x for stargazing without a tripod. The magnification amplifies hand shake. The stars appear as dancing points of light.
A tripod adapter is essential for any stargazing binocular.
For a beginner, an 8×42 is still a good starting point. It will show the moon, bright planets, and star clusters. Upgrade to a larger binocular later if you get serious about astronomy.
Hiking and Travel: Weight vs. Performance
Hiking and travel demand portability. A full-size 8×42 binocular weighs about 20 to 30 ounces. That is manageable for a day hike.
But if you want to save weight, consider an 8×32 binocular.
An 8×32 weighs about 15 to 20 ounces. It is smaller and lighter. It fits in a jacket pocket.
It still offers good performance for daytime use. The trade-off is less light gathering in low light.
For most hikers, an 8×32 is the right choice. It is light enough to carry all day. It provides a wide field of view.
It works well for general wildlife viewing. If you plan to hike at dawn or dusk, stick with the 8×42.
Sports and Concerts: Close Focus and Wide Field
For sports and concerts, you want a wide field of view and close focus. The 8×32 is a great choice here. It is compact.
It is easy to carry in a pocket. It offers a wide field of view for tracking action.
Look for a close focus distance of 6 feet or less. This allows you to see details at a concert or sporting event. The 8×32 is also good for theater and opera.
It is discreet and easy to use.
Avoid 10x for sports and concerts. The narrow field of view makes it hard to track the action. The 8x is much better for this use case.
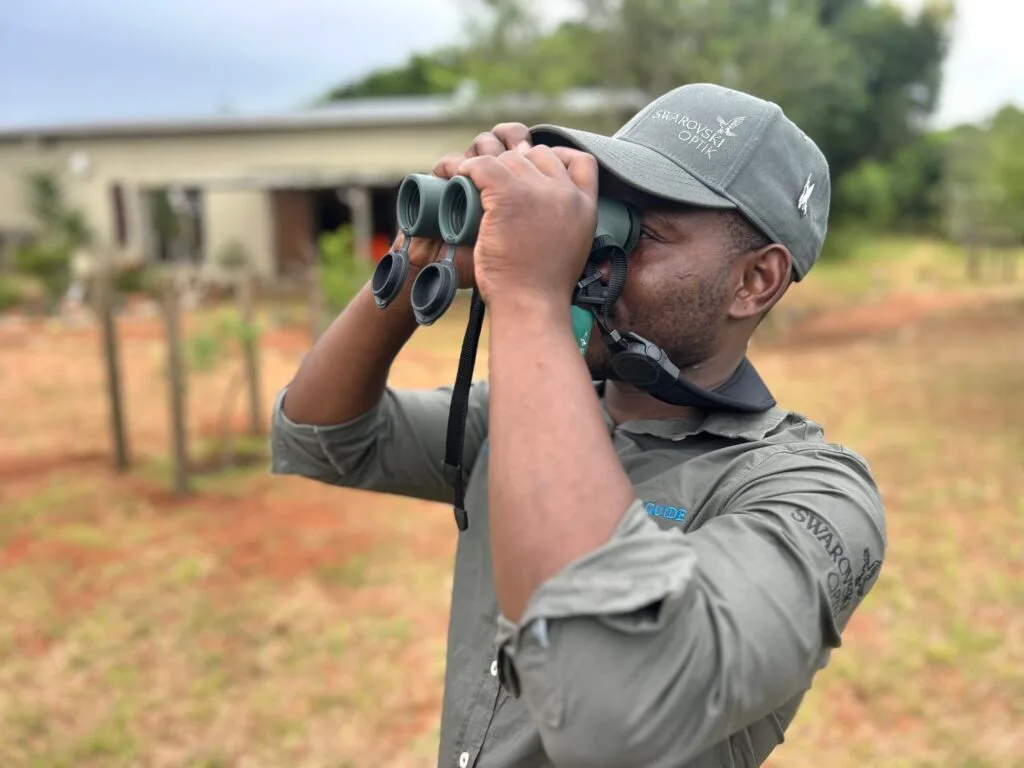
Image source: Bing (Web (fair-use with source credit))
3 Mistakes Beginners Make Buying Binoculars
Even with the right specs, beginners make common mistakes. These mistakes can ruin the experience. Here are the three most common errors and how to avoid them.
Picking the Wrong Size for Your Hands
Binoculars come in different sizes. A full-size 8×42 is about 6 inches long. It weighs about 25 ounces.
That is fine for most adults. But if you have small hands, it can be uncomfortable.
The solution is to try before you buy. Hold the binoculars in your hands. Check that the focus wheel is easy to reach.
Check that the eyecups fit your eyes comfortably. If the binoculars feel too large, look for a mid-size 8×32.
For children, look for a dedicated youth binocular. These are smaller and lighter. They have a lower magnification like 7x or 8x.
They are easier for small hands to hold.
Ignoring Eye Relief
Eye relief is the distance from the eyepiece to your eye. If you wear glasses, you need enough eye relief to see the full field of view. Without enough eye relief, you see a black ring around the image.
The minimum eye relief for glasses wearers is 15mm. The ideal is 17mm or more. Many binoculars advertise "long eye relief." Check the specifications.
Look for a model with at least 15mm of eye relief.
If you do not wear glasses, eye relief is less critical. But it still affects comfort. Longer eye relief reduces eye strain during long viewing sessions.
Chasing the Highest Magnification
Many beginners think higher magnification is better. They want to see objects as close as possible. But higher magnification has trade-offs.
It narrows the field of view. It amplifies hand shake. It makes it harder to find objects.
The sweet spot for beginners is 8x. Some people are happy with 10x. But 12x or higher is almost always a mistake for handheld use.
At 12x, the image is shaky. You need a tripod to get a stable view.
Stick with 8x for your first pair. If you want more magnification later, you can upgrade. But start with the lower magnification.
It will be more enjoyable.
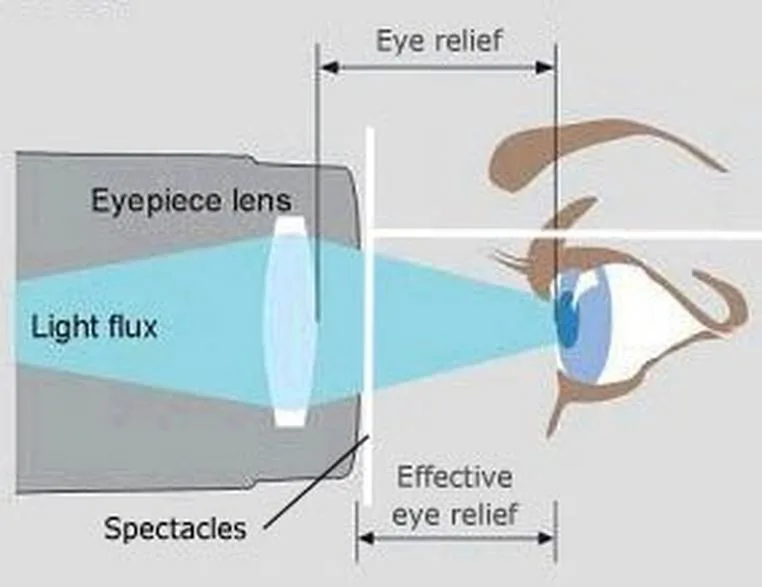
Image source: Bing (Web (fair-use with source credit))
Your Budget and What It Actually Gets You
Budget is a practical concern. You want to spend enough to get a good pair. But you do not want to overspend on your first pair.
Here is what each price range offers.
Under $75: What to Expect
Under $75, you can find basic binoculars. These are often porro prism models. They are made from plastic.
The lenses have basic coatings. The image quality is acceptable for daytime use.
What to avoid: models with no lens coatings. Uncoated lenses produce dim, hazy images. Look for "fully coated" or "multi-coated" lenses.
Also avoid models with no warranty. A good warranty is a sign of quality.
Budget binoculars are fine for casual use. They work for backyard birding and general observation. But they are not suitable for low light conditions.
They are also more likely to break if dropped.
$75 to $150: The Sweet Spot
This is the sweet spot for most beginners. You get a good quality pair for a reasonable price. At this price, you can find roof prism binoculars with good coatings.
You get a solid warranty. The image quality is good.
Look for models with multicoated lenses. Look for a waterproof and fogproof design. Look for a brand with a good warranty.
Brands like Nikon, Celestron, and Vortex have models in this range.
The Nikon Aculon A30 is a compact and lightweight option. It has multicoated lenses. It is affordable.
The Vortex Diamondback is another option. It has a better warranty and better build quality.
$150 to $250: Investing in Staying Power
At $150 to $250, you get a significant jump in quality. The lenses have better coatings. The build quality is better.
The binoculars are more durable. They are also more comfortable to use.
This price range is good if you plan to use your binoculars regularly. It is also good if you want a pair that will last for years. The image quality is noticeably better in low light.
Look for models with phase correction coatings. These improve contrast and color accuracy. Look for dielectric coatings on the prisms.
These improve brightness. The Vortex Diamondback HD is a good example. It offers excellent image quality for the price.
The decision tree approach helps you choose the right budget. If you are a casual user, stick with the $75 to $150 range. If you are a serious user, invest in the $150 to $250 range.
You will appreciate the quality.
Real-World Scenarios: Putting the Decision Tree to Work
Theory is helpful. Real examples make it click. Here are four common scenarios.
Each one walks through the decision tree. See which one matches your situation.
Scenario 1: The Weekend Birder Who Wears Glasses
Sarah wants to watch birds at her backyard feeder and local park. She wears glasses full time. She has never owned binoculars before.
Her budget is around $100.
The decision tree says start with 8×42. The 8x magnification is easier to hold steady. The 42mm lens gathers enough light for dawn and dusk.
Eye relief is critical for her glasses. She needs at least 15mm, preferably 17mm.
Close focus distance matters too. She wants to see birds at her feeder. A close focus of 6 to 10 feet is ideal.
She also wants a wide field of view. This helps her find birds in trees.
Her recommended pair is an 8×42 with long eye relief and a close focus under 10 feet. Brands like Nikon and Celestron offer models in her budget. She should check the eye relief spec before buying.
A model with 17mm of eye relief will show the full field of view with glasses on.
Scenario 2: The Stargazer Who Wants to See the Milky Way
Mark wants to see the Milky Way and star clusters. He is a beginner. He has a decent budget of $200.
He is willing to use a tripod.
The decision tree says prioritize light gathering. For stargazing, exit pupil size matters. The 7×50 has a 7mm exit pupil.
This matches the average human pupil in darkness. It provides the brightest possible image.
But Mark is a beginner. He might also want to use the binoculars for daytime viewing. An 8×42 is a compromise.
It works for stargazing and birding. It has a 5.25mm exit pupil. This is smaller than 7mm, but still good for bright objects.
The recommendation is an 8×42 with good low light performance. Look for models with fully multicoated lenses and BaK-4 prisms. These improve brightness and contrast.
A tripod adapter is essential for steady views. Mark should budget for one.
Scenario 3: The Hiker Who Wants One Pair for Everything
Jake hikes every weekend. He wants a pair of binoculars for wildlife, landscapes, and occasional stargazing. He is a beginner.
He wants something light enough to carry all day.
The decision tree says consider weight. A full-size 8×42 weighs about 25 ounces. That is manageable for a day hike.
But if Jake wants to save weight, an 8×32 is better. It weighs about 17 ounces.
The 8×32 has a smaller objective lens. It gathers less light. But for daytime hiking, it is fine.
It offers a wide field of view. It is compact enough to fit in a jacket pocket.
The recommendation is an 8×32 for daytime hiking. If Jake plans to hike at dawn or dusk, stick with the 8×42. He should also look for a waterproof model.
Hiking involves rain, dust, and drops. A waterproof binocular will last longer.
Scenario 4: The Parent Buying for a Teen
Lisa wants to buy binoculars for her 14-year-old son. He is interested in birding. He is a beginner.
He has small hands. Her budget is under $75.
The decision tree says consider size. A full-size binocular is too large for a teenager. A compact or mid-size model is better.
The 8×25 or 8×32 is a good choice.
The 8×25 is very compact. It weighs about 12 ounces. It fits in a small hand.
It is easy to carry. The trade-off is smaller lenses. They gather less light.
But for daytime use, it is fine.
The recommendation is an 8×25 or 8×32. Look for a model with a good warranty. Vortex and Nikon have youth-friendly options.
The Vortex Crossfire 8×25 is a good choice. It is compact, durable, and comes with a good warranty.
FAQs About Beginner Binoculars
Can I Use Binoculars for Stargazing and Birding?
Yes, but with compromises. The 8×42 is the best all-around choice. It works for both activities.
For stargazing, it will show the moon, bright planets, and star clusters. For birding, it offers a wide field of view. If you want serious stargazing, consider a 7×50 or 8×56 later.
Do I Need Waterproof Binoculars?
Waterproofing is highly recommended. It protects against rain, dust, and humidity. It also prevents internal fogging.
Most modern binoculars in the $75 to $150 range are nitrogen purged and O-ring sealed. This keeps the lenses clear. The extra cost is worth it.
Are Cheap Binoculars Worth Buying?
Cheap binoculars under $50 are often disappointing. They have poor lens coatings. The image is dim and hazy.
The build quality is low. They break easily. Spend at least $50 or $75.
You will get a much better experience. The sweet spot is $75 to $150.
How Do I Know If a Pair Is Comfortable?
Comfort comes from fit. The binoculars should feel balanced in your hands. The focus wheel should be easy to reach.
The eyecups should fit your eyes. If you wear glasses, check the eye relief. A comfortable pair encourages use.
An uncomfortable pair ends up in a drawer.
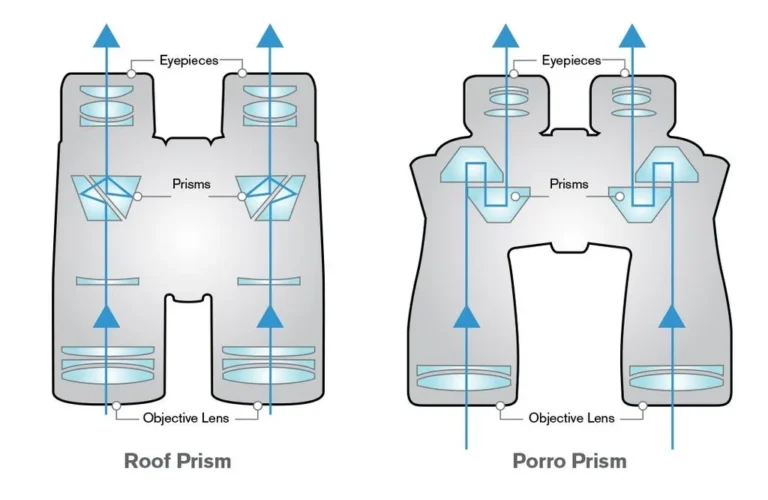
What Is the Difference Between Porro and Roof Prism?
Porro prisms are the classic design with a wider body. They are cheaper to make. They offer good image quality for the price.
Roof prisms are more compact and streamlined. They are more expensive. For beginners, porro prisms offer better value.
Roof prisms are better for portability.
The Final Decision Guide: Your Step-by-Step Path
By now, you have a clear picture. The decision tree has narrowed the options. Here is the final step-by-step guide.
Follow these steps in order.
Step 1: Confirm Your Primary Use Case
Write down your main activity. Is it birding, hiking, stargazing, or sports? This determines the first branch.
If you are unsure, choose 8×42. It is the most versatile.
Step 2: Choose Magnification and Lens Size
Stick with 8×42 for most beginners. Choose 8×32 for hiking and travel. Choose 7×50 for stargazing.
Choose 10×42 only if you are confident you want long-distance viewing.
Step 3: Set Your Budget
The sweet spot is $75 to $150. This buys a good quality pair. If you have more to spend, the $150 to $250 range offers better coatings and build quality.
Stick with this range for your first pair.
Step 4: Check Key Features
Check for eye relief if you wear glasses. Check for close focus distance if you watch birds at feeders. Check for waterproofing if you hike.
Check for warranty length. A good warranty is a sign of quality.
Step 5: Read Verified Buyer Feedback
Look at aggregate reviews. Focus on long-term durability. Look for comments about image quality and comfort.
Avoid models with consistent complaints about breakage or blurry images.
Step 6: Make Your Choice
You now have a short list. Pick the model that fits your budget and use case. Trust the decision tree.
The first pair is a learning experience. You can always upgrade later.
The Final Recommendation
For most beginners, the best choice is an 8×42 binocular in the $75 to $150 range. Look for a waterproof model with multicoated lenses and BaK-4 prisms. Check for a warranty of at least 10 years.
This combination offers the best balance of performance, comfort, and value.
The decision tree is forgiving. Even if you pick the wrong magnification, you will still enjoy the experience. The important thing is to start.
Get outside and look at the world. That is the real reward.