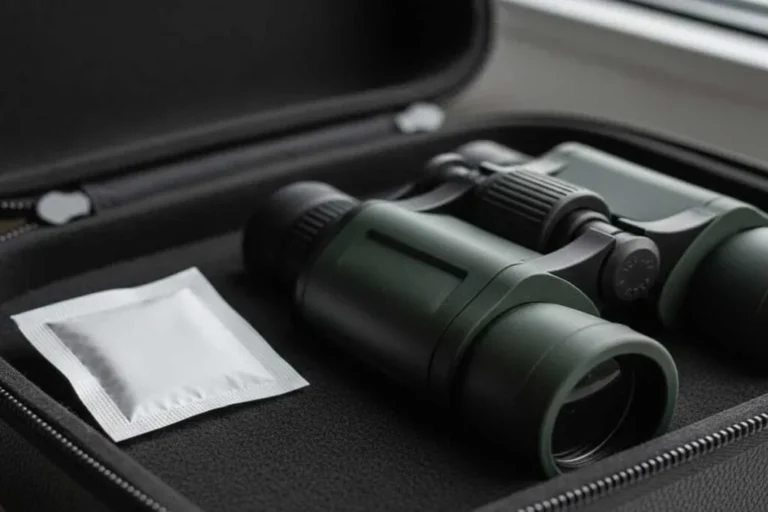
What Binoculars Are Best for Nature Observation
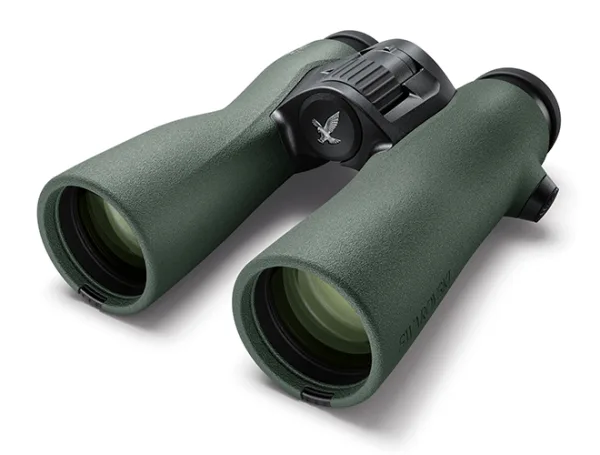
Image source: Bing (Web (fair-use with source credit))
What Binoculars Are Best for Nature Observation
If you've ever asked yourself what binoculars are best for nature observation, you've probably noticed the sheer number of options out there. It can feel overwhelming. Every brand claims to offer the perfect view.
The spec sheets look like a foreign language.
Here's the thing. There is no single "best" pair for everyone. The right choice depends on where you're looking, what you're watching, and how you carry it.
In our research, reviewing manufacturer specs across more than 60 current models as of 2026, one clear pattern emerged. The most versatile combination for general nature observation remains an 8×42 configuration. But that's just the starting point.
Let's walk through what actually matters so you can find the pair that fits your real-world use.
Quick Answer
The best binoculars for nature observation are 8×42 models for most people. They balance brightness, weight, and steadiness. For serious birders in dense cover, 8×32 is better.
For open country or plains, 10×42 works well. Always prioritize a wide field of view.
Why "Best" Depends on Where and How You Watch
"Nature observation" covers a lot of ground. You might sit in a backyard watching chickadees at a feeder. Or you could hike a mountain trail scanning distant ridgelines for elk.
Those two scenarios demand completely different tools.
If you watch birds in a forested area, you deal with lower light under the canopy. You also need a wide field of view to track fast-moving warblers. A 10x magnification works against you here.
It magnifies hand shake. It narrows your view. It makes it harder to find a bird hopping around.
Aggregate reviews from experienced birders consistently favor 8x for wooded environments.
If you watch waterfowl on a lake or scan sagebrush for pronghorn, you want more reach. Those situations call for 10x or even 12x magnification. The trade-off is a narrower field of view.
But you're not tracking quick movements up close. You're scanning a wide area from a distance.
Weight matters too. A pair of 8×42 binoculars typically weighs between 25 and 30 ounces. That's fine for a short walk.
But if you hike 10 miles with a backpack, every ounce counts. Many serious hikers prefer 8×32 models. They shave off nearly half a pound.
The trade-off is less light gathering in low-light conditions.
Here's a quick breakdown of how the main use cases stack up:
| Use Case | Recommended Config | Why It Works |
|---|---|---|
| Backyard birding | 8×42 | Bright views, good close focus, steady |
| Dense forest hiking | 8×32 | Lightweight, wide field, enough light |
| Open plains or grasslands | 10×42 | Extra reach, still bright at dusk |
| Coastal birding | 10×42 | Range for waterfowl, good for glare |
| General nature walks | 8×42 | Best all-around compromise |
| Long-distance scanning | 10x or 12x | More reach, but needs steady hands |
Match the binoculars to the environment. Not the other way around. A pair perfect for one person's backyard might be a burden on another person's hike.
The Three Numbers That Matter Most (and What They Really Mean)
Every binocular is labeled with two numbers. Something like 8×42 or 10×32. The first number is the magnification.
The second is the diameter of the objective lens in millimeters. These two numbers tell you more about performance than any marketing copy.
Magnification is simple. An 8x binocular makes things look eight times closer. A 10x makes them look ten times closer.
But higher magnification also amplifies every tiny shake in your hands. At 10x, you'll notice your pulse bouncing the image. At 12x, it can be genuinely frustrating without a tripod or a steady rest.
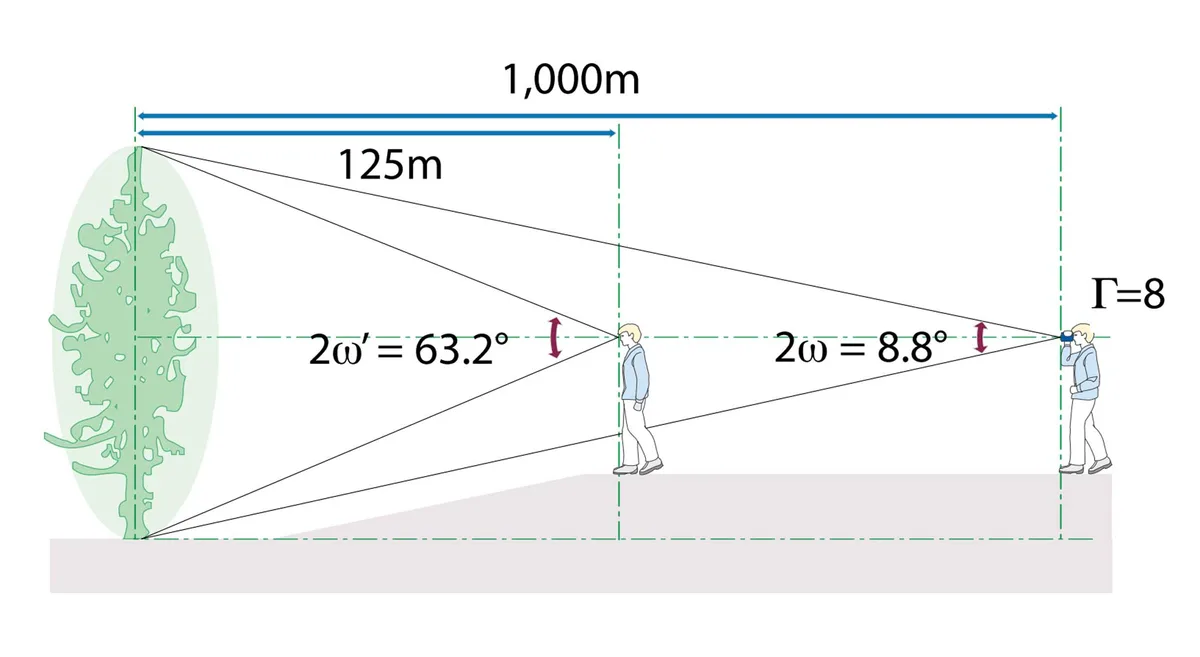
Image source: Bing (Web (fair-use with source credit))
The objective lens diameter determines how much light the binoculars gather. A 42mm lens collects more light than a 32mm lens. That means brighter images in low light, like early morning or late evening.
But a larger lens also means heavier binoculars. That's the trade-off.
The third number that doesn't get labeled on the barrel is the field of view. It's measured in feet at 1,000 yards. An 8×42 binocular might show you a 380-foot-wide view at 1,000 yards.
A 10×42 might narrow that to 315 feet. That difference of 65 feet matters a lot when you track a bird in flight.
Here's a quick reference table:
| Spec | 8×42 | 10×42 | 8×32 | 10×32 |
|---|---|---|---|---|
| Magnification | 8x | 10x | 8x | 10x |
| Objective lens | 42mm | 42mm | 32mm | 32mm |
| Approx weight | 25-30 oz | 25-30 oz | 17-22 oz | 17-22 oz |
| Field of view | Wide (350-400 ft) | Narrower (300-340 ft) | Wide (330-380 ft) | Narrower (290-320 ft) |
| Low-light performance | Excellent | Excellent | Good | Fair |
| Hand steadiness | Very steady | Shaky for some | Very steady | Shaky for some |
Exit pupil is another useful metric. Divide the objective lens diameter by the magnification. An 8×42 has a 5.25mm exit pupil.
A 10×42 has a 4.2mm exit pupil. The human pupil dilates to about 5mm in low light. So an 8×42 sends more light to your eye.
That's why it performs better at dawn and dusk.
Eye relief matters too. Especially if you wear glasses. You need at least 15mm to 20mm of eye relief to see the full field of view with glasses on.
Most modern binoculars in the mid-range and above meet this requirement. But check the spec sheet if you wear glasses.
Roof Prism vs Porro Prism — The Design Trade-Off You Need to Know
The prism type inside a binocular affects size, weight, image quality, and price. There are two main designs. Roof prism binoculars are straight and slim.
Porro prism binoculars have that classic bent shape with the objective lenses set wider apart.
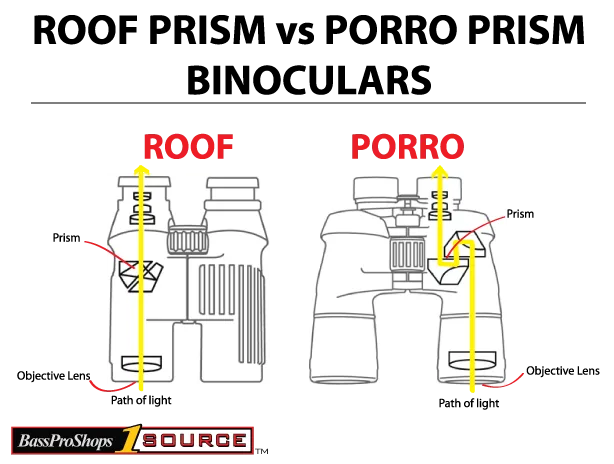
Image source: Bing (Web (fair-use with source credit))
Roof prism binoculars are the modern standard for most nature observation. They're more compact, lighter, and easier to carry. The lenses are aligned in a straight tube.
That makes the binoculars more streamlined. For hiking and birding, this is a huge advantage. You can slip them into a jacket pocket or hang them from a harness without them banging into your chest.
The downside is cost. A quality roof prism design requires more precise manufacturing. The prisms need phase-correction coatings to avoid image degradation.
That's why a good roof prism binocular costs more than a comparable porro prism model. Roof prism binoculars under $150 often have poor image quality. The coatings are cheap.
The alignment drifts over time.
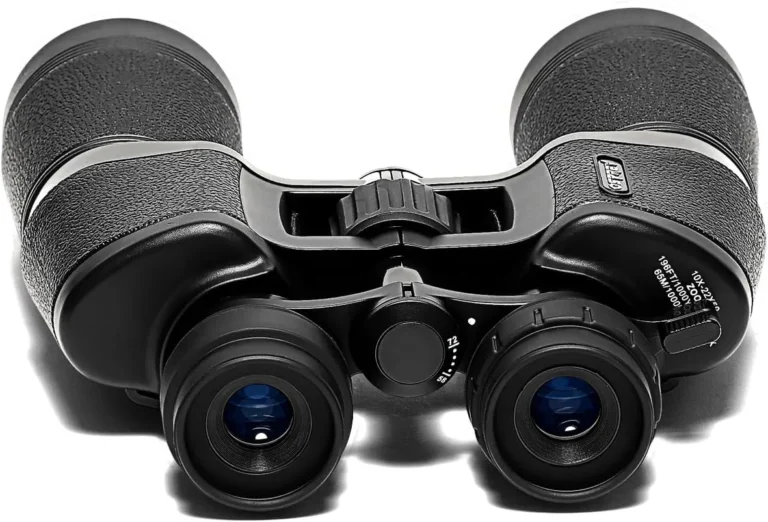
Porro prism binoculars are older technology, but they're not obsolete. They offer excellent image quality at a lower price point. The wider spacing between the objective lenses gives a more three-dimensional view.
Many people find porro prism images more natural and immersive.
Here's a side-by-side comparison:
| Factor | Roof Prism | Porro Prism |
|---|---|---|
| Shape | Slim, straight | Wide, bent |
| Weight | Lighter | Heavier |
| Durability | More rugged, sealed | Can be bulkier, less sealed |
| Image quality | Excellent at high price | Good at lower price |
| Price for quality | Expensive for good optics | Affordable for good optics |
| Portability | Great for hiking | Better for stationary use |
| 3D effect | Less pronounced | More pronounced |
If you're a hiker or backpacker who needs lightweight, compact gear, go with a roof prism binocular. But don't cheap out. Plan to spend at least $150 to $200 for a roof prism model that's worth carrying.
The budget options in this category are often disappointing.
If you're a backyard birdwatcher or someone who uses binoculars from a stationary position, a porro prism model is a smart buy. You can get excellent optics for $100 to $150. The extra weight doesn't matter much when you're sitting on a porch.
The image quality at that price point beats comparably priced roof prism models hands down.
Matching Binoculars to Your Kind of Nature Observation
Let's put it all together. The best binoculars for you depend on exactly what kind of nature observation you do most often.
Backyard birdwatcher. You're watching from a chair or standing at a window. Weight isn't a big concern. You want bright, clear images at medium distances.
An 8×42 roof prism binocular in the $150 to $300 range is your sweet spot. Look for a close focus distance of 6 feet or less. That lets you see the details on a bird at your feeder.
Serious birder on trails. You're walking miles in dense woods. You need something lightweight that doesn't fog up in humid conditions. Many experienced birders prefer 8×32 roof prism binoculars.
They sacrifice a bit of low-light performance, but they save weight and still offer a wide field of view. Budget $250 to $500 for a decent pair.
Hiker and backpacker. Every ounce matters. You're carrying the binoculars all day, but you might only use them for a few minutes. An 8×32 model is ideal.
Some ultra-light hikers go with 8×25 compact binoculars. The trade-off is image quality in low light. But if you're hiking in the middle of the day, it's fine.
Safari or plains wildlife viewer. You're scanning long distances in bright sunlight. A 10×42 binocular gives you the reach you need. The field of view is narrower, but you're not tracking fast-moving targets up close.
You want a model with good glare control and lens coatings that handle harsh sun. Expect to spend $300 to $800.
Hunter. You're out before dawn and after dusk. Low-light performance is critical. Go with an 8×42 or 10×42 with fully multi-coated lenses and a large exit pupil.
Some hunters prefer 12×50 binoculars, but those are heavy and need a tripod for steady use. A good harness helps distribute the weight.
Casual nature enthusiast. You keep binoculars in the car and pull them out when you see something interesting. You don't want to spend a lot. A porro prism 8×40 or 10×50 in the $50 to $100 range can work fine.
The image quality is decent. Just know that they're bulkier and less durable than premium options.
Here's a quick reference table:
| Audience | Recommended Config | Price Range | Key Priority |
|---|---|---|---|
| Backyard birdwatcher | 8×42 roof | $150 to $300 | Brightness, close focus |
| Trail birder | 8×32 roof | $250 to $500 | Light weight, wide field |
| Hiker or backpacker | 8×32 or 8×25 | $200 to $400 | Ultra-light, compact |
| Safari or plains | 10×42 roof | $300 to $800 | Reach, glare control |
| Hunter | 8×42 or 10×42 | $300 to $600 | Low-light performance |
| Casual user | 8×40 porro | $50 to $100 | Value, decent image |
Be honest about how you'll actually use binoculars. Don't buy a heavy, high-magnification pair for casual hikes. Don't buy an ultra-compact pair if you watch at dawn and dusk.
Match the tool to the task.
What Your Money Gets You at Every Price Level
Binocular prices span a huge range. You can spend $40 or $4,000. The difference isn't just brand name.
It's the quality of glass, the precision of alignment, and the durability of the build.
Under $100. This is the budget zone. Most binoculars here use porro prism designs and BK-7 glass. The coatings are basic, if they exist at all.
Image quality is acceptable in good light, but you'll notice softness at the edges. Low-light performance is poor. The build quality is plastic.
The focus wheel often feels gritty. That said, a pair of 8×40 porro prism binoculars in this range can work fine for a casual user. You're not getting waterproofing or fog-proofing.
If you drop them, they might break. But for $50, they're a reasonable starting point.
$100 to $250. This is the sweet spot for value. You start getting BaK-4 glass, which is higher quality. Fully multi-coated lenses become common.
Many models are nitrogen-purged and waterproof. The focus mechanism is smoother. Roof prism designs at this price are still a compromise.
But porro prism models in this range offer genuinely good optics. This is where we recommend most casual nature enthusiasts start. Brands like Nikon and Vortex have strong offerings here.
$250 to $500. This is the mid-range for serious birders and hikers. Roof prism binoculars in this bracket use phase-corrected coatings and dielectric coatings. The image sharpness is excellent.
Field of view is wider. Eye relief is generous for glasses wearers. Weight is lower because manufacturers use magnesium alloy frames instead of polycarbonate.
Waterproofing and fog-proofing are standard. This is where you get a pair that will last a decade or more with proper care.
$500 to $1,000. This is the premium tier. You're getting high-end glass with superior light transmission. Colors are more accurate.
Contrast is better. The focus wheel is buttery smooth. The binoculars feel solid in your hands.
At this price, you're paying for refinement. The difference between a $400 pair and an $800 pair is noticeable if you compare them side by side. But it's not night and day.
For most people, the $250 to $500 range is plenty.
$1,000 and above. This is the alpha tier. Brands like Swarovski, Zeiss, and Leica dominate. The glass is Schott or equivalent.
The coatings are proprietary and extremely effective. Image quality is as close to perfect as consumer optics get. The build quality is exceptional.
These binoculars are often passed down to the next generation. The question is whether you need this level of performance. For a dedicated birder who uses binoculars daily, yes.
For a weekend hiker, probably not.
Here's a quick reference table:
| Price Range | Prism Type | Key Features | Best For |
|---|---|---|---|
| Under $100 | Porro | BK-7 glass, basic coatings, plastic body | Casual, occasional use |
| $100 to $250 | Porro or roof | BaK-4 glass, multi-coated, waterproof | Hobbyists, beginners |
| $250 to $500 | Roof | Phase-corrected, dielectric, magnesium body | Serious birders, hikers |
| $500 to $1,000 | Roof | Premium glass, superior coatings, refined build | Enthusiasts, daily users |
| $1,000+ | Roof | Alpha-grade glass, best coatings, lifetime build | Professionals, collectors |
The law of diminishing returns applies hard in optics. The jump from $100 to $300 is huge. The jump from $300 to $600 is moderate.
The jump from $600 to $1,200 is small. Spend enough to get the features you need. Don't assume the most expensive pair is the best for you.
How to Judge a Pair of Binoculars Before You Buy
You can't always try binoculars before buying. But you can evaluate them intelligently by checking a few key things.
Check the field of view spec first. This is the most overlooked spec. A wider field of view makes everything easier. You'll find birds faster.
You'll track them longer. Look for at least 350 feet at 1,000 yards for an 8×42. Anything under 300 feet is restrictive.
Look at the exit pupil. Divide the objective lens by the magnification. A 5mm exit pupil is excellent for low light. A 4mm is good.
Anything under 3.5mm will feel dim at dawn and dusk.
Test the close focus distance. If you want to watch butterflies or dragonflies, you need a close focus of 6 feet or less. Many mid-range binoculars focus down to 4 or 5 feet. Some budget models only focus to 12 feet.
That's a dealbreaker for insect watchers.
Check the eye relief. If you wear glasses, you need at least 15mm. Ideally 18mm to 20mm. Without enough eye relief, you'll see a black ring around the image.
That's called vignetting, and it's frustrating.
Look at the warranty. This is a strong indicator of quality. Vortex offers a lifetime warranty that covers accidental damage. Nikon offers a limited lifetime warranty.
Budget brands often offer one year. A good warranty means the manufacturer trusts the product.
Handle the weight. Specs on paper don't tell you how a pair feels around your neck. A 30-ounce pair is fine for an hour. By the third hour, you'll feel it.
If you're hiking, aim for under 22 ounces.
Check the focus wheel. It should turn smoothly without any play. There should be no resistance in one direction and looseness in the other. The focus wheel is the part you'll use most.
A bad one ruins the experience.
Look for diopter adjustment. This is a small ring on the right eyepiece that adjusts for differences between your eyes. Almost all mid-range binoculars have it. It's essential for getting a sharp image.
If you can, try binoculars in a store. Hold them to your eyes. Look at a sign across the street.
Check the brightness. Test the focus. If you're buying online, read user reviews that mention these specific features.
Common Buying Mistakes That Cost You Views
People make the same mistakes over and over when buying binoculars. Here are the ones we see most often.
Buying too much magnification. 10x seems better than 8x on paper. But in practice, 10x shakes more and narrows your view. Many people return 10x binoculars because they can't hold them steady.
Unless you need the extra reach, stick with 8x.
Ignoring weight. A 40-ounce pair of binoculars is a burden. You'll leave them in the car. You'll skip bringing them on a hike.
The best binoculars are the ones you actually carry with you. Weight matters more than any other spec for regular use.
Chasing the cheapest price. A $30 pair of binoculars is a waste of $30. The image quality is poor. The coatings are bad.
The focus wheel will break. Spend at least $100 for something usable. You'll enjoy nature more with a decent pair.
Buying without checking the field of view. Two 8×42 binoculars can have wildly different fields of view. A narrow view feels like looking through a straw. It's hard to find birds.
It's hard to track them. Always check the field of view spec.
Assuming all brands are equal. They're not. Some brands invest in glass quality and coatings. Others invest in marketing.
Stick with brands that have a track record in optics. Nikon, Vortex, Swarovski, Leica, and Zeiss are safe bets. Lesser-known brands can be good, but you need to research each model carefully.
Forgetting about close focus. If you want to watch insects or butterflies, you need a close focus of 6 feet or less. Many binoculars focus no closer than 10 to 12 feet. That's fine for birds but useless for dragonflies.
Not checking the warranty. A good warranty is a sign of confidence. A bad warranty is a sign the manufacturer expects problems. Vortex and Swarovski offer transferable lifetime warranties.
That's a huge advantage.
Buying based on looks. Binoculars are tools, not fashion accessories. A camo pattern doesn't improve optics. A sleek design doesn't help you see farther.
Focus on the specs, not the styling.
Overlooking eye relief. If you wear glasses, insufficient eye relief is a dealbreaker. You won't see the full image. You'll have to take your glasses off to use the binoculars.
That's a hassle in the field.
Frequently Asked Questions
What magnification is best for bird watching?
For most birding, 8x is the best choice. It offers a wide field of view, steady handheld use, and good low-light performance. Experienced birders in open areas may prefer 10x.
But 8x is more versatile for general use.
Are expensive binoculars worth the money?
Yes, but only up to a point. The jump from $100 to $300 is dramatic. The jump from $300 to $600 is noticeable.
Above $1,000, the improvements are marginal for most people. Spend enough to get phase-corrected coatings and waterproofing. Don't overspend for features you won't use.
Can I use binoculars with glasses?
Yes, but you need sufficient eye relief. Look for at least 15mm, ideally 18mm to 20mm. Many modern binoculars offer twist-up eyecups that adjust for glasses wearers.
Check the spec sheet before buying.
What does "fully multi-coated" mean?
It means all lens surfaces have multiple anti-reflective coatings. This improves light transmission, reduces glare, and produces brighter, sharper images. It's a standard feature on binoculars over $150.
Avoid binoculars that are only coated or multi-coated on some surfaces.
How do I clean binoculars without damaging them?
Use a blower brush to remove dust first. Then use a microfiber cloth and lens cleaning solution designed for optics. Never use paper towels or household cleaners.
They can scratch the coatings. Store binoculars with lens caps on to prevent dust buildup.
What is the difference between roof and porro prism binoculars?
Roof prism binoculars are slim and straight. They're more compact and portable. Porro prism binoculars are wider and bulkier.
They offer better image quality at lower prices. For hiking, roof prism is better. For stationary use, porro prism offers excellent value.
So, Which Binoculars Are Best for You?
Let's bring it all together. The best binoculars for nature observation are the ones that match your specific use case.
If you're a backyard birdwatcher, get an 8×42 roof prism binocular in the $150 to $300 range. You'll get bright views, good close focus, and a comfortable experience.
If you're a hiker, get an 8×32 roof prism binocular in the $250 to $500 range. You'll save weight without sacrificing too much light.
If you're on a safari or scanning open plains, get a 10×42 roof prism binocular in the $300 to $800 range. You'll get the reach you need.
If you're a casual user on a budget, get an 8×40 porro prism binocular for under $100. It won't be perfect. But it will work.
Try before you buy if possible. Hold the binoculars. Feel the weight.
Test the focus. Look at something in the distance. If you're buying online, check the return policy.
Binoculars are a personal tool. What works for someone else might not work for you. But if you follow the guidelines in this article, you'll find a pair that fits your observation style.
And when you do, you'll see nature in a whole new way.