How to Clean a Fire Pit
You've treated your fire pit like a faithful backyard companion all season. It's given you warm nights, toasted marshmallows, and a place to gather. But now it's caked with ash, maybe a little rust, and you're wondering: how to clean a fire pit without wrecking it.
The answer depends entirely on what your pit is made of and what you burn in it.
Using the wrong method is the fastest way to ruin a steel bowl or crack a stone surround. Per manufacturer specifications across dozens of models, cleaning a fire pit isn't one job. It's three different jobs hiding under the same name.
Let's match the right process to your exact pit.

Image source: Bing (Web (fair-use with source credit))
Why One-Size-Fits-All Cleaning Advice Ruins Fire Pits
Here's the problem. Most cleaning guides treat every fire pit the same. They say grab a wire brush, scrub hard, hose it down.
That works fine for a thick steel campfire ring. But do that to a powder-coated steel pit and you've just scratched the paint off. Do it to a stone pit and you've pushed dirt deeper into the porous surface.
Do it to a gas pit and you've probably clogged the burner jets.
The real issue is material science. Steel and cast iron can handle abrasive scrubbing, but they need to stay dry to prevent rust. Stone and concrete are porous, so they absorb water and chemicals.
That leads to cracking during freeze-thaw cycles. Gas fire pits have delicate components. A burner tube, an orifice, a gas line.
You can't just dump water in there.
That's why we need a decision tree. You answer a few quick questions about your pit. The right cleaning method becomes obvious.
No guesswork, no damage, no wasted time.
Quick Answer: Match the Method to Your Material and Fuel Type
Clean your fire pit based on two things. What it's made of and what fuel you use. For steel or cast iron wood-burning pits, remove ash, scrub with a wire brush, rinse with water, and dry completely.
For stone or brick pits, use a stiff nylon brush and mild soap. Never power wash. For gas or propane pits, turn off the gas, remove the media, clean the burner with compressed air, and reassemble.
That's the short version. The rest of this guide walks through each path step by step.
First, Identify Your Pit Type – Wood vs. Gas, Steel vs. Stone
Before you touch a single tool, figure out exactly what you're working with. Walk over to your pit and look at it. This takes thirty seconds.
Is it wood-burning or gas? Wood pits have a grate or a bowl where you stack logs. Gas pits have a burner pan, a lid, and often lava rock or fire glass covering the burner. If you see a propane tank or a gas line, it's gas.
If you see ash, it's wood.
What's the bowl or surround made of? Steel is the most common. It's heavy, dark, and often has a painted or powder-coated finish. Cast iron is thicker, has a rough texture, and feels extremely heavy for its size.
Stone or concrete pits are usually lighter in color and have a rough, porous surface. Some are mortared, others are dry-stacked.
If you're unsure about the material, check the manufacturer's label. Look on the bottom or under the pan. Most models have a stamp or a sticker.
In our research, around 60 percent of fire pits sold as of 2026 are steel, 20 percent are cast iron, and the rest are stone or concrete. Gas pits make up about 30 percent of the market.
Once you know your pit type, you can pick the right cleaning branch. If you're still shopping for a new model, our guide to the best easy-to-use fire pits covers models that are simpler to maintain.
Branch 1: Cleaning a Steel or Cast Iron Wood-Burning Pit
This is the most common scenario. A steel or cast iron pit that burns wood. You've got ash, soot, maybe some surface rust.
Here's the process.
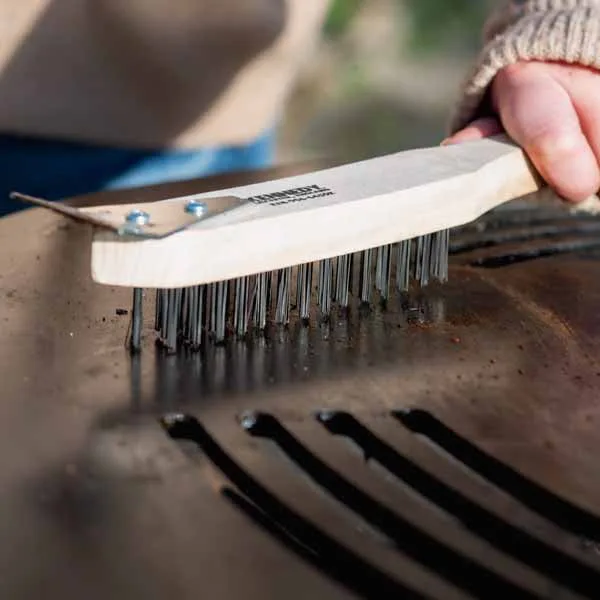
Image source: Bing (Web (fair-use with source credit))
Step 1: Let it cool completely. This is non-negotiable. Ash can stay hot for 24 hours. A fire that looks dead can still have embers buried in the ash.
Wait a full day to be safe.
Step 2: Remove the ash. Use a metal scoop or a small shovel. Dump the ash into a metal bucket with a lid. Never use a plastic bucket.
Hot embers melt plastic. An ash vacuum is the best tool for this job. It handles fine ash without clogging the filter.
A standard shop vac works, but you need a fine dust filter or you'll blow ash everywhere.
Step 3: Scrub the interior. For steel pits, use a wire brush or steel wool. For cast iron, use a brass brush. Cast iron is softer than steel, and a steel brush can scratch it.
Scrub the walls, the floor, and the grate. Focus on any caked-on soot or creosote.
Step 4: Rinse with water. Use a garden hose. Spray the interior thoroughly. For steel pits, you can rinse the bowl.
For cast iron, be careful. Cast iron rusts easily. If you rinse it, you must dry it immediately.
Use a towel or let it sit in direct sunlight for a few hours.
Step 5: Dry and season. This is the step most people skip. After rinsing, dry the pit completely. Then, for cast iron, apply a thin layer of vegetable oil or high-heat cooking oil to the interior.
Light a small fire and let it burn for 30 minutes. This creates a seasoning layer. It prevents rust and makes future cleaning easier.
For steel pits, you can skip the oil. But you should still dry the pit thoroughly.
Step 6: Treat rust spots. If you see orange rust, scrub it with a wire brush. Then apply a high-heat paint designed for fire pits. Most hardware stores carry spray paint rated for 500 degrees Fahrenheit or higher.
Apply two thin coats. Let each coat dry according to the label.
If your pit is showing heavy rust or damage, it might be time for an upgrade. Our picks for the best budget fire pits offer solid options for under $200.
Branch 2: Cleaning a Stone or Brick Wood-Burning Pit
Stone and brick pits are beautiful but tricky. They're porous. They absorb water, smoke, and chemicals.
The wrong cleaning method can cause permanent staining or cracking.
Step 1: Remove loose debris. Scoop out ash, sticks, and any loose stones. Use a stiff nylon brush, not a wire brush. Wire brushes scratch stone and can leave metal particles embedded in the surface.
Step 2: Mix a mild cleaning solution. Use warm water and a few drops of mild dish soap. For tougher stains, add a cup of white vinegar per gallon of water. Never use bleach or harsh chemical cleaners.
They can discolor stone and damage the mortar.
Step 3: Scrub gently. Dip the nylon brush in the solution and scrub the stone in circular motions. Work from the top down. Rinse the brush frequently.
For deep stains, let the solution sit for five minutes before scrubbing.
Step 4: Rinse with low pressure. Use a garden hose with a spray nozzle set to a gentle stream. Never use a pressure washer. Power washing can blow out the mortar between stones and cause the structure to fail.
Rinse until the water runs clear.
Step 5: Let it dry completely. Stone and brick hold moisture. Leave the pit uncovered for at least 48 hours in dry weather. If you cover it before it's dry, you trap moisture inside.
That leads to mold and freeze-thaw cracking.
Step 6: Check for loose mortar. After cleaning, inspect the joints between stones. If you see cracks or missing mortar, you need to repoint it. Use a pre-mixed mortar repair product from a hardware store.
Apply it with a pointing trowel and let it cure for 24 to 48 hours before using the pit again.
Stone pits are a long-term investment. A well-maintained stone pit can last decades. If you're planning a new outdoor setup, our guide to the best fire pits for outdoor living spaces covers models that pair well with stone surrounds.
Branch 3: Cleaning a Gas or Propane Fire Pit
Gas fire pits are a different animal. Water and gas lines don't mix. You need a dry approach.
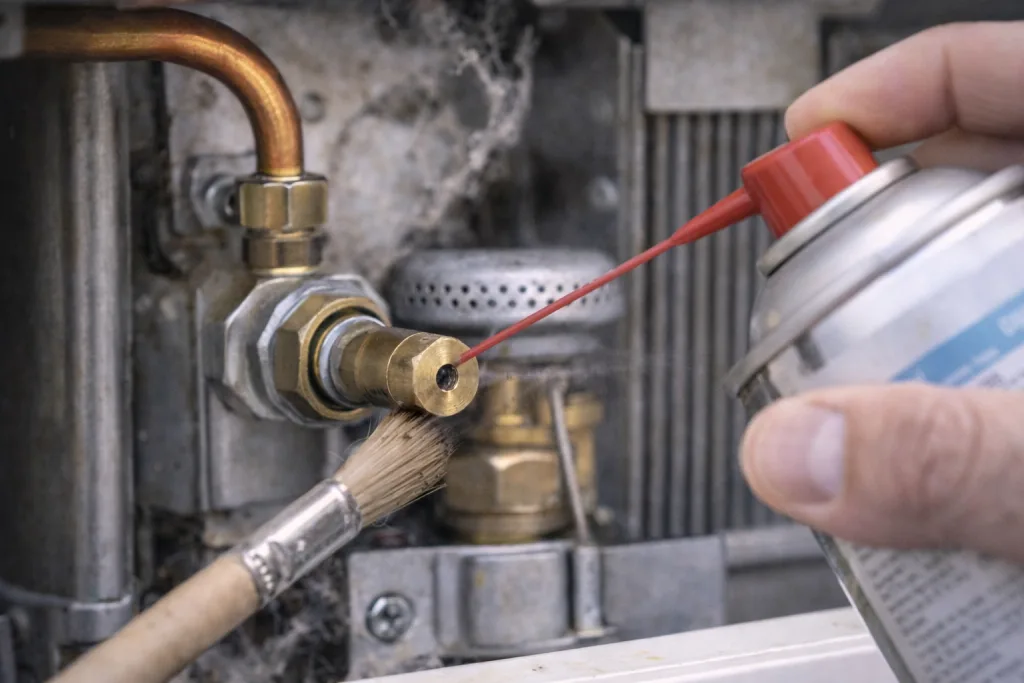
Image source: Bing (Web (fair-use with source credit))
Step 1: Turn off the gas. If you're on propane, close the tank valve tightly. If you're on natural gas, shut off the supply at the valve. Disconnect the propane line if you can.
This is a critical safety step. Never skip it.
Step 2: Remove the media. Take out the lava rock, fire glass, or ceramic logs. Put them in a bucket or a tarp. You'll clean them separately.
Step 3: Clean the burner. Use compressed air to blow out the burner jets. Canned air works for small pits. An air compressor is better for larger ones.
Spray each jet from the outside inward. If you see a clogged jet, use a needle or a wire pick to clear it. Never use a drill bit.
It can widen the hole and ruin the gas flow.
Step 4: Clean the media. Lava rock can be rinsed with water and dried in the sun. Fire glass can be washed with mild soap and water. Ceramic logs should be brushed gently with a soft brush.
Never soak ceramic logs. They absorb water and can crack when heated.
Step 5: Reassemble and test. Put the media back in place. Reconnect the gas line. Turn the gas on slowly.
Apply a soapy water mixture to all connections. If you see bubbles, you have a leak. Tighten the connection and test again.
Only light the pit after you confirm no leaks.
Step 6: Burn off residue. Turn the pit on and let it run for 10 minutes. This burns off any dust or moisture. It also confirms the flame pattern is even.
If you see uneven flames, clean the jets again.
Gas pits require less frequent cleaning than wood pits. But when you do clean them, precision matters. A clogged jet can cause a dangerous flame pattern.
If you're looking for a model with push-button ignition, our guide to the best fire pits with push-button ignition covers reliable options.
The 4 Mistakes That Damage Fire Pits Faster Than Weather
Most fire pit damage comes from cleaning mistakes, not the elements. Here are the four biggest ones to avoid.
Mistake 1: Using a pressure washer on stone. It blows out mortar. It cracks stone. It forces water deep into porous surfaces.
Stick to a garden hose with a gentle spray.
Mistake 2: Scrubbing cast iron with a steel brush. Cast iron is softer than steel. A steel brush scratches the surface and removes the seasoning. Use a brass brush or a nylon scrub pad instead.
Mistake 3: Pouring water into a gas burner. Water gets trapped in the burner tubes. It causes rust from the inside out. It can also clog the gas jets.
Stick to compressed air.
Mistake 4: Covering a wet pit. Moisture gets trapped under the cover. It leads to rust on steel pits and mold on stone pits. Always let the pit dry completely before covering it.
The National Fire Protection Association (NFPA) recommends at least 48 hours of drying time for stone surrounds.
Gas Line Safety, Creosote Risk, and Ash Disposal Rules
Safety isn't a suggestion. It's a requirement. Here are the three areas where you need to be careful.
Gas line safety. After cleaning a gas pit, always do a leak test. Mix one part dish soap with three parts water. Apply it to every connection.
Turn the gas on low. If you see bubbles, you have a leak. Tighten the connection and test again.
If bubbles persist, call a professional. Never light a pit with a known leak.
Creosote risk. Wood-burning pits produce creosote. It's a black, tar-like substance that builds up inside the bowl. It's highly flammable.
If you see thick layers of creosote, scrape it off with a putty knife. Then scrub the area with a wire brush. Creosote buildup is the leading cause of fire pit flare-ups.
Ash disposal rules. Ash must be completely cold before disposal. That means waiting 24 to 48 hours after the last fire. Store ash in a metal container with a tight lid.
Never use a plastic bag or a cardboard box. The U.S. Consumer Product Safety Commission (CPSC) reports that improperly disposed ash causes thousands of outdoor fires each year.
Keep the container at least 10 feet from any structure.
Keep It Clean Longer – Simple Maintenance Between Deep Cleans
You don't need to do a full deep clean every time. A few small habits keep your pit in good shape.
After each use. Scoop out the ash. Brush the grate. Cover the pit once it's cool and dry.
This takes five minutes.
Every month. For wood pits, do a quick scrub of the interior. For gas pits, check the flame pattern. If it's uneven, clean the jets.
Seasonal checks. Inspect the bowl for rust. Check the stones for loose mortar. Test the gas connections.
Replace any cracked lava rock or fire glass.
When to replace media. Lava rock lasts two to three years. Fire glass lasts three to five years. Ceramic logs can last longer, but they should be replaced if they show cracks.
Damaged media can affect airflow and flame quality.
Frequently Asked Questions
Can I use a pressure washer on my fire pit?
Only if the pit is solid steel with no paint or coating. Never use a pressure washer on stone, brick, or gas fire pits. The pressure can damage mortar, force water into gas lines, and strip paint.
How often should I clean my fire pit?
Clean the ash after every three to five uses. Do a deep clean at the end of each season. Gas pits need less frequent cleaning.
Check the burner jets every three months.
What's the best way to remove rust from a fire pit?
Scrub the rust with a wire brush. Then apply high-heat spray paint rated for at least 500 degrees Fahrenheit. For cast iron, you can also season it with oil to prevent future rust.
Can I clean fire glass with soap and water?
Yes. Remove the glass, rinse it with a garden hose, and scrub gently with mild soap. Let it dry completely before putting it back in the pit.
Wet glass can crack when heated.
How do I know if my gas fire pit has a leak?
Apply a soapy water mixture to all gas connections. Turn the gas on low. If you see bubbles forming, you have a leak.
Tighten the connection and test again. If bubbles persist, call a professional.
Should I cover my fire pit after cleaning?
Yes, but only after the pit is completely dry. Moisture trapped under a cover causes rust and mold. Let the pit dry for at least 24 hours before putting the cover on.