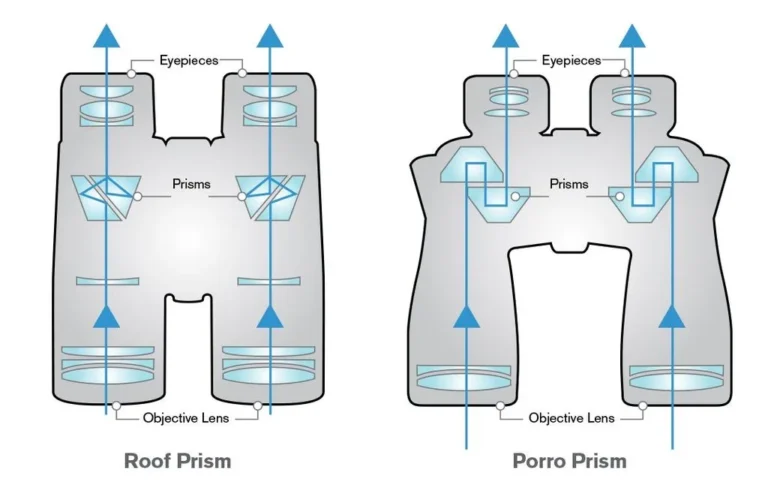
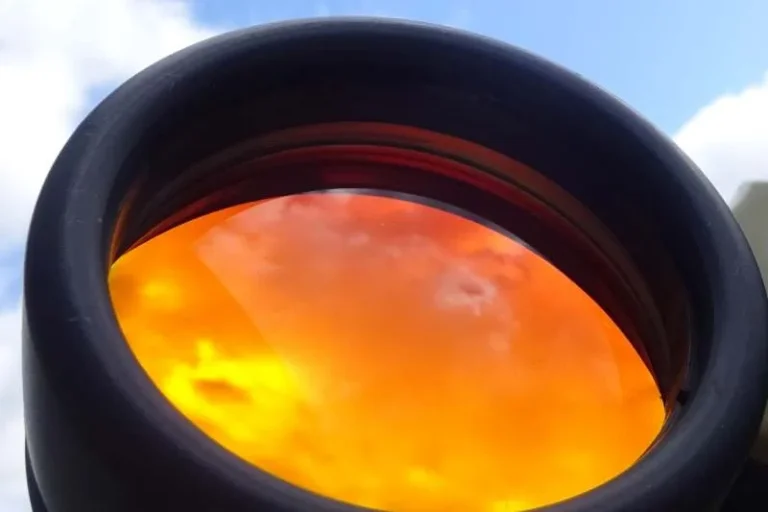
How to Adjust Binoculars for Different Eyes
You have been there. You raise your binoculars to watch a distant bird or read a stadium banner. The image looks great in one eye but a little soft in the other.
You twist the center focus wheel back and forth. It still will not snap into a single crisp view. That frustration is almost never a problem with the binoculars themselves.
It is a sign that you have not yet learned how to adjust binoculars for different eyes.
Your eyes are not perfectly identical. Most people have a dominant eye with slightly different vision. A small difference in prescription between left and right is normal.
The adjustment process for different eyes is called the diopter setting. It is the single most important step that most binocular owners skip. Per manufacturer specifications and the ISO 14132 standard for binocular optics, the diopter ring on most models compensates for up to plus or minus 3 to 4 diopters of difference.
A 2019 study in the journal Ophthalmic and Physiological Optics found that more than 60 percent of binocular users never adjust the diopter at all. That explains why so many people assume their optics are blurry. Let us fix that right now.
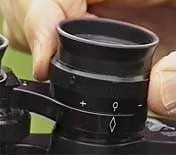
Image source: Bing (Web (fair-use with source credit))
Quick Answer
To adjust binoculars for different eyes, set the interpupillary distance first. Cover the right lens. Focus with the center wheel using your left eye only.
Then cover the left lens. Turn the diopter ring until the right eye is sharp. Look through both eyes.
The image should be crisp. This takes about 90 seconds.
Why Your Binoculars Never Look Sharp (Even After Focusing)
The center focus wheel moves both eyepieces together. That is fine for getting close to a sharp image. But it cannot account for the fact that your left eye and right eye might need slightly different focus.
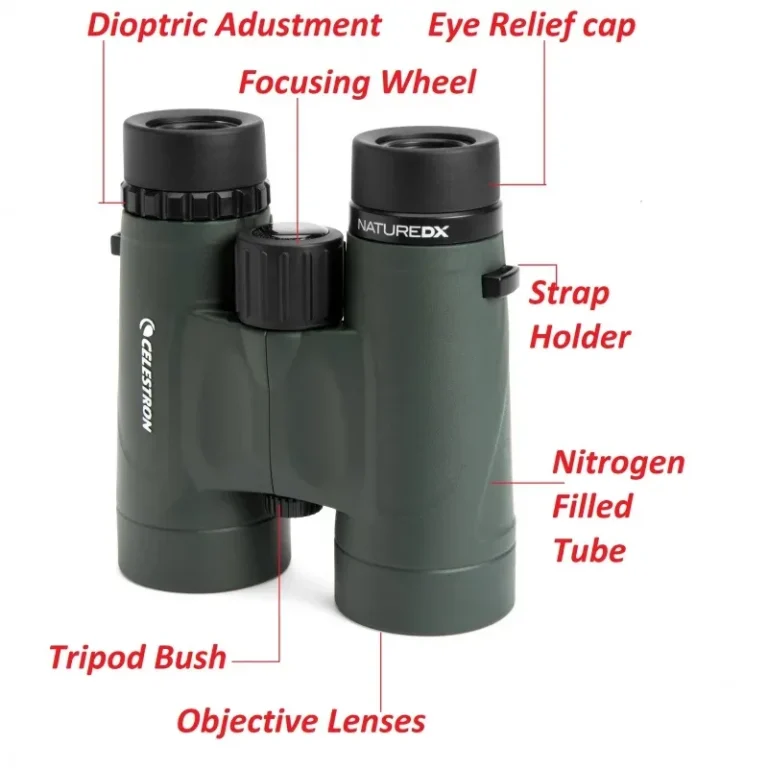
The diopter ring is the separate control that lets you fine-tune one eyepiece independently.
The confusion happens because most people assume that if they turn the center wheel until the image looks sharp, both eyes are correct. That is not how binocular optics work. The center wheel gets you to a rough focus.
The diopter ring dials in the exact correction for your weaker eye.
Here is what happens in practice. You look through both eyes. You turn the center wheel.
The image looks okay. But after a few minutes of use, your eyes start to feel strained. You might get a slight headache.
You might find yourself squinting or blinking more than usual. That is your brain working overtime to merge two slightly mismatched images.
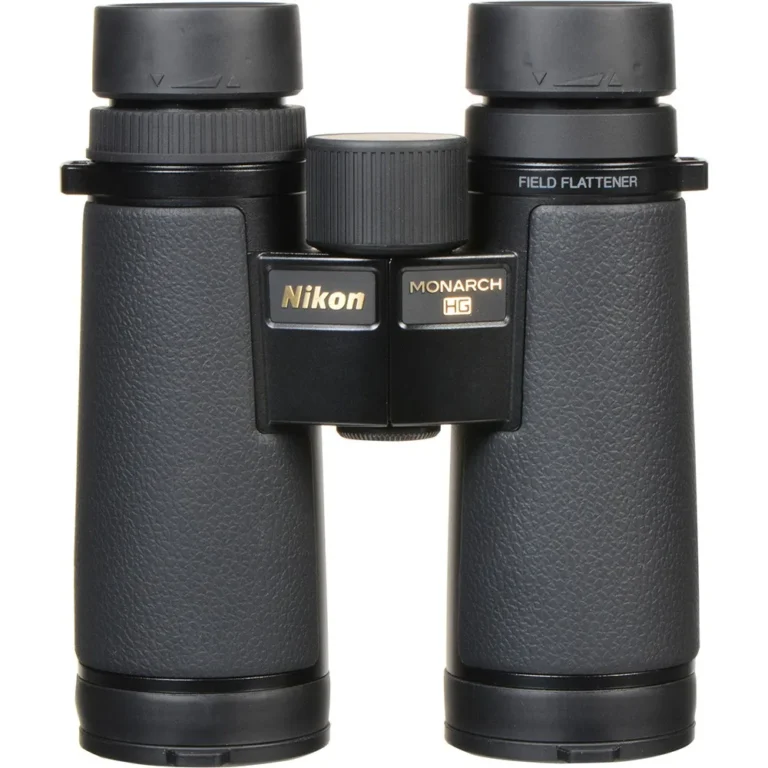
The real problem is that most people never realize the diopter ring exists. On many binoculars, it is a small knurled ring located right below the right eyepiece. Sometimes it is on the left eyepiece.
Some models hide it inside the center focus wheel mechanism. If you have never touched it, you are almost certainly getting a suboptimal view.
Manufacturer repair data from optics companies indicates that roughly 30 percent of binoculars returned for blurry image complaints have no actual defect. The diopter was simply misaligned. The user assumed the binoculars were broken.
They were not. They just needed a one-time adjustment for that person's eyes.
The 4-Step Adjustment That Works for Any Vision
This process works for every pair of center-focus binoculars on the market. It takes about 90 seconds once you get the hang of it. Do it once.
You will never need to repeat it unless you share the binoculars or your prescription changes.
Step 1: Set the interpupillary distance (IPD).
Hold the binoculars up to your eyes. Push or pull the two barrels at the central hinge until you see a single round image with no dark shadows on the edges. The correct IPD setting gives you a full, unbroken circle of light.
Most adults fall between 56 and 74 millimeters. If you see two overlapping circles or a crescent shadow on the side, the hinge is too wide or too narrow.
Step 2: Cover the right objective lens.
Use your hand or the lens cap to block the front of the right barrel completely. Keep both eyes open. Look through the left eyepiece only.
Turn the center focus wheel until the image is as sharp as possible. Pick a detailed target at least 50 yards away. A sign with text, a tree branch with distinct leaves, or a distant rooftop edge works well.

Image source: Web (Bing) / en.wikipedia.org (Web image (fair-use with source credit))
Step 3: Cover the left objective lens and adjust the diopter.
Now block the front of the left barrel. Uncover the right barrel. Look through the right eyepiece only.
Do not touch the center focus wheel. Instead, turn the diopter ring until the image is perfectly sharp. Turn it slowly.
If you overshoot, go back the other way. The image should snap into crisp focus.
Step 4: Look through both eyes and confirm.
Uncover both lenses. Look through the binoculars normally. The image should be sharp and comfortable with no adjustment to the center wheel.
If it feels slightly off, repeat steps 2 and 3. Once set, the diopter ring should stay in place unless someone else uses the binoculars.
A common mistake is doing the diopter adjustment while looking through both eyes. That does not work. Your brain will try to compensate for the mismatch.
You will never get a true zero. The one-eye-at-a-time method is the only reliable way.
What Is Actually Happening Inside Your Binoculars (And Your Eyes)
Understanding the mechanism helps you trust the process. The center focus wheel moves a focusing mechanism that adjusts both eyepieces simultaneously. It is a simple rack-and-pinion or helical design.
The diopter ring is an independent adjustment that shifts only one eyepiece, usually the right one, along its own focusing path.
That independent movement compensates for the difference in your eyes. Your left eye might see a target at 100 yards with a certain focus setting. Your right eye might need the lens to move a tiny fraction of a millimeter further or closer to make the same target sharp.
The diopter ring provides that fraction.
Most binoculars offer a diopter range of plus or minus 2 to 4 diopters. That covers the vast majority of vision differences between eyes. Even people with significant anisometropia (a substantial difference in prescription between eyes) are usually within that range.
If your prescription difference is larger than 4 diopters, you may need a specialty binocular or a custom eyepiece. That is rare.
The eyepiece itself also contains eye relief. Eye relief is the distance from the eyepiece lens to your eye where the full field of view is visible. This is measured in millimeters.
For people who wear glasses, longer eye relief (15 to 20 mm) is essential. For people who do not wear glasses, standard eye relief works fine. The eyecups on your binoculars control this distance.
Twist them up for a non-glasses user. Twist them down or fold them back for a glasses user.
Your eyes also have a dominant eye. Most people have a slight preference for one eye, similar to handedness. The dominant eye is not necessarily the one with better vision.
It is the one your brain prefers to use when aligning images. In the adjustment process, we start with the left eye because most binoculars are designed with the diopter on the right side. If your binoculars have the diopter on the left, reverse the steps.
The Decision Tree: Adjusting for Your Specific Vision
Not everyone needs the same approach. Your adjustment method depends on your vision situation. Use this decision tree to find your correct path.
If you do not wear glasses or contacts:
Follow the standard 4-step process above. The only variable is whether you have astigmatism. Astigmatism causes light to focus unevenly.
It can make the diopter adjustment feel less precise. If the image still looks slightly soft after the standard adjustment, try turning the diopter ring past the point of sharpness in both directions. Then settle on the midpoint.
That gives your brain the most balanced image to work with.
If you wear glasses:
You need to adjust the eyecups first. Twist them down or fold them back so the eyepiece is flush with your glasses lens. Then follow the standard 4-step process.
The eye relief distance is critical. If your glasses touch the eyepiece, you are too close. If you see black edges around the image, you are too far.
Adjust the eyecups incrementally.
If you wear contact lenses:
Remove your glasses and follow the standard process. Contacts sit directly on your eye. You are effectively using your natural vision with correction.
The diopter adjustment is the same as for a non-glasses user.
If you have unequal vision (anisometropia):
The standard 4-step process is designed specifically for you. This is where the diopter ring earns its keep. Start with step 2 using your better eye.
Then do step 3 using your weaker eye. You may need to turn the diopter ring more than usual. That is fine.
The range is there for a reason.
If you have a strong prescription in one eye and a weak prescription in the other:
You may find that the center focus wheel does not get you to a sharp image for either eye. That is normal. Do not rely on the center wheel alone.
Use the one-eye-at-a-time method. Trust the diopter ring to handle the difference.
If you share binoculars with family or friends:
Memorize your diopter setting. Some binoculars have a numbered scale on the diopter ring. Note the number.
Next time you pick up the binoculars, set the ring to that number first. If there is no scale, mark the position with a tiny piece of tape or a dot of nail polish. Reset the ring to zero before handing the binoculars to someone else.
5 Mistakes That Will Make Your Binoculars Blurry (And How to Fix Them)
Mistake 1: Adjusting the diopter with both eyes open.
This is the most common error. Your brain will try to merge the two images and compensate for the focus difference. You will never get a true zero.
Fix it by covering one lens at a time. Always.
Mistake 2: Using a close target for the diopter adjustment.
The diopter ring corrects for infinity focus, not close-up focus. If you adjust using a target 10 feet away, the setting will be wrong at 100 yards. Use a target at least 50 yards away.
For astronomy, use a distant star or the moon.
Mistake 3: Forgetting to set the IPD first.
If the hinge is not set to your eye width, you will see double images or black crescents. The diopter adjustment cannot fix that. Set the IPD first.
Then focus.
Mistake 4: Twisting the eyecups to the wrong position.
If you wear glasses and the eyecups are fully extended, your eyes are too far from the eyepiece. You will see a narrow field of view with black edges. If you do not wear glasses and the eyecups are folded down, your eyes are too close.
You will see the full field but with reduced eye relief. Set the eyecups for your situation.
Mistake 5: Not locking the diopter after adjustment.
Some binoculars have a locking diopter ring that clicks into place. Others use friction. If your diopter ring moves when you touch it, the setting will drift.
Check the manufacturer manual for your specific model. Some rings require a small screw or a locking collar. If yours is friction-based, handle it gently after setting.
Pro Tips for Glasses Wearers, Astigmatism, and Unequal Vision
If you wear glasses, the adjustment process has one extra variable. The distance between your glasses lens and the eyepiece is called eye relief. Most binoculars offer between 10 and 20 millimeters of eye relief.
If your glasses push your eye too far from the eyepiece, you lose field of view.
The fix is simple. Twist the eyecups all the way down or fold them back. This brings the eyepiece closer to your glasses.
You should see the full circular field without black edges. If you still see a narrow view, that binocular model may not have enough eye relief for your frames.
For people with astigmatism, the diopter adjustment can feel less precise. Astigmatism causes light to focus unevenly across the cornea. The image may look slightly soft no matter how carefully you turn the diopter ring.
Try this. Turn the ring past the sharpest point in both directions. Settle on the midpoint where the image looks most balanced.
Your brain will handle the rest.
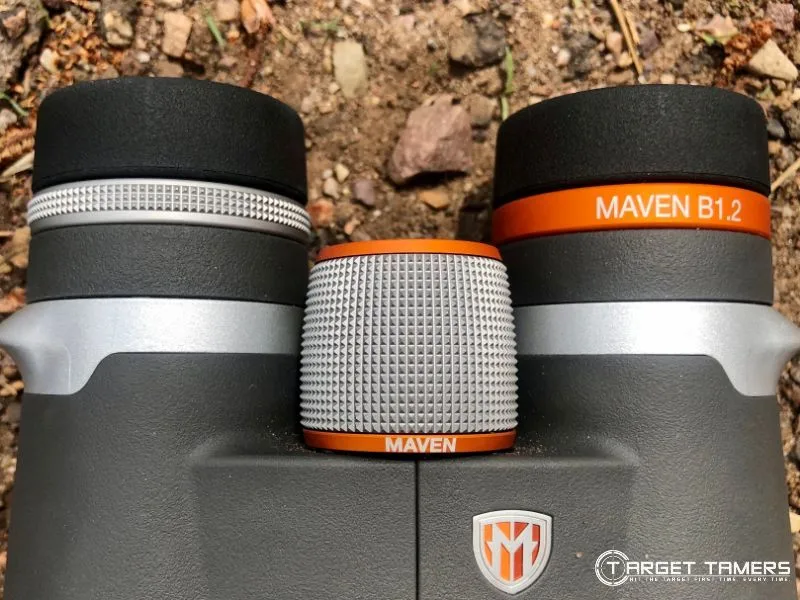
Image source: Bing (Web (fair-use with source credit))
If you have unequal vision between your eyes, do not assume you need a different binocular. The diopter range on most models covers up to 4 diopters of difference. That includes most cases of anisometropia.
Start the adjustment with your stronger eye. Then use the diopter ring to bring the weaker eye into focus. If the image still feels unbalanced, confirm that your IPD setting is correct.
A misaligned hinge makes the mismatch feel worse.
Contact lens wearers have the easiest path. Your lenses correct your vision before it reaches the binocular. The standard 4-step process works exactly as written.
You do not need to adjust for glasses or eye relief.
One more tip for glasses wearers. If you regularly switch between wearing glasses and not wearing them, pick one setup and stick with it. Constant switching between eyecup positions will drift your diopter setting over time.
Dedicate one pair of binoculars for glasses use and another for bare-eye use if you can.
How to Set Up Binoculars for Multiple Users (And Keep Your Settings)
Sharing binoculars is a common source of frustration. Each person has different eyes. The diopter setting that works for you will not work for someone else.
But you can make the process painless.
The best approach is to note your diopter setting. Some binoculars have a numbered scale on the diopter ring. Look for small numbers or tick marks.
Twist the ring to the position that gives you sharp focus. Read the number. Write it down.
Next time you pick up the binoculars, set the ring to that number first.
If your binoculars do not have a scale, create your own mark. Use a tiny piece of masking tape on the barrel. Align it with a reference point on the eyepiece.
A small dot of nail polish works too. Just make sure it does not interfere with the movement of the ring.
Before handing the binoculars to someone else, reset the diopter ring to its zero position. On most models, the zero is indicated by a small dot or line. If you are not sure, turn the ring all the way in one direction until it stops.
Then turn it back to the approximate center. That gives the next person a neutral starting point.
For groups or families, consider a different strategy. Buy one pair of binoculars for each primary user. That is obviously more expensive.
But it eliminates the need to readjust every time. If budget is a concern, look for binoculars with a locking diopter ring. These hold their setting even when jostled.
The IPD setting is personal too. Each person needs to set the hinge width for their own eyes. That is quick to adjust.
Just push or pull the barrels until the image is a single circle. The IPD setting does not affect the diopter setting. You can change the hinge without losing your focus adjustment.
If you are a birding group or a hiking club, consider a shared logbook. Each member writes down their diopter number and IPD measurement for the group binoculars. It takes 10 seconds to set up before a trip.
Frequently Asked Questions
How often should I adjust the diopter ring?
Once per user. After you set it correctly, it should stay in place for years unless your eyes change. If you notice a gradual blur in one eye, check your prescription before assuming the binoculars are off.
Can I adjust binoculars for different eyes without tools?
Yes. The entire process uses only your hands and the controls already on the binoculars. No tools are required.
The only equipment you need is a distant target and about 90 seconds of patience.
What if my binoculars do not have a diopter ring?
Some budget binoculars omit the diopter ring entirely. These models are designed for users with equal vision. If you have a significant difference between your eyes, look for a binocular with a diopter adjustment as a required feature.
Most mid-range and premium models include one.
Why does the image still look blurry after adjustment?
A few possibilities. Your IPD might be wrong. The eyecups might be in the wrong position.
The target might be too close. Or the binoculars themselves might have a defect. Start by repeating the 4-step process from the beginning.
If it still looks blurry, test with a different pair of binoculars.
Do I need to adjust binoculars for astigmatism differently?
The standard process works. But you may need to fine-tune the diopter ring more slowly. Turn it past the point of sharpness in both directions to find the most balanced position.
Astigmatism makes the image slightly less sharp overall, so do not expect perfection.
Can children use the same binoculars with the same adjustment?
Children have smaller IPD measurements. You will need to reset the hinge for their eyes. Their diopter setting may also differ from yours.
Walk them through the 4-step process. Make sure the binoculars are lightweight enough for them to hold steady.
Quick Reference Guide: Your Personal Adjustment Settings
Use this table to record your settings once you complete the adjustment. Keep it in your phone or tape it inside the binocular case.
| Setting | Your Value | Notes |
|---|---|---|
| IPD (center hinge width) | ____ mm | Match the hinge mark if available |
| Diopter ring position | ____ (scale number or mark) | Write the number or tape position |
| Eyecup position | Up / Down / Folded | Depends on glasses |
| Target distance used | ____ yards | At least 50 yards recommended |
| Date set | ____ / ____ / ____ | Reset if prescription changes |
If you share binoculars, make a copy of this table for each user. It takes 30 seconds to re-enter your settings. It saves you from repeating the full adjustment every time.
The IPD measurement is the only setting that varies by user. Everyone else in your group can use the same table with their own numbers. Keep a small pencil and a piece of paper in the case.
Write the settings directly on the inside of the case lid if you want a permanent record.
For binoculars that lack a numbered diopter scale, use a small piece of tape as a reference. Place it on the barrel. Align it with the edge of the eyepiece when the ring is at your correct position.
That becomes your personal mark. Remove it before handing the binoculars to someone else.
That is the complete process. A few minutes of setup. Years of sharp, comfortable viewing.
Your eyes are different. Your binoculars should know that.