Can a Fire Pit Get Wet
If you’ve ever left your fire pit out overnight and woken up to a surprise rainstorm, you’ve probably wondered: can a fire pit get wet? The short answer is yes, but the longer answer comes with a list of serious caveats. What happens next depends entirely on what your fire pit is made of and how it’s built.
A cheap steel pit left uncovered will behave very differently than a high-end stainless steel model with proper drainage.
Manufacturer specifications indicate that most steel fire pits with a gauge thinner than 16 can show visible rust within 72 hours of sustained moisture exposure. Per NFPA outdoor fire safety standards, any fire pit that has been saturated should never be lit until it is fully dried and inspected. That’s the kind of detail that separates a safe setup from a hazard.
Let’s walk through what you need to know.
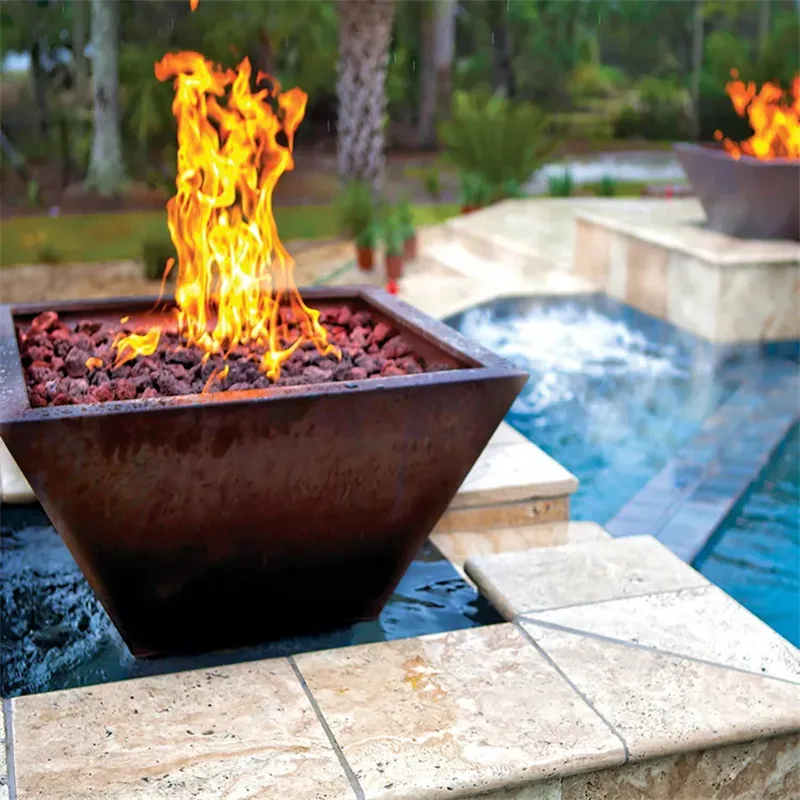
Image source: Bing (Web (fair-use with source credit))
Quick Answer
Yes, a fire pit can get wet. But not all pits handle water the same way. Steel pits rust quickly without protection.
Gas fire pits risk water in the gas line. Proper drying and a quality cover are essential. Drainage holes help prevent standing water.
Always check the manufacturer’s guidance for your specific model.
The Real Danger: Why a Simple Yes or No Doesn’t Work
The question sounds straightforward. But the answer changes based on material, fuel type, and how long water sits. A gas fire pit with electronic ignition has sensitive components.
A wood-burning steel pit can rust through in months if left uncovered. That’s why a blanket “yes” or “no” doesn’t work.
The real danger isn’t the rain itself. It’s what happens afterward. Water trapped in gas lines can freeze or block flow.
Standing water in a steel bowl accelerates rust. Moisture in ash creates a corrosive paste that eats through metal faster than clean water. These issues turn a simple wet fire pit into a costly repair or a safety risk.
Manufacturer warnings consistently stress one thing: never light a fire pit that has visible water inside the burner or gas line. This isn’t just advice. It’s a safety standard backed by NFPA outdoor fire safety guidelines.
Ignoring it can lead to flash fires, regulator damage, or carbon monoxide issues.
The key takeaway is preparation. A fire pit built for all-weather use includes drainage holes and weather-resistant coatings. But even the best pit needs routine care.
Water exposure is manageable. Neglect is not.
What Water Does to Steel, Cast Iron, Copper, and Concrete Fire Pits
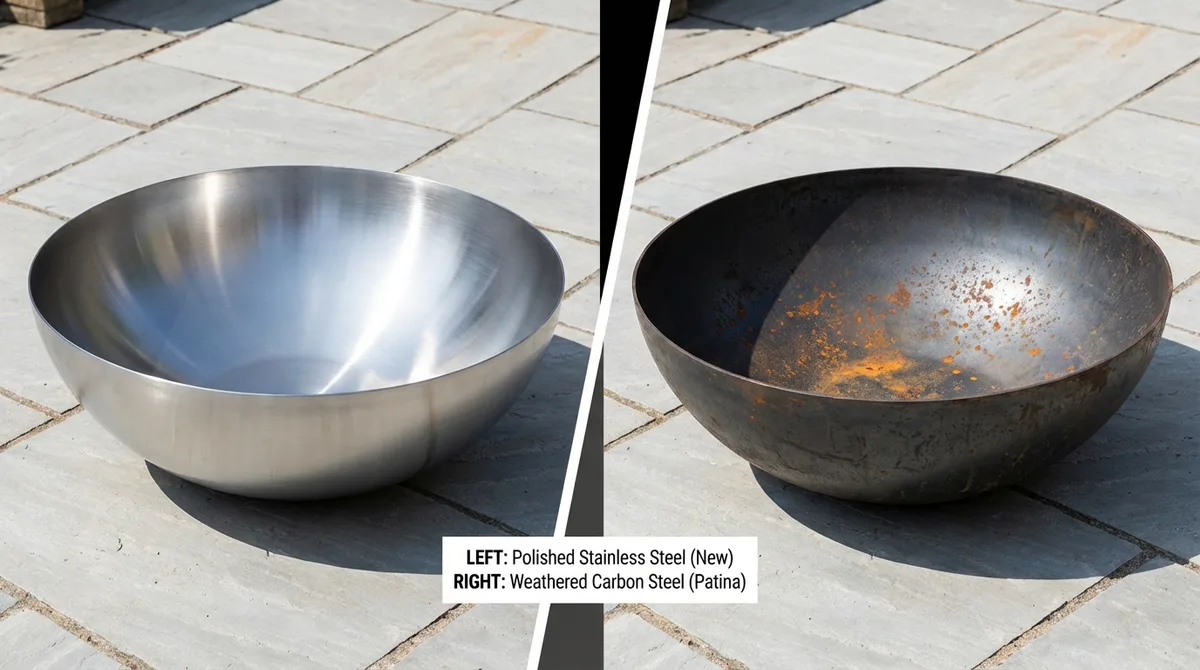
Image source: Bing (Web (fair-use with source credit))
Each material reacts differently to water. Understanding these differences helps you choose the right pit and maintain it properly.
Steel is the most common fire pit material. Untreated steel rusts fast. A thin 16-gauge steel pit can develop pinhole rust through the bowl within one season if left uncovered.
Powder-coated steel resists better, but scratches expose bare metal. Water then seeps under the coating and causes bubbling.
Cast iron handles moisture poorly. It’s porous. Water seeps into the surface and causes rust from the inside out.
Many cast iron pits crack after freeze-thaw cycles because trapped water expands. They need to be stored indoors or under a heavy-duty cover.
Copper is the most water-resistant metal. It develops a natural patina over time. That green coating actually protects the metal underneath.
But copper is expensive and soft. It dents easily. For rainy climates, it’s a solid investment.
Concrete and stone pits absorb water. Freeze-thaw cycles cause cracking. A concrete pit without proper sealing can crumble after a few winters.
Stainless steel sits in the middle. It resists rust well but isn’t immune. Cheap stainless steel can still corrode in coastal areas with salt air.
For a pit that handles moisture well, consider options built for a concrete patio setup. The right material extends the life of your fire pit significantly.
Gas vs. Wood-Burning: Two Different Risk Profiles
Gas fire pits have more sensitive components. The burner, ignition system, and gas line all need to stay dry. Water in the gas line can block flow or cause the regulator to freeze.
Electronic ignition systems short out if water gets inside. That’s a costly repair. Even a manual match-light gas pit needs the burner ports to be clear of water.
If water pools in the burner pan, it can cause uneven flame or flashback.
Wood-burning pits are simpler. They have fewer parts that can fail. But they rust faster because ash and water create a corrosive mix.
Creosote, a byproduct of burning wood, becomes acidic when wet. That accelerates rust. Wood-burning pits also need to be completely dry inside before lighting.
A wet ash bed can cause steam explosions that send embers flying.
The risk profile is different. Gas pits are more vulnerable to immediate damage. Wood pits suffer more from long-term neglect.
But both benefit from the same basic care: keep them covered and dry them out before use.
If you’re choosing between the two, think about your climate. In wet areas, a gas pit with a manual ignition (no electronics) reduces the risk of component failure. For wood burning, a thick stainless steel bowl offers the best durability.
A guide to multi-fuel fire pit options can help you find a model that works in varied conditions.
Your Fire Pit Got Soaked: How to Dry It Out Safely

Image source: Bing (Web (fair-use with source credit))
If your fire pit got drenched, don’t panic. Follow these steps to dry it out safely.
Step 1: Remove standing water. Tilt the bowl to drain it. Use a towel or sponge to soak up remaining water. For gas pits, check the burner pan and ignition area.
Step 2: Remove ash and debris. Wet ash is corrosive. Scoop it out and dispose of it. Don’t leave it sitting in the bowl.
Step 3: Air dry thoroughly. Leave the pit uncovered in direct sunlight. A fan speeds up the process. For gas pits, let the burner and gas line dry for 24 hours before lighting.
Step 4: Inspect for damage. Look for rust spots, cracks, or water in the gas line. If you see rust, treat it with a wire brush and high-temperature paint. For gas pits, check the regulator and hose for moisture.
Step 5: Light a small test fire. Start with a small amount of dry wood or a low gas setting. Watch for uneven flames or hissing sounds. If something seems off, stop and inspect again.
For wood-burning pits, a low smoke fire pit option often has better airflow for drying. But the process is the same regardless of design.
Costly Mistakes That Ruin a Wet Fire Pit
Most fire pit damage happens because of a few common errors. Avoid these and your pit will last years longer.
Mistake 1: Lighting a wet fire pit. This is the most dangerous. Water trapped in gas lines can cause irregular flow. Steam from wet wood can explode ash into the air.
Always wait until everything is bone dry. That means at least 24 hours for gas pits after heavy rain.
Mistake 2: Using a tarp instead of a fitted cover. Tarps trap moisture underneath. Condensation forms against the metal. That keeps the surface wet longer.
A fitted cover with breathable fabric lets air circulate while blocking rain. It’s a small investment that saves your pit from constant moisture.
Mistake 3: Storing a wet pit in a shed or garage. Enclosed spaces trap humidity. That accelerates rust. Always dry the pit completely before storing it.
If you have to store it wet, leave the cover off and let air move through the space.
Mistake 4: Ignoring rust spots. A small rust patch turns into a hole quickly. Treat it as soon as you see it. Use a wire brush, sandpaper, and high-temperature paint.
For stainless steel, a stainless steel cleaner and non-abrasive pad works best.
Mistake 5: Forgetting to drain the bowl. Standing water is the enemy. If your pit doesn’t have drainage holes, drill a few 1/4-inch holes in the bottom. Water needs a way out.
A pit without drainage collects water every time it rains.
Mistake 6: Not checking the gas line. Water in the propane line is invisible. It causes regulator freeze-up and uneven flame. After heavy rain, disconnect the tank and let the line dry out.
If you hear sputtering or see yellow flames, moisture is likely present.
Mistake 7: Leaving ash in the bowl. Wet ash is acidic. It eats through metal faster than water alone. Always clean out ash after every use.
This is especially important if rain is in the forecast. A clean bowl dries faster and rusts slower.
For a pit that sees heavy use, an easy-clean fire pit design makes maintenance simpler. But even basic models last longer with routine care.
How to Protect Your Fire Pit From Water Damage
Prevention beats repair every time. Here’s a simple protection plan that works for any fire pit.
Get a quality cover. This is the single most effective step. Look for a cover made from marine-grade polyester or heavy-duty vinyl. It should have a waterproof backing and vented sides to prevent condensation.
A good cover costs between $30 and $80. Compare that to a $150 replacement burner.
Elevate the pit. Place your fire pit on a gravel or concrete base. This keeps it off wet grass. Ground moisture seeps up through metal over time.
A few inches of elevation makes a big difference. For setups on a gravel patio, this is already built in.
Add drainage holes. If your pit doesn’t have them, drill 1/4-inch to 1/2-inch holes in the bottom. Space them every 6 inches. Water needs a path out.
Without drainage, every rain event leaves standing water in the bowl.
Store propane tanks properly. Never leave a propane tank connected during rain. Water can enter the regulator through the vent. Disconnect the tank and store it upright in a dry, ventilated area.
Cover the connection with a plastic cap.
Apply a protective coating. For steel pits, high-temperature paint or ceramic coating adds a rust barrier. Reapply every year or two. For concrete pits, use a masonry sealer.
This prevents water absorption and freeze-thaw cracking.
Bring it indoors during winter. Freeze-thaw cycles are brutal. Metal expands and contracts. Water trapped in cracks freezes and widens them.
If you can’t store it inside, use a heavy-duty cover and place it on a dry surface. For year-round use, a fire pit rated for all seasons handles this better.
Seasonal maintenance matters. Check your pit at the start of each season. Tighten bolts. Inspect rust.
Replace worn covers. A 10-minute check saves hours of repair later. For a pit that lives on a deck, consider a fire pit designed for deck use, which often has a heat shield and better drainage.
Frequently Asked Questions
Can I use my fire pit in the rain?
Light rain is generally safe for gas fire pits with manual ignition. Heavy rain is not. Water can extinguish the flame and cause gas to pool.
Wood-burning pits should not be used in rain. Wet wood produces heavy smoke and poor heat. Always check the manufacturer’s guidance.
How long does it take for a fire pit to dry after rain?
Wood-burning pits dry in 1 to 2 hours in direct sun with good airflow. Gas pits need 24 hours for the burner and gas line to dry completely. Humid conditions double those times.
A fan speeds up the process significantly.
Does rain ruin a propane fire pit?
Rain can damage the ignition system and gas line. Water in the regulator causes freeze-up. But a propane pit with a manual ignition and proper drainage is fairly resilient.
The key is drying it out before use. A fitted cover prevents most issues.
Can I leave my fire pit outside in winter?
Yes, but winter storage is harder on fire pits than summer rain. Freeze-thaw cycles crack metal and concrete. Snow sitting in the bowl accelerates rust.
Use a heavy-duty cover and elevate the pit off the ground. Disconnect and store the propane tank indoors.
How do I know if water got into my gas line?
Signs include sputtering flames, yellow or orange flames instead of blue, reduced heat output, and a hissing sound from the regulator. If you suspect water in the line, disconnect the tank and let the line dry for 24 hours. If problems persist, replace the regulator.
What’s the best material for a fire pit in a rainy climate?
Stainless steel and copper are the best choices. Copper develops a protective patina. Stainless steel resists rust well.
Avoid untreated steel and cast iron in wet areas. For a budget-friendly option, look for a model with a powder-coated steel bowl and drainage holes.