What Binoculars Are Best for Bird Watching
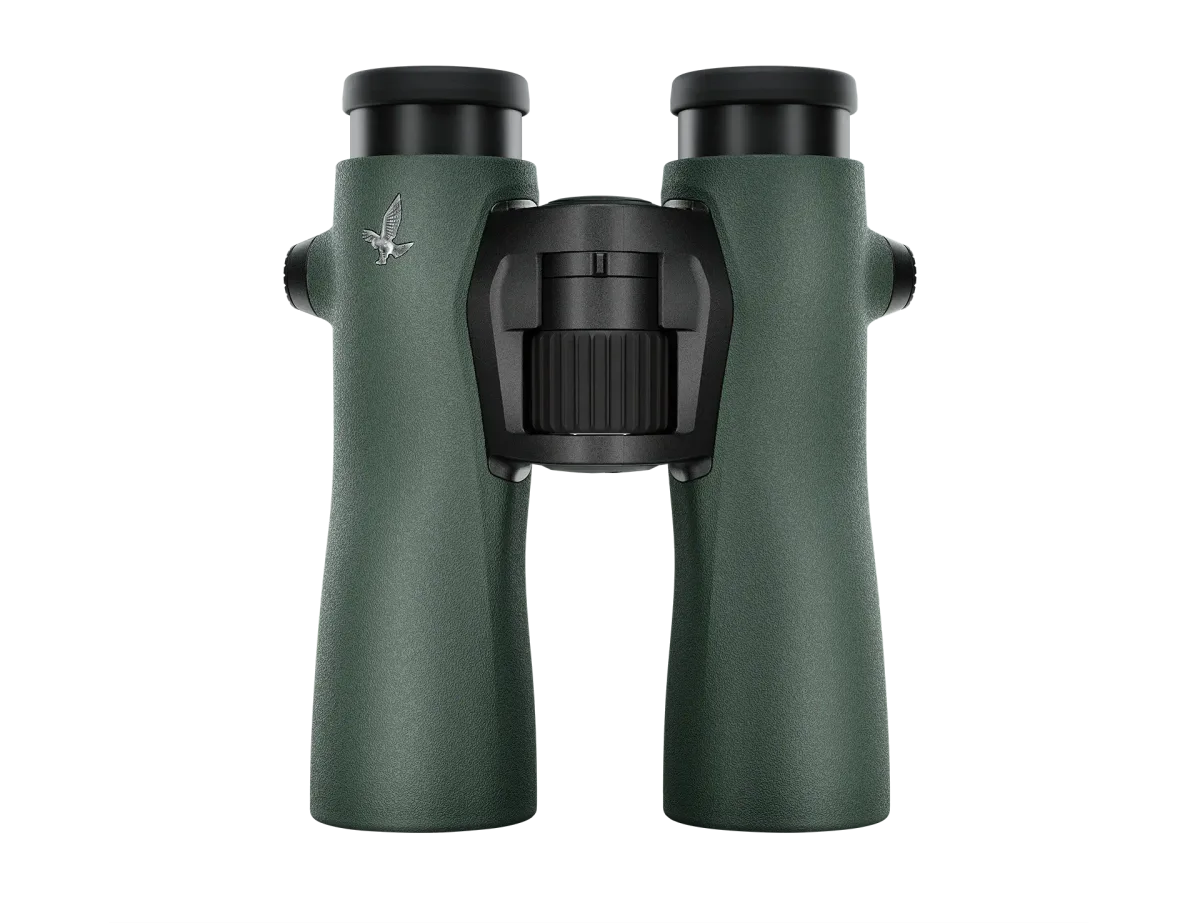
Image source: Bing (Web (fair-use with source credit))
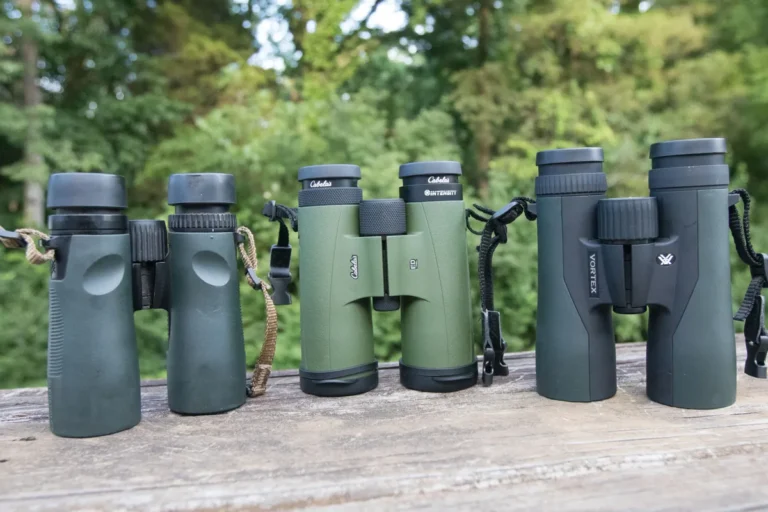
If you're wondering what binoculars are best for bird watching, the short answer is an 8×42 roof prism model with fully multi-coated lenses and BaK-4 prisms. But that label barely scratches the surface. The real answer depends on where you bird, how you hold the binoculars, and whether you wear glasses.
Aggregate reviews from thousands of birders and manufacturer specifications confirm that 8×42 hits the sweet spot for most conditions. Per the American Birding Association's equipment guidelines, an exit pupil of 5.25mm gives you enough light for dawn and dusk without weighing you down. Let's break down the trade-offs so you can pick the pair that actually fits your style.
Quick Answer
The best binoculars for bird watching are 8×42 roof prism models. They balance magnification and light gathering well. Look for fully multi-coated lenses and BaK-4 prisms.
A wide field of view and long eye relief help too. Expect to spend between $200 and $600 for a quality pair that will last.
Why Most Advice Gets It Wrong
Most birding optics advice starts with a single number. 8×42. That's the universal recommendation. It's not wrong, but it's not the whole picture.
The real question is about trade-offs. Every binocular is a compromise between three things: magnification, light gathering, and portability. You can't max out all three at once.
The best binocular for a coastal birder scanning mudflats at midday is different from what a forest birder needs at dawn.
Here's what most advice gets wrong. It assumes you bird in average conditions. Average light.
Average distance. Average hand steadiness. But birding is rarely average.
You might be tracking warblers in dense undergrowth at 15 feet. Or scanning for raptors at 500 yards across an open field. Or birding from a boat where every bit of shake gets magnified.
If you mostly bird in open habitats like marshes, fields, or coastlines, a 10×42 might serve you better than an 8×42. The extra magnification helps you pick out distant birds. The added weight matters less since you're not hiking miles.
If you bird in dense forests or thickets, a wider field of view matters more than raw magnification. An 8×32 with a wide FOV could be a better choice. You'll see more of the canopy and track fast-moving warblers easier.
If you bird from a car or a backyard feeder, weight hardly matters. You can afford the heavier, more expensive glass. But if you hike five miles to your secret spot, every ounce counts.
The point is this. Don't start with a number. Start with your actual birding style.
Then match the specs to the conditions.
Why 8×42 Is the Default Answer
The 8×42 configuration is the default for a reason. It's the most versatile combination for the widest range of conditions.
Let's look at the numbers. An 8×42 binocular has an exit pupil of 5.25 millimeters. That's the diameter of the beam of light that reaches your eye.
In bright daylight, your pupil is about 2 to 3 millimeters wide. A 5.25mm exit pupil gives you plenty of light. But the real advantage shows up at dawn and dusk.
As light fades, your pupils dilate to about 5 to 7 millimeters. A 5.25mm exit pupil still delivers enough light for a bright, usable image. Drop to a 4mm exit pupil, and you'll struggle in low light.
The 8x magnification is also a sweet spot. It's low enough that most people can hold it steady without a tripod. It's high enough to see feather details on a bird at 50 feet.
The field of view is typically wide enough to track birds in flight.
When to Ignore 8×42
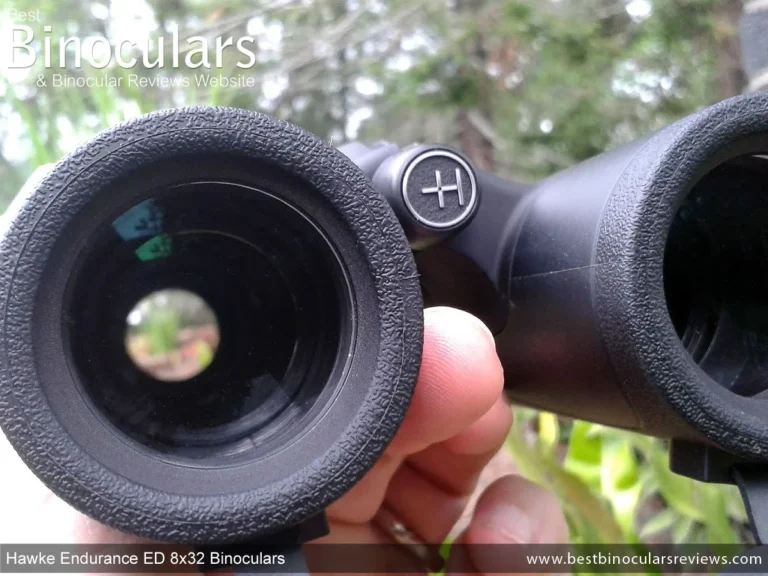
If you wear glasses, check the eye relief first. Eye relief is the distance from the eyepiece to your eye where you can see the full field. You need at least 17 millimeters.
Many 8×42 models offer 15 to 16 millimeters. That means you'll lose part of the image. Some 8×32 models offer longer eye relief.
In that case, the 8×32 might be a better fit even though it gathers less light.
If you have small hands or arthritis, weight matters. A typical 8×42 weighs between 22 and 26 ounces. An 8×32 weighs 16 to 20 ounces.
Six ounces might not sound like much. After a two-hour hike, it's a real difference.
If you bird exclusively in bright daylight, you don't need the extra light gathering of a 42mm objective lens. A 32mm lens works fine and saves weight.
If you're birding from a boat or a moving vehicle, the 8×42's stability advantage disappears. You might benefit from image-stabilized binoculars. They're heavier and more expensive but cancel out motion.
If you're a beginner on a tight budget, you can get a decent 8×42 for under $200. But you can also get a very good 8×32 for the same price. The 8×32 might have better coatings and glass because the manufacturer saved on materials.
In that case, the 8×32 could be the better value.
The 8×42 vs 10×42 Decision: Stability Wins Every Time
This is the most common debate in birding optics. The short answer is that 8×42 wins for most birders. Here's why.
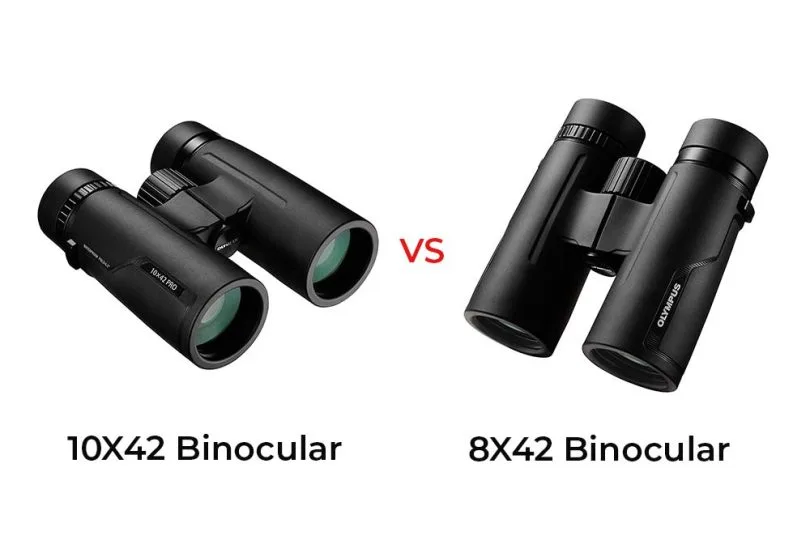
Image source: Bing (Web (fair-use with source credit))
Stability is the deciding factor. At 10x magnification, every tiny movement of your hands gets amplified. Your heartbeat.
Your breathing. The wind. The result is a shaky image that makes it hard to see feather details.
You end up bracing against a tree or sitting down to get a steady view.
At 8x magnification, the image is noticeably steadier. You can hold it comfortably for longer periods. You can track birds in flight without the image bouncing around.
Field of view is another factor. A typical 8×42 offers a field of view of about 340 to 400 feet at 1,000 yards. A typical 10×42 offers about 300 to 340 feet.
That narrower field makes it harder to find birds in the first place. You're looking through a smaller window.
Low light performance favors the 8×42 as well. The exit pupil is 5.25mm versus 4.2mm for the 10×42. In dim conditions, that extra millimeter of light makes a real difference.
When 10×42 Makes Sense
If you bird in open habitats like marshes, fields, or coastlines, the extra magnification helps you pick out distant birds. You have a clear, unobstructed view. The narrower field of view is less of a problem because the habitat is open.
If you're watching raptors migrating at a hawk watch site, 10x is better. The birds are often high and distant. You have time to get the bird in view and study it.
If you're an experienced birder with steady hands, 10x is manageable. Some people can hold 10x as steady as others hold 8x. But that's rare.
If you use a tripod or a monopod, 10x is fine. The stability issue disappears.
Here's a quick comparison table:
| Feature | 8×42 | 10×42 |
|---|---|---|
| Exit pupil | 5.25mm | 4.2mm |
| Typical field of view | 340-400 ft at 1000 yds | 300-340 ft at 1000 yds |
| Low light performance | Good | Fair |
| Handheld stability | Excellent | Fair |
| Weight | 22-26 oz | 24-30 oz |
| Best for | Forests, general use, beginners | Open fields, raptors, experienced users |
The bottom line: 8×42 is the safer choice for most birders. You get a steadier view, a wider field, and better low light performance. Unless you have a specific reason to go with 10x, stick with 8x.
The 8×42 vs 8×32 Trade-Off: Light Gathering vs. Portability
This is a closer call than the 8×42 vs 10×42 debate. Both are 8x magnification, so stability is the same. The difference is in the objective lens size.
The 8×42 has a 42mm objective lens. The 8×32 has a 32mm lens. That 10mm difference affects three things: light gathering, weight, and field of view.
Light gathering is the biggest difference. The 8×42 has an exit pupil of 5.25mm. The 8×32 has an exit pupil of 4mm.
In bright daylight, both work fine. In dim conditions, the 8×42 gives you a brighter image. If you bird at dawn, dusk, or in deep shade, the 8×42 is better.
Weight is where the 8×32 shines. A typical 8×32 weighs 16 to 20 ounces. A typical 8×42 weighs 22 to 26 ounces.
That 4 to 6 ounce difference is significant on a long hike. It also makes the 8×32 easier to hold steady for extended periods.
Field of view is similar between the two. Some 8×32 models offer a wider field of view than some 8×42 models. It depends on the specific design.
But in general, the 8×32 has a slightly narrower field of view.
Here's a quick comparison table:
| Feature | 8×42 | 8×32 |
|---|---|---|
| Exit pupil | 5.25mm | 4mm |
| Low light performance | Good | Fair |
| Weight | 22-26 oz | 16-20 oz |
| Field of view | 340-400 ft | 330-420 ft |
| Best for | General use, low light, car birding | Hiking, travel, small hands |
Which One Should You Choose?
If you hike far to your birding spots, go with 8×32. The weight savings is real. You'll be less tired at the end of the day.
You'll be more likely to bring the binoculars on every trip.
If you bird from a car or a backyard feeder, go with 8×42. Weight doesn't matter. You want the brightest image possible.
If you bird in low light conditions, go with 8×42. The extra light gathering is worth the weight.
If you have small hands or arthritis, go with 8×32. The smaller size is easier to hold.
If you travel by plane, go with 8×32. It's easier to pack in a carry-on and less likely to get damaged.
If you're a beginner, start with 8×42. It's the most forgiving. You'll get a bright, steady image in most conditions.
The Price-Tier Breakdown: What You Actually Get at Each Level
Binocular prices span a huge range. You can spend $50 or $3,000. Here's what you actually get at each price tier.
Budget: $100 to $200
At this price, you get basic binoculars. The lenses are multi-coated or fully multi-coated, but the coatings are entry-level. The prisms are BaK-4 or BK-7.
The body is usually polycarbonate or aluminum. The warranty is limited or non-existent.
What you can expect: decent image quality in good light. Some chromatic aberration, especially at the edges. A narrow field of view.
A focus wheel that might be stiff or loose. These binoculars work for casual birding. They're fine for backyard use or short walks.
What you can't expect: good low light performance. A wide field of view. Edge-to-edge sharpness.
Durability in wet conditions. Some models are waterproof, but not all.
Mid-Range: $300 to $600
This is the sweet spot for most birders. At this price, you get fully multi-coated lenses with better coatings. The prisms are BaK-4 with phase correction coating.
The body is magnesium alloy. The warranty is lifetime and often transferable.
What you can expect: bright, clear images in most conditions. Good low light performance. A wide field of view.
Edge-to-edge sharpness. A smooth, precise focus wheel. Waterproof and fog-proof construction.
These binoculars will last for years with proper care.
What you can't expect: the absolute best glass and coatings. Some chromatic aberration at the edges. Heavier than premium models.
But for most birders, the difference between mid-range and premium is small.
Premium: $800 to $2,500
At this price, you get the best glass and coatings. The lenses are fully multi-coated with proprietary coatings. The prisms are BaK-4 with dielectric coating and phase correction.
The body is magnesium alloy or titanium. The warranty is 30 years or lifetime.
What you can expect: exceptional brightness and clarity. Minimal chromatic aberration. A wide field of view with edge-to-edge sharpness.
Fast, smooth focus. Excellent low light performance. Lightweight construction.
Digiscoping compatibility.
What you can't expect: a bargain. You're paying for the last 10 to 15 percent of performance. The difference between a $600 and a $1,500 binocular is real but small.
It's noticeable in low light and at the edges of the field.
Top-Tier: $2,500 and Up
This is the enthusiast level. Brands like Swarovski, Zeiss, and Leica compete here. You get the absolute best optical performance.
The field of view is stunning. The brightness is remarkable. The build quality is flawless.
Here's a quick comparison table:
| Price tier | Typical cost | Key features | Best for |
|---|---|---|---|
| Budget | $100-$200 | Basic coatings, limited warranty | Casual use, backyard birding |
| Mid-range | $300-$600 | FMC, phase coating, lifetime warranty | Most birders, serious hobbyists |
| Premium | $800-$2,500 | Premium glass, dielectric coating, lightweight | Enthusiasts, digiscopers |
| Top-tier | $2,500+ | Best optics, wide FOV, exceptional build | Collectors, professionals |
The bottom line: if you're a beginner, start with a mid-range pair. You get good quality without breaking the bank. If you're serious about birding, spend $300 to $600.
That's where the value is. If you have the money and want the best, go premium. But don't feel like you need to.
Lens Coatings, Prisms, and Specs That Actually Matter
You can ignore most of the numbers on a binocular spec sheet. But a few actually change what you see through the lens. Here's what matters and what doesn't.
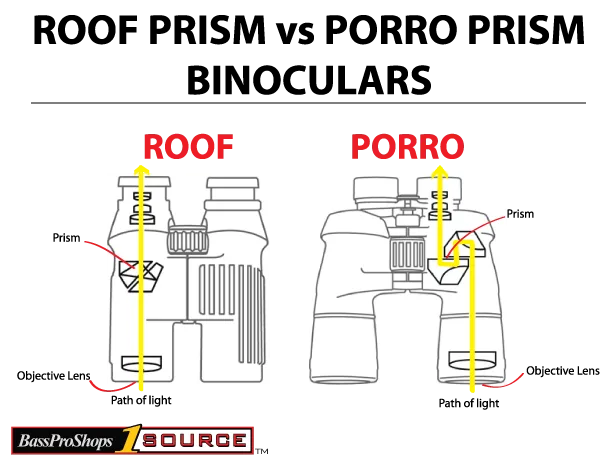
Image source: Bing (Web (fair-use with source credit))
Lens coatings are the single most important spec for image quality. Coatings reduce light loss and glare. Every air-to-glass surface loses about 4 percent of light without coatings.
With good multi-coatings, that drops to less than 0.5 percent.
Look for "fully multi-coated" on the spec sheet. That means every lens surface has multiple layers of anti-reflective coating. "Multi-coated" means only some surfaces have multiple layers.
"Coated" means single layers. Fully multi-coated is the standard for decent birding binoculars.
Prism type affects the shape and size of the binoculars. Roof prism binoculars are compact and streamlined. Porro prism binoculars are bulkier with offset barrels.
Roof prisms dominate the birding market because they're easier to hold and pack.
Prism glass matters too. BaK-4 glass is higher quality than BK-7. BaK-4 gives brighter, sharper images.
BK-7 is cheaper and produces darker edges. Every binocular in the mid-range and above uses BaK-4.
Phase correction coating is essential for roof prism binoculars. Without it, the image has reduced contrast and resolution. All quality roof prism binoculars have phase correction.
If a spec sheet doesn't mention it, keep looking.
Dielectric coating is a premium feature. It reflects more light than standard aluminum coatings. It produces brighter, more color-accurate images.
You'll find it on binoculars above $500.
Eye relief is critical if you wear glasses. You need at least 17 millimeters. Some models offer 19 to 20 millimeters.
That gives you room to see the full field without pressing your glasses against the eyepiece.
Field of view is measured in feet at 1,000 yards. A wider field helps you find birds faster. Look for 340 feet or more in an 8×42.
Some premium models offer 400 feet or wider.
Close focus distance matters for warbler watching. Some birds feed at 10 to 15 feet. A close focus of 6 feet or less lets you see them in detail.
Many mid-range models focus to 6 feet. Some premium models go under 5 feet.
What you can safely ignore: the "zoom" or "variable" magnification claim. Fixed magnification gives better image quality. The "lens diameter" alone doesn't tell you much.
The "weight" in grams without context. And any claim about "military grade" or "combat tested" unless you're actually in the military.
The Best Binoculars for Bird Watching by Use Case
Rather than listing brands, let's match specs to your actual birding situation. The best binocular for you depends on where and how you bird.
Forest birding: You need a wide field of view and good close focus. Birds move fast through dense foliage. You want to track them without losing them.
An 8×42 with a field of view of 380 feet or more works well. Close focus under 6 feet helps with warblers and vireos.
Open field and marsh birding: You're scanning distant birds. A 10×42 gives you more reach. The wider field of an 8×42 is less important because the habitat is open.
You might also want a tripod adapter for long viewing sessions.
Coastal birding: Salt spray and fog are the enemies. You need fully waterproof binoculars with good sealing. Look for IPX7 or IPX8 ratings.
Hydrophobic lens coatings help repel water. A harness is essential because you'll be standing for hours.
Backyard birding: You're at short distances. A compact 8×32 or even 8×25 works fine. You don't need the low light performance of a 42mm lens.
Weight doesn't matter since you're not hiking.
Travel birding: You need lightweight and compact. An 8×32 is the best compromise. It fits in a carry-on.
It's comfortable for all-day walks. Some models weigh under 16 ounces.
Pelagic birding: You're on a moving boat. Image stabilization can help. Some binoculars have built-in stabilization.
They're heavier and more expensive but worth it if you bird from boats regularly.
Digiscoping: You want to take photos through your binoculars. Look for models with a tripod adapter and a wide field of view. Some brands offer dedicated digiscoping adapters.
A phone adapter is a cheap way to start.
Here's a quick reference table:
| Use case | Recommended specs | Key features |
|---|---|---|
| Forest | 8×42, 380+ ft FOV, close focus under 6 ft | Wide field, fast focus |
| Open field | 10×42, tripod adapter | Reach, stability |
| Coastal | 8×42 or 10×42, waterproof IPX7+ | Sealing, hydrophobic coatings |
| Backyard | 8×32 or 8×25 | Compact, close focus |
| Travel | 8×32, under 20 oz | Lightweight, packable |
| Pelagic | 8×42 or 10×42 with stabilization | Motion canceling |
| Digiscoping | 8×42, wide FOV, adapter compatible | Tripod mount, phone adapter |
The pattern is clear. Most birders need an 8×42. But if you fit one of the specific use cases above, adjust accordingly.
What Nobody Tells You About Warranty, Harnesses, and Real-World Use
The binocular itself is only half the story. The other half is how you carry it, protect it, and get it fixed if something breaks.
Warranty matters more than you think. Binoculars take abuse. They get dropped, bumped, and splashed.
A good warranty saves you hundreds of dollars.
Look for a "lifetime, no-fault, transferable" warranty. That means the manufacturer repairs or replaces the binocular for any reason. Even if you drop it off a cliff.
Even if you're not the original owner. Vortex and Maven both offer this level of warranty. Others offer 25 or 30 years.
Some offer only one year.
If you buy a used binocular, check the warranty transfer policy. Some brands require the original receipt. Others don't.
A binocular harness is not optional. It's the best upgrade you can make. A neck strap hangs all the weight on your cervical spine.
After an hour, you feel it. After three hours, you're in pain.
A harness distributes the weight across your shoulders and upper back. It keeps the binoculars snug against your chest. They don't swing when you bend over or look down.
You can hike, climb, and crawl without the binoculars bouncing.
Harnesses cost $20 to $60. They work with any binocular. Get one before your first serious outing.
Cleaning your binoculars the wrong way damages them. Never use your shirt or a paper towel. Those fabrics scratch the lens coatings.
Use a lens pen or a microfiber cloth designed for optics. Blow off loose dust first with a rocket blower. Then use the lens pen or cloth in a circular motion.
Storage matters for longevity. Store binoculars in a dry, cool place. A camera bag or padded case works.
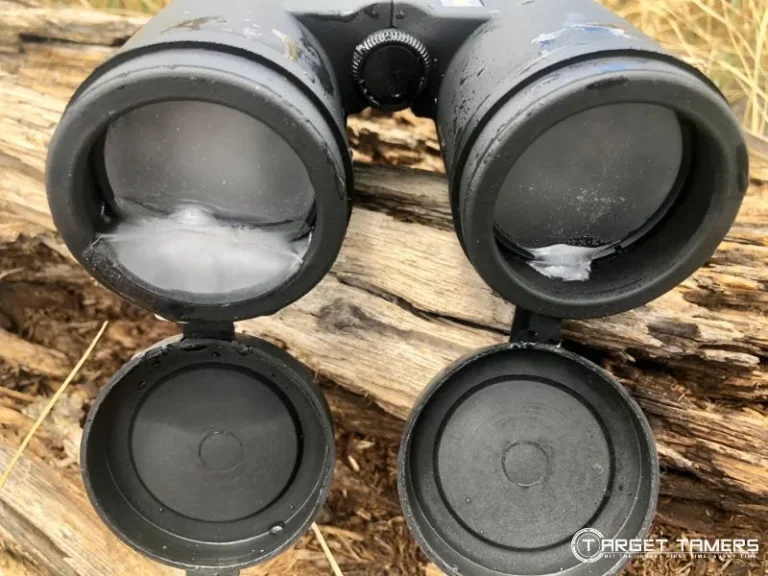
Add a silica gel pack to absorb moisture. Never leave them in a hot car. The heat can damage the seals and lubricants.
Digiscoping is easier than you think. You can take decent photos through your binoculars with a phone adapter. The adapter clips onto the eyepiece and holds your phone in place.
It costs $20 to $50. The results are surprisingly good for social media and personal records.
The focus wheel on your left or right? Check before you buy. Some models have the focus wheel on the left barrel. Others have it on the right.
If you're used to one setup, the other feels awkward. Test it in a store if possible.
How to Buy Your First Pair Without Getting Burned
Buying binoculars online is risky. You can't test the ergonomics, the focus wheel, or the eye relief. Here's how to avoid common mistakes.
Step 1: Set a budget and stick to it. More expensive binoculars are better, but the improvement is diminishing. A $300 pair is significantly better than a $100 pair.
A $600 pair is better than the $300 pair, but the difference is smaller. A $1,200 pair is only slightly better than the $600 pair.
Step 2: Buy from an authorized dealer. Gray market binoculars are cheaper because they're imported outside the manufacturer's distribution channels. The warranty is often not honored.
You save $50 and lose $500 of protection. It's not worth it.
Step 3: Check the return policy. You need at least 30 days to test the binoculars in the field. Some retailers offer 60 or 90 days.
If the binoculars don't fit your hands or your eyes, you need to be able to send them back.
Step 4: Test the ergonomics in person if possible. Visit a store that carries multiple brands. Hold each pair for at least two minutes.
Check the focus wheel smoothness. Check the eye relief. Check the weight.
If you can't visit a store, read reviews from multiple sources.
Step 5: Compare two or three models at the same price. Don't buy the first one you see. Look at specs side by side.
Read reviews from birding forums, not just retail sites. Birders are brutally honest about flaws.
Step 6: Don't be swayed by unnecessary features. You don't need a rangefinder. You don't need image stabilization unless you're on a boat.
You don't need a compass. These features add weight and cost without improving birding.
Step 7: Consider buying used. Birders upgrade frequently. You can find excellent condition binoculars at half the retail price.
Check the warranty transfer policy first. Some brands transfer warranties freely. Others don't.
Common Mistakes to Avoid
- Buying a 10×42 as your first pair. You'll struggle with shake.
- Buying the cheapest binoculars you can find. The image quality is poor. You'll want to upgrade within a year.
- Buying based on magnification alone. 8x is better for most birders.
- Buying without checking eye relief. If you wear glasses, this is a dealbreaker.
- Buying from a non-authorized dealer. The warranty is useless.
The upgrade path: Start with a mid-range 8×42. Use it for a year. You'll learn what you like and don't like.
Then you can make an informed decision about your next pair.
Frequently Asked Questions
What is the best magnification for bird watching?
8x is the best magnification for most birders. It offers a wide field of view and steady handheld viewing. 10x is better for open habitats and distant birds. 7x is too low for most situations. 12x is too high for handheld use.
Do I need to spend over $500 for good birding binoculars?
No. You can get excellent binoculars for $300 to $500. The mid-range tier offers fully multi-coated lenses, BaK-4 prisms, and lifetime warranties.
The difference between a $500 pair and a $1,000 pair is small. The difference between a $200 pair and a $500 pair is significant.
Can I use binoculars for birding if I wear glasses?
Yes. Look for binoculars with at least 17 millimeters of eye relief. Some models offer 19 to 20 millimeters.
Twist-up eyecups let you adjust the distance. Test the eye relief before buying if possible. Many birders who wear glasses prefer 8×32 models for their longer eye relief.
What is the difference between roof prism and porro prism binoculars?
Roof prism binoculars are compact and streamlined. They have a straight barrel shape. Porro prism binoculars are bulkier with offset barrels.
Roof prisms dominate the birding market. They're easier to hold and pack. Porro prisms offer slightly better image quality for the same price but are heavier.
How do I clean my binoculars without scratching them?
Blow off loose dust first with a rocket blower or compressed air. Use a lens pen or a microfiber cloth designed for optics. Work in a circular motion from the center outward.
Never use your shirt, paper towels, or household cleaners. For stubborn dirt, use a drop of lens cleaning solution on the cloth.
What is the warranty on birding binoculars?
Warranties vary by brand. Some offer lifetime, no-fault, transferable warranties. Others offer 25 or 30 years.
Some offer only one year. Read the warranty terms before buying. A lifetime warranty is worth paying extra for.
It covers drops, bumps, and water damage.
The Verdict: Pick One, Stop Searching, and Go Birding
After all the specs, comparisons, and trade-offs, one truth stands out. The best binocular for bird watching is the one that actually goes with you every time.
A premium pair that stays in the closet is worse than a mid-range pair that hangs around your neck. Don't let perfect be the enemy of good. Birding is about being outside, not about owning the most expensive glass.
If you're a beginner, start with a mid-range 8×42. It costs $300 to $600. It has fully multi-coated lenses, BaK-4 prisms, and a lifetime warranty.
It will serve you well for years. You can upgrade later if you need to.
If you're upgrading, identify your pain point first. Is your current pair too heavy? Too dark?
Too shaky? Then buy the specific solution. Don't just spend more money on a different brand with the same specs.
If you're buying for a specific use case, match the specs to the habitat. Forest birding needs wide field of view and close focus. Open fields need reach.
Coastal birding needs waterproofing and a harness.
Here's the final checklist before you buy:
- Magnification: 8x for most birders, 10x for open habitats
- Objective lens: 42mm for general use, 32mm for travel
- Eye relief: 17mm minimum if you wear glasses
- Field of view: 340 feet or more at 1,000 yards
- Close focus: 6 feet or less for warbler watching
- Coatings: Fully multi-coated, phase correction, dielectric if possible
- Warranty: Lifetime, no-fault, transferable
- Accessories: Harness, lens pen, rocket blower
The best binocular for bird watching is the one you'll use. Pick a pair that fits your budget, your hands, and your habitat. Then stop researching and go find some birds.