How to Clean a Propane Fire Pit
If your propane fire pit is sputtering, producing a weak flame, or starting to smell like gas before you light it, you are not alone. Learning how to clean a propane fire pit properly is the critical first step to fixing it. Most people ignore the burner until something goes wrong.
Propane fire pits operate at a specific pressure and air-to-fuel ratio. According to NFPA 58 standards for LP gas storage and handling, any obstruction in the burner or venturi tube can cause incomplete combustion. That means yellow flames, soot, or even a dangerous gas buildup.
A thorough clean takes about 45 minutes. Let us walk through it step by step.
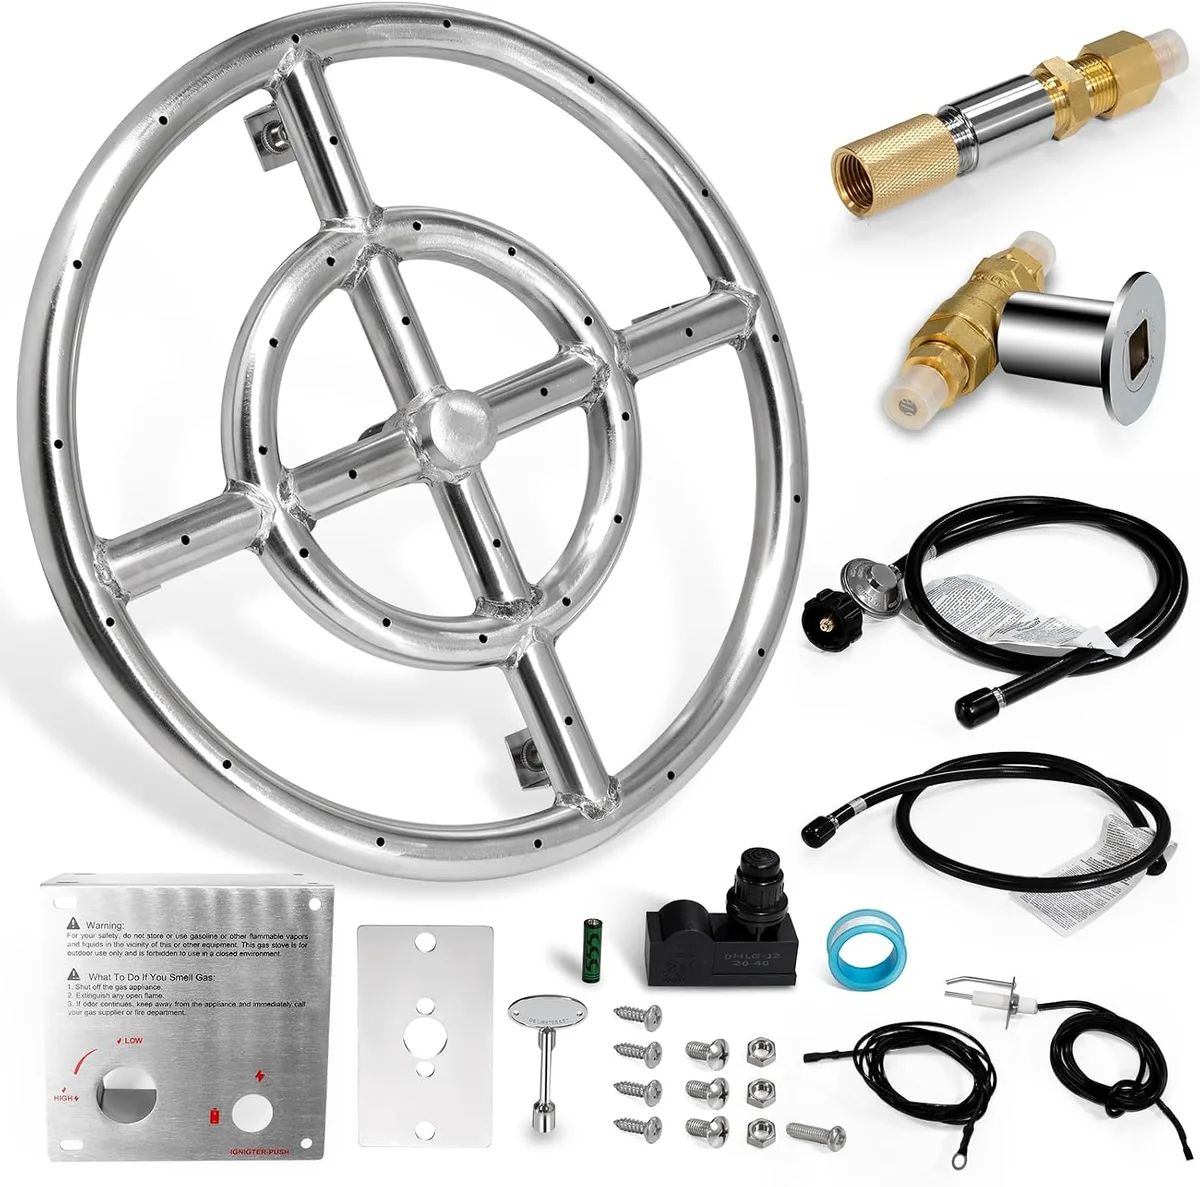
Image source: Bing (Web (fair-use with source credit))
Quick Answer
Turn off the gas at the tank. Disconnect the propane line. Remove the fire media and burner assembly.
Brush every burner port clean. Blow out the tubes with compressed air. Dry everything completely.
Reassemble and test for leaks with soapy water.
Why Cleaning a Propane Fire Pit Is Different from a Wood-Burning One
A wood fire pit just needs ash removal and a metal rake. A propane fire pit involves a gas system. If you treat it the same way, you risk a leak or a fire.
The Gas System Is the Difference
Propane fire pits have a sealed gas train. That includes the tank valve, regulator, hose, control valve, burner orifice, and the burner tube itself. Every single connection must be tight.
Every port must be clear. A clogged burner port forces gas to escape somewhere else. That is where the danger comes from.
Burner Ports Are Tiny
Most propane fire pit burners have dozens of small holes. They are roughly 1/16 to 1/8 of an inch wide. Spiders, mud daubers, and dirt love to block them.
When a port is blocked, gas flows unevenly. The flame may lift off the burner or burn yellow. Both are signs of incomplete combustion.
You Cannot Use Just Any Cleaner
Wood fire pits tolerate harsh chemicals and wire brushes. A propane burner is more delicate. Wire brushes can scratch the metal and create hotspots.
Harsh chemicals can leave a residue that burns off as toxic fumes. The cleaning method matters.
Leak Testing Is Mandatory
After a wood fire pit cleaning, you just light it. After a propane fire pit cleaning, you must test for leaks. Fire pits built for frequent use often have electronic ignition systems that require even more careful reassembly.
A simple soapy water test catches loose fittings before they become a problem.
Key takeaway: This is not a scrub and go job. It is a gas appliance maintenance task. Treat it with the same respect you would give a propane grill or a gas stove.
How Often Should You Clean It
There is no one size fits all schedule. The right frequency depends on how often you use the fire pit and where you live.
Standard Usage (Twice a Month)
If you use your fire pit a couple times per month during the warmer seasons, clean it every three months. That usually means two cleanings per year. One in spring before peak use.
One in fall before you store it.
Heavy Usage (Weekly or More)
If you light it every weekend or leave it on for hours at a time, clean it every six to eight weeks. Carbon buildup happens faster with frequent use. So does spider activity.
Coastal or Sandy Environments
Salt air accelerates rust on steel burners. Sand and dust blow into the burner ports. In coastal areas, clean every four to six weeks during the active season.
In desert climates, the same rule applies.
Storage Season
Before you cover the fire pit for winter, always do a full clean. Propane tanks should be disconnected and stored upright. The burner assembly should be completely dry.
Moisture trapped under the cover causes rust. Some low-maintenance options come with stainless steel burners that resist corrosion better than standard steel.
When to clean based on signs:
| Symptom | What It Means | Action |
|---|---|---|
| Yellow or orange flame | Clogged ports or incomplete combustion | Clean immediately |
| Flame lifting off burner | Blocked venturi or orifice | Clean and inspect |
| Soot on fire glass or lava rock | Carbon buildup from poor mix | Clean and adjust air shutter |
| Gas smell when off | Loose connection or leak | Turn off gas, leak test |
| Igniter not sparking | Dirty or corroded electrode | Clean or replace igniter |
What You Will Need Before You Start
Gather everything before you touch the gas valve. Running back and forth for tools is how parts get lost.
Tools and Supplies
| Item | Purpose | Notes |
|---|---|---|
| Soft nylon brush | Cleaning burner ports | Toothbrush works well |
| Compressed air | Blowing out tubes | Canned air duster or compressor |
| Bucket of warm soapy water | Cleaning fire media and base | Dish soap only, no degreaser |
| Spray bottle with soapy water | Leak testing | Same mix, 1:10 soap to water |
| Ratchet or wrench | Disconnecting propane line | Usually 9/16 inch or adjustable |
| Screwdriver | Removing burner assembly | Check your model |
| Shop vacuum | Cleaning base and debris | Dry vacuum only |
| Clean cloth or towel | Drying parts | Lint free preferred |
| Protective gloves | Handling fire glass or lava rock | Sharp edges possible |
What to Skip
- Wire brushes or steel wool (scratches metal)
- Harsh chemical cleaners (leaves residue)
- Bleach or ammonia (corrodes aluminum)
- WD-40 or any lubricant on burner parts (flammable residue)
- Pressure washers (forces water into gas lines)
The right tools for simple upkeep are inexpensive. Most of them are already in your garage or kitchen drawer. If you are shopping for a new fire pit, budget-conscious choices often include models with removable burner trays that make cleaning much easier.
Step-by-Step: The Safe Cleaning Process
This is the core of the guide. Follow every step in order. Do not skip the drying step.
Step 1: Shut Off the Gas
Turn the propane tank valve clockwise until it stops. This is the main valve on top of the tank. Not the control knob on the fire pit.
The control knob only shuts off the flow at the appliance. The tank valve is the real safety shutoff.
Step 2: Disconnect the Propane Line
Unscrew the connection at the tank. Use a wrench if it is tight. Move the hose and tank away from the fire pit.
You do not want the tank near any cleaning water or debris.
Step 3: Remove the Fire Media
Carefully lift out lava rock, fire glass, or ceramic logs. Place them in a bucket or on a tarp. Do not mix different types of media.
Glass can scratch lava rock and create dust.
Step 4: Remove the Burner Assembly
Most burners are held in place with two or three screws. Remove them and lift the burner straight up. You may need to wiggle it free from the venturi tube.
Set it on a clean surface.
Step 5: Clean the Burner Ports
Use the soft nylon brush to scrub every burner port. Work the brush back and forth. Pay extra attention to the ports near the igniter.
That is where spiders love to nest.
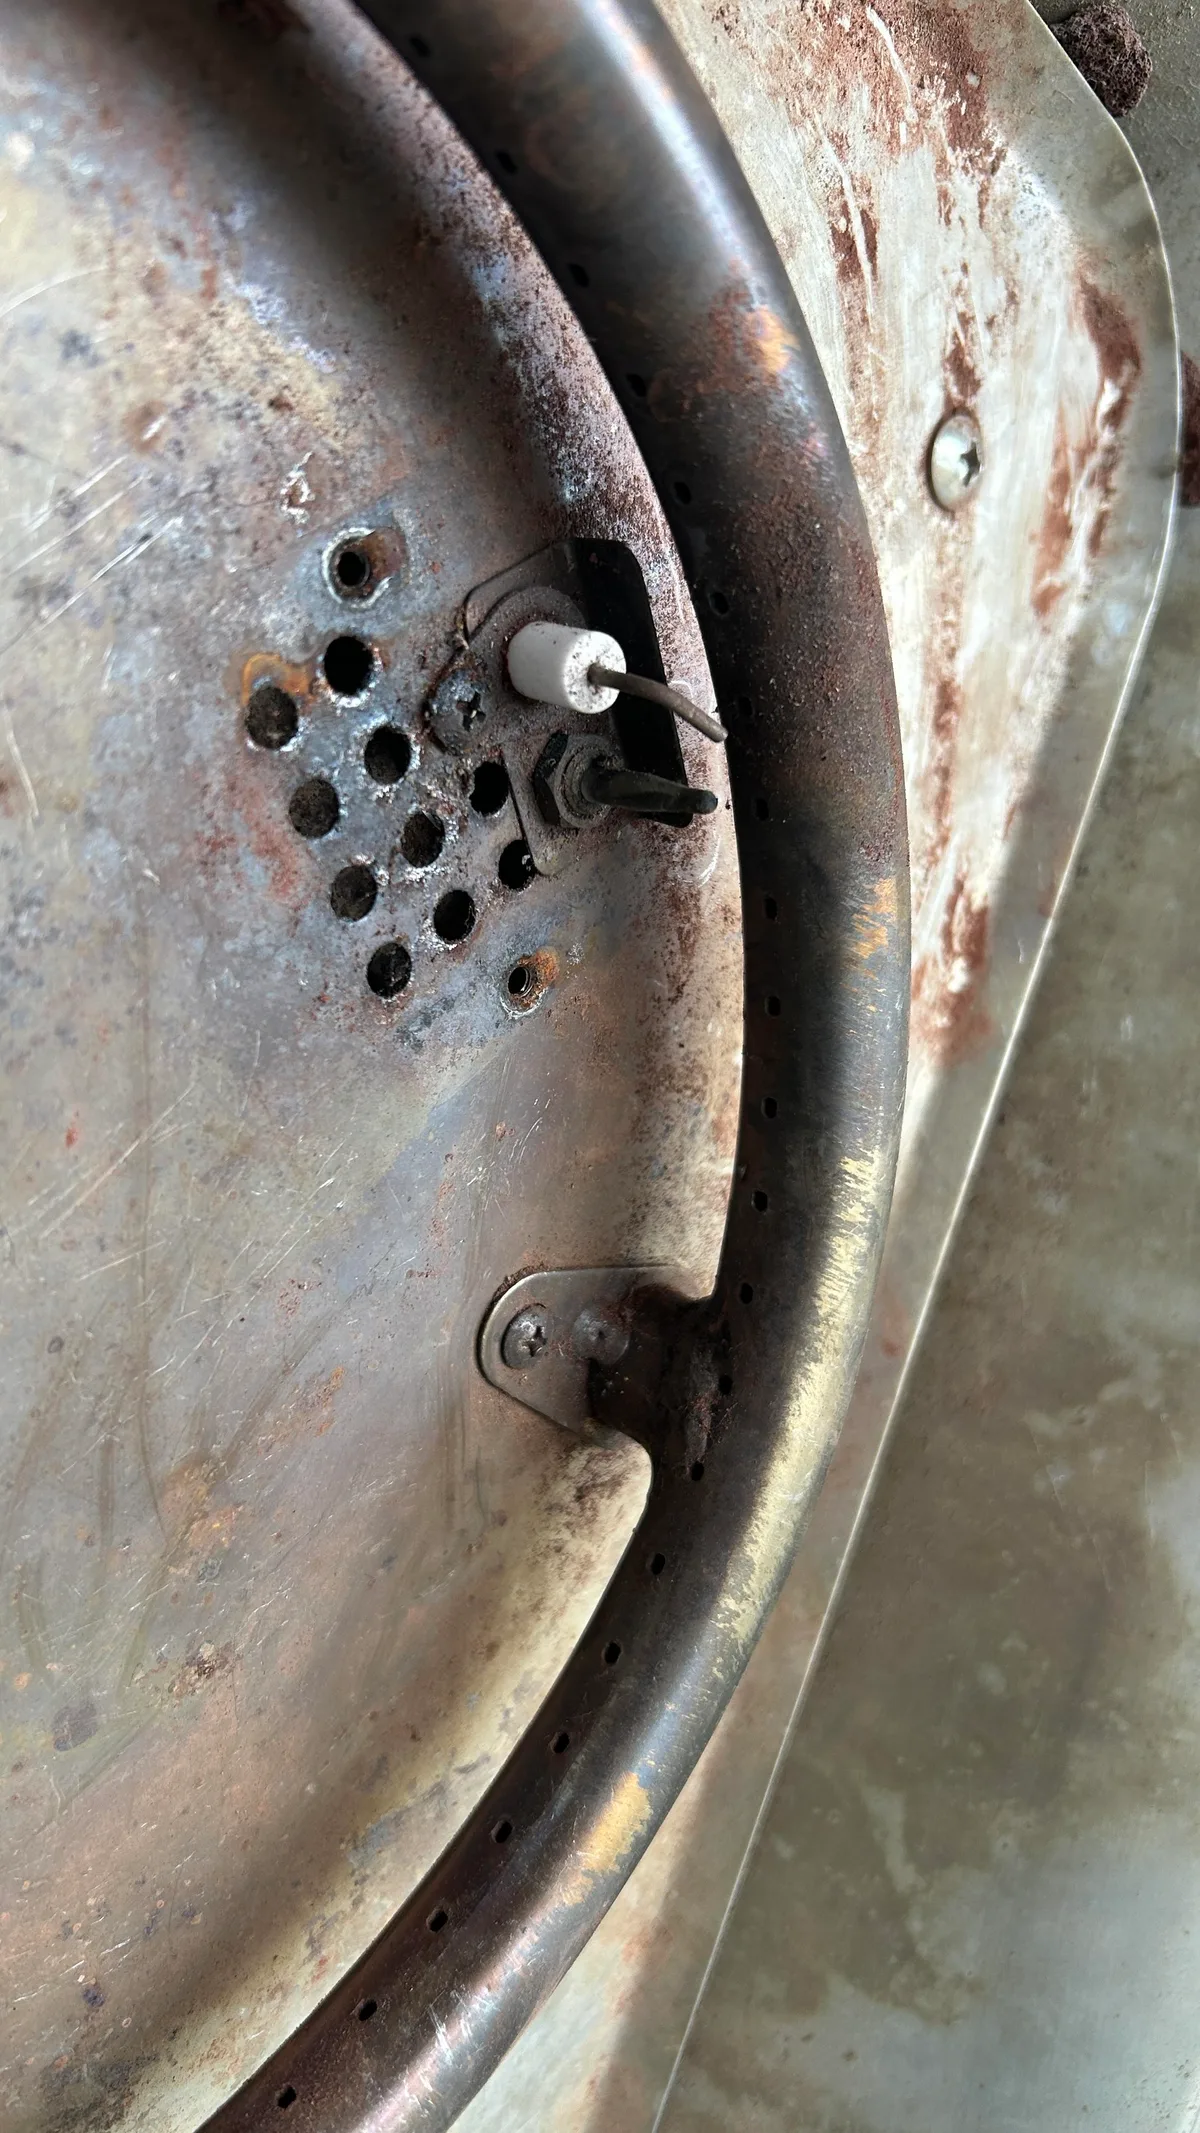
Image source: Bing (Web (fair-use with source credit))
Step 6: Clear the Burner Tube
Hold the burner assembly upside down and shake it. Debris should fall out. Then use compressed air to blow through the burner tube.
Aim the air into the open end where the gas enters. Blow from the opposite end of the ports. This clears any blockages in the venturi.
Step 7: Clean the Fire Pit Base
Vacuum out the base of the fire pit. Remove any leaves, dirt, or spider webs. Wipe down the inside with a damp cloth.
Do not use water directly on the gas valve or control knob.
Step 8: Clean the Fire Media
If you use lava rock, rinse it in a bucket of warm soapy water. Swish it around and let it soak for 10 minutes. Rinse thoroughly.
Fire glass can be cleaned the same way. Let both dry completely.
Step 9: Dry Everything
This is the most important step. Set the burner assembly in sunlight for at least 24 hours. Fire glass and lava rock need the same drying time.
Any moisture trapped inside the burner tube will cause a sputtering flame.
Step 10: Reassemble
Put the burner assembly back in place. Tighten the screws. Replace the fire media.
Reconnect the propane line to the tank. Hand tighten the connection. Do not use a wrench to overtighten.
Step 11: Leak Test
Mix a spray bottle of soapy water. Spray every connection. The tank valve connection.
The hose connection. The control valve. The burner orifice.
If you see bubbles, you have a leak. Tighten the connection and test again. If bubbles persist, replace the part.
Step 12: Light It
Turn on the gas at the tank. Turn the control knob to low. Press the igniter.
You should see a clean blue flame. Let it burn for five minutes to burn off any residue. Then enjoy.
The entire process takes about 45 minutes of active work plus drying time. For permanent outdoor setups, consider adding a quick release fitting to the propane line. This makes future disconnections much faster.
Common Mistakes That Can Cause a Fire or Leak
People make the same errors over and over. Here is what to avoid.
Mistake 1: Cleaning While the Tank Is Connected
This is the most dangerous mistake. If you tip the fire pit or knock the hose, the tank valve can break. Always disconnect the tank first.
Move it out of the work area.
Mistake 2: Using a Wire Brush on Burner Ports
Wire brushes scratch the metal. Scratches create hotspots that can cause uneven burning. Use only a soft nylon brush or a toothbrush.
Mistake 3: Not Drying the Burner Assembly
Water trapped in the burner tube will cause a sputtering flame. It can also rust the burner from the inside. Dry for 24 hours minimum.
In humid climates, dry for 48 hours.
Mistake 4: Over-tightening the Propane Connection
Hand tighten only. If you use a wrench, you can crack the brass fitting. That creates a leak.
A hand tight connection plus a quarter turn with a wrench is enough.
Mistake 5: Skipping the Leak Test
Every time you reconnect the gas line, test it. Even if you think you did it right. A loose fitting can take hours to develop a leak.
The soapy water test catches it immediately. The U.S. Consumer Product Safety Commission recommends leak testing after any gas appliance maintenance.
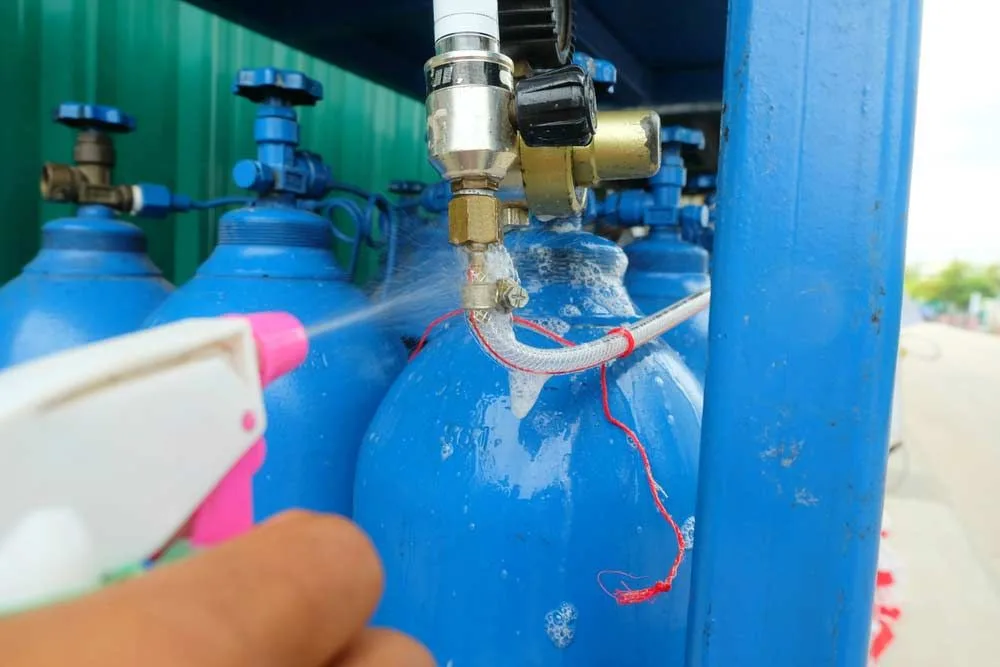
Image source: Bing (Web (fair-use with source credit))
Mistake 6: Cleaning Fire Glass While Hot
Fire glass retains heat for a long time. If you pour water on hot glass, it can crack or shatter. Always let the fire pit cool completely.
That means at least two hours after the last flame.
Mistake 7: Ignoring the Orifice
The orifice is a tiny brass fitting with a small hole. It meters the gas flow. If it is clogged, the flame will be weak or nonexistent.
Use a pin or compressed air to clear it. Never use a drill bit. The orifice is precision sized.
Fire pits with one-button startup tend to have fewer ignition issues after cleaning because the spark gap stays consistent. If your igniter stops working, check the electrode gap first. It should be roughly 1/8 inch from the burner.
Frequently Asked Questions
How do I know if my propane fire pit burner is clogged?
Look for yellow or orange flames instead of blue. Listen for a sputtering sound. Watch for flames that lift off the burner surface.
If the fire pit takes longer than usual to light, the burner ports are likely blocked.
Can I use a pressure washer to clean my fire pit?
No. Pressure washers force water into the gas lines and control valve. That water can freeze in cold weather or cause internal rust.
Stick to a soft brush, compressed air, and a damp cloth.
What is the best way to clean lava rock for a propane fire pit?
Rinse lava rock in a bucket of warm water with mild dish soap. Swish it around for a few minutes. Rinse thoroughly until the water runs clear.
Let it dry completely in sunlight for 24 hours before returning it to the fire pit.
Why does my propane fire pit smell like gas after cleaning?
A gas smell usually means a loose connection. Turn off the tank valve immediately. Mix a spray bottle of soapy water and spray every fitting.
Look for bubbles. If you find a leak, tighten the connection and test again. If the leak continues, replace the part.
How often should I replace the propane tank on my fire pit?
Propane tanks do not need regular replacement. They need recertification every 12 years. Check the collar of the tank for the date stamp.
If it is older than 12 years, exchange it for a new one at a local propane supplier.
Can I clean the igniter on my propane fire pit?
Yes. Use fine sandpaper or a small file to clean the metal electrode tip. Wipe it with a dry cloth.
Check the gap between the electrode and the burner. It should be about 1/8 inch. If the igniter still does not spark, replace the battery or the entire igniter module.