What Binoculars Are Best for Wildlife Viewing
You came here for one answer. But there is no single "best" binocular for everyone. The right pair depends on where you're watching, what you're watching, and how your own eyes work.
That's why the question "what binoculars are best for wildlife viewing" needs a framework, not a product name.
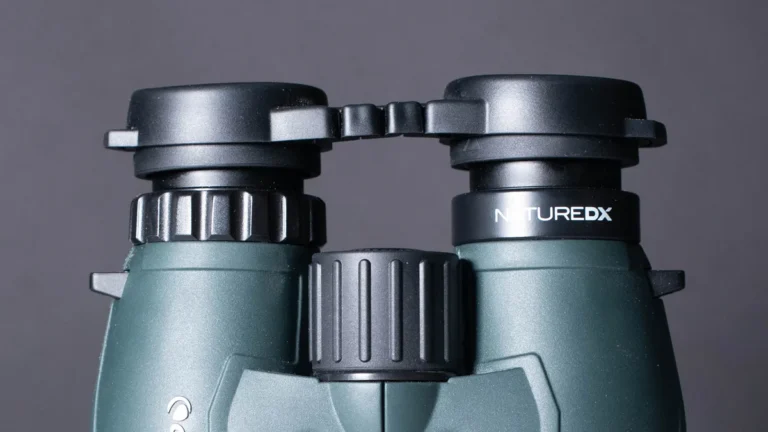
The standard recommendation across optics professionals is an 8×42 configuration. This gives you a 5.25mm exit pupil, which matches the human eye's dilation in most daylight conditions. It still performs well in low light.
Per standards from the American Birding Association, this spec hits the sweet spot for weight, brightness, and field of view. Let's walk through the real trade-offs so you can pick the pair that fits your use.
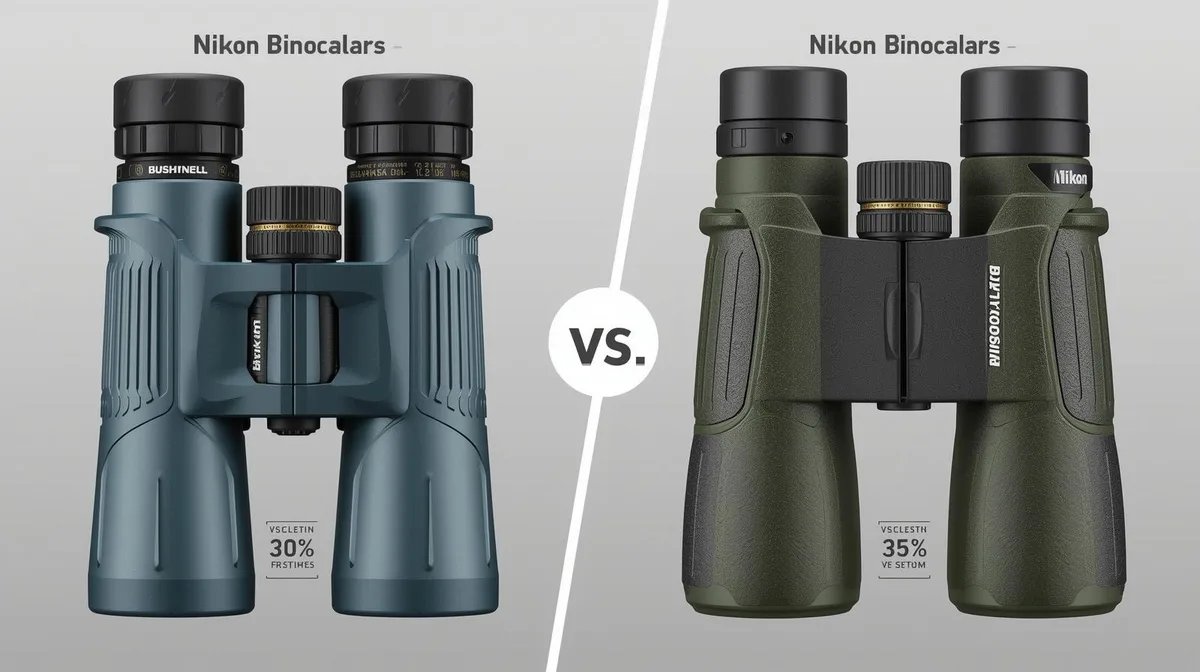
Image source: Bing (Web (fair-use with source credit))
Quick Answer
The best binoculars for wildlife viewing are 8×42 roof prism models. Look for multi-coated lenses and BaK-4 prisms. This spec balances weight, brightness, and field of view.
For low light or long distances, try 10×42. If you wear glasses, aim for 18mm of eye relief or more.
Why This Comparison Matters
Most people buy binoculars based on price or brand name. They end up with a pair that's too heavy for a hike. Or too dark at dawn.
Or too narrow to track a bird in flight. That's a waste of money.
The real cost isn't the price tag. It's the moment you're squinting through fogged lenses. It's your neck aching after an hour of glassing.
It's not being able to find a warbler because your field of view is too narrow. The right comparison saves you from that frustration.
A well-chosen pair can last 20 years or more. A poorly chosen pair sits in the closet after one season. The differences between models are small on paper but huge in the field.
Our research shows that the three most common regret points from buyers are weight, low-light performance, and eye relief. All three are avoidable with a little upfront knowledge.
The Specs That Actually Matter (and the Ones You Can Ignore)
Binocular specs look intimidating. Only a handful directly affect your experience. The rest are marketing numbers that don't change what you see.
Magnification and Objective Lens
The first number is magnification. The second is objective lens diameter in millimeters. An 8×42 magnifies eight times and has a 42mm front lens.
Magnification determines how close things look. Objective lens size determines how much light enters.
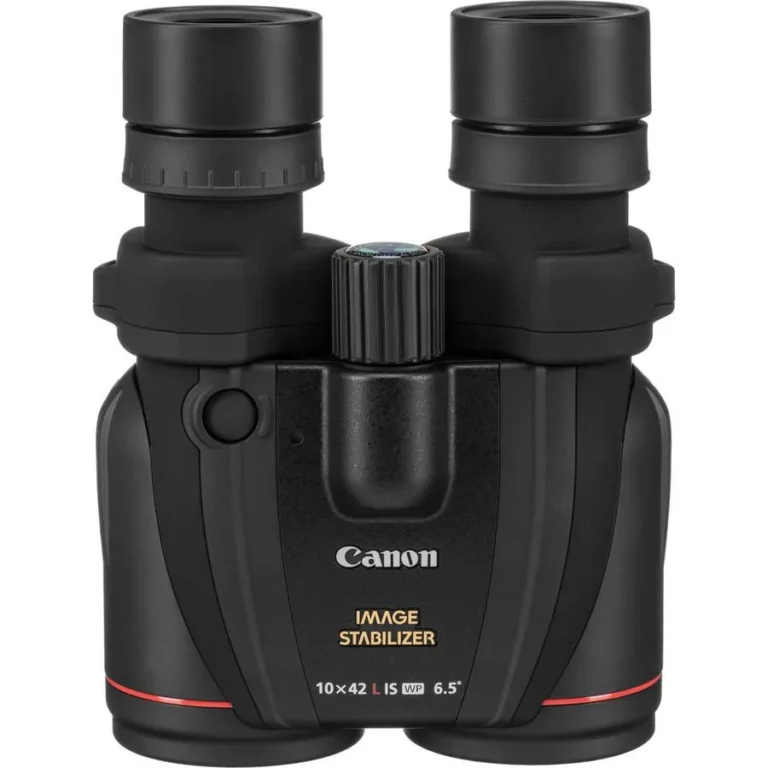
Higher magnification isn't always better. At 10x, hand shake becomes noticeable. At 12x, you'll need a tripod or image stabilization.
The trade-off is reach versus stability.
Exit Pupil
Exit pupil is the objective lens diameter divided by magnification. An 8×42 gives 5.25mm. A 10×42 gives 4.2mm.
Your eye's pupil opens to about 7mm in complete darkness and 5mm in typical dawn light. A smaller exit pupil than your eye's pupil means a dimmer image.
Field of View
Field of view is how wide an area you can see at 1000 yards. Measured in feet, a wider field makes it easier to find and track moving animals. An 8×42 typically offers 330 to 400 feet.
A 10×42 offers 300 to 340 feet. For birding in dense forest, wider is better.
Eye Relief
Eye relief is the distance from your eye to the eyepiece while still seeing the full field. For glasses wearers, 18mm or more is essential. Without glasses, 14mm to 16mm works fine.
Check this spec before buying if you wear glasses.
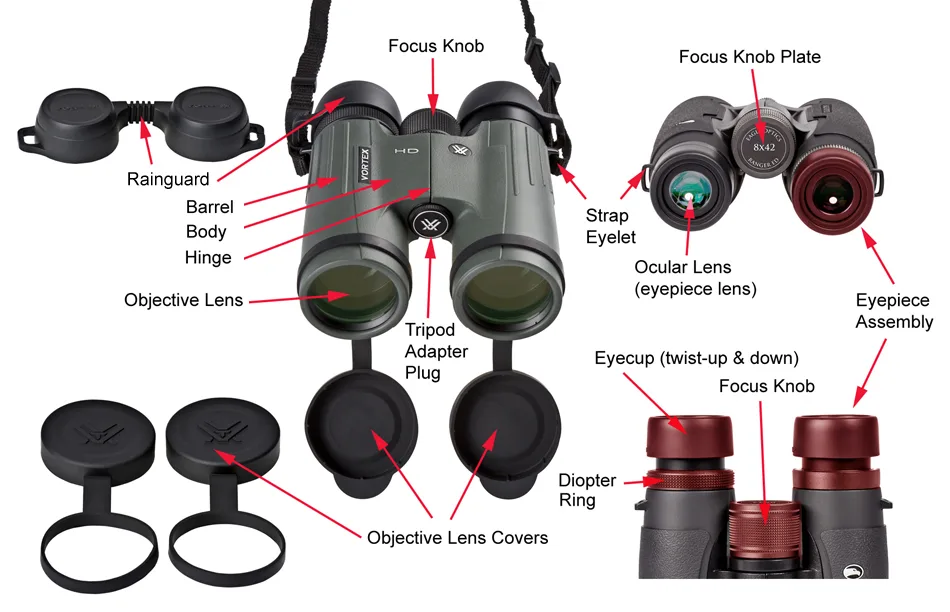
Image source: Bing (Web (fair-use with source credit))
Specs You Can Ignore
Some numbers don't matter for most wildlife viewing. Twilight factor is a calculated number that doesn't translate to real-world performance. Relative brightness is another math formula that ignores coating quality.
Lens coatings matter far more than either of these.
What really matters is the quality of the glass, the coatings, and the prism. Those aren't on a spec sheet, but they determine sharpness, brightness, and color accuracy.
Roof Prism vs. Porro Prism: Your First Big Decision
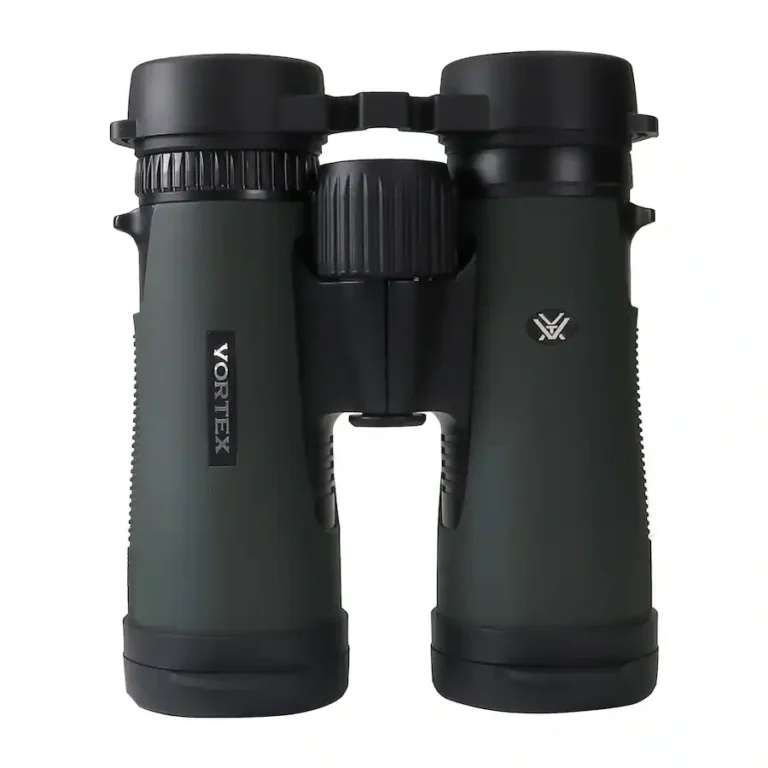
The internal design of your binoculars affects size, weight, and image quality. There are two main types: roof prism and porro prism.
Roof Prism Binoculars
Roof prism binoculars have a straight, compact body. The lenses are in line with each other. This design is more expensive to manufacture because it requires precise phase coatings to correct light interference.
Good roof prism binoculars cost more than comparable porro prisms.
The advantage is a slimmer, lighter package that's easier to pack and carry. Most modern birders and hunters prefer roof prisms for their ergonomics and weather sealing. The best models use dielectric coatings and phase correction to deliver bright, sharp images.
Porro Prism Binoculars
Porro prism binoculars have an offset, zigzag shape. The objective lenses are wider apart than the eyepieces. This design is cheaper to make and naturally produces brighter images at the same price point.
No phase coating is needed.
The downside is bulk. Porro prisms are wider and heavier. They're also harder to seal against water and fog.
Many budget-friendly porro prisms offer excellent value. For a first pair under $200, a porro prism often gives you the best image quality.
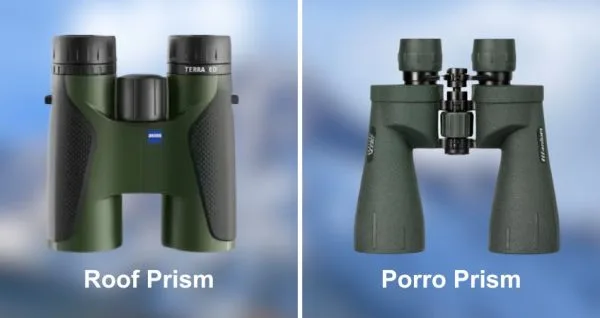
Image source: Bing (Web (fair-use with source credit))
Which Should You Choose
If you're hiking long distances or need weather resistance, go with a roof prism. If you're on a tighter budget, a porro prism is a solid choice. For serious birding or wildlife photography, roof prisms dominate the market.
They offer better ergonomics and sealing.
8x vs. 10x vs. 12x: Matching Magnification to Your Wildlife
Magnification is the most personal choice in binoculars. It affects stability, field of view, and low-light performance. Here's how to pick based on your typical wildlife.
8x Magnification
This is the standard for general wildlife viewing. It offers a wide field of view. That makes it easy to find and track moving animals.
The image is stable enough to hand-hold for long periods. You can glass for hours without fatigue.
Best for: forest birding, close-range wildlife, and anyone with shaky hands. It's also the best choice for beginners.
10x Magnification
This gives you more reach. You'll see details at longer distances. The trade-off is a narrower field of view and more noticeable hand shake.
Many experienced birders prefer 10x for open habitats like wetlands and coastlines.
Best for: open country, waterfowl, and long-distance viewing. If you have steady hands, 10x is excellent.
12x and Above
These are specialized tools. At 12x, hand shake is significant. You'll need a tripod or image stabilization.
The field of view is narrow, making it hard to find animals. These are best for long-range hunting or astronomy.
Best for: dedicated spotting and tripod use. Not recommended for general wildlife viewing.
Matching to Your Wildlife
| Wildlife Type | Recommended Magnification | Reason |
|---|---|---|
| Songbirds in forest | 8x | Wide field to find birds in branches |
| Waterfowl on open water | 10x | Reach across distance |
| Big game in open plains | 10x or 12x | Long distance spotting |
| Backyard feeders | 8x | Close range, wide view |
| Butterflies and insects | 8x | Close focus and wide field |
| Dawn and dusk mammals | 8x | Larger exit pupil for brightness |
The Price Tiers: What You Really Get for $150, $500, $1,000, and $2,000+
Binocular prices jump dramatically. It's not just brand markup. Each tier brings real improvements in glass quality, coatings, and build.
Entry Level: Under $200
At this price, you're getting porro prism designs or basic roof prisms. Coatings are minimal. Glass is standard BK-7 or lower-grade BaK-4.
Build quality is plastic with rubber armor. These are fine for casual backyard use or occasional hikes.
Expect some chromatic aberration in bright light. Low-light performance is mediocre. The warranty is usually limited.
But for a first pair or a kid's binocular, this tier works.
Mid-Range: $200 to $500
This is the sweet spot for most wildlife viewers. You get fully multi-coated lenses, BaK-4 prisms, and phase coatings on roof prisms. Build quality improves to aluminum or magnesium alloy.
Waterproofing and fog-proofing are standard.
The image is noticeably brighter and sharper. Chromatic aberration is reduced. Field of view widens.
The warranties are often lifetime and transferable.
High-End: $500 to $1,200
Here you enter premium territory. Lenses use ED (extra-low dispersion) glass to eliminate color fringing. Dielectric coatings boost light transmission to 95% or more.
Phase coatings are standard. Magnesium chassis keep weight down.
The image is stunningly bright and sharp. Colors are accurate and contrast is high. Eye relief is generous for glasses wearers.
Build quality is exceptional.
Alpha Level: $1,200 and Up
This is the top tier. You get the best glass available, the most advanced coatings, and the tightest manufacturing tolerances. The image is optically perfect.
Color, contrast, and brightness are unmatched.
Build quality is hand-assembled and individually tested. Waterproofing is guaranteed to extreme depths. The warranty is long but typically not transferable.
For a serious birder or professional guide, this is the standard. For most people, the high-end tier delivers 90% of the performance at half the price.
Price Tier Summary Table
| Tier | Price Range | Key Features | Best For |
|---|---|---|---|
| Entry | Under $200 | Basic coatings, plastic body, limited warranty | Casual use, kids, beginners |
| Mid-Range | $200-$500 | Multi-coated, phase coated, magnesium, lifetime warranty | Regular wildlife viewers, hikers |
| High-End | $500-$1,200 | ED glass, dielectric coatings, premium build | Serious birders, hunters, low-light use |
| Alpha | $1,200+ | Best glass, hand-assembled, optical perfection | Professionals, collectors |
The law of diminishing returns kicks in hard after $500. Each extra dollar buys less improvement. Most people are perfectly happy with a $400 pair.
The key is matching the tier to your actual use.
Best Binoculars for Specific Wildlife Scenarios
Your binocular choice changes based on where you're actually watching. Here's how to match the specs to real-world conditions.
Forest Birding
Dense woods mean short distances, fast movement, and low light under the canopy. An 8×32 or 8×42 is ideal here. The wide field of view helps you find birds hopping between branches.
The larger exit pupil of the 8×42 helps in shaded conditions.
Close focus distance matters more than you think. Many forest birds are 15 to 30 feet away. A close focus of 6 feet or less lets you see details on a warbler at arm's length.
Look for models with a close focus under 8 feet.
Open Plains and Grasslands
You're covering long distances with few obstructions. A 10×42 is the standard choice. The extra magnification helps you identify birds at 200 yards or more.
The field of view is narrower, but you don't need to track through dense cover.
Stability becomes a factor here. At 10x, hand shake is more noticeable. Rest your elbows on your knees or use a tripod for long sessions.
Wetlands and Coastlines
Water, mud, and salt spray demand fully waterproof binoculars. Look for an IPX7 rating. This means the binoculars can be submerged up to 1 meter for 30 minutes.
Argon purging is better than nitrogen for these environments. Argon molecules are larger and leak out slower.
Fogging is a real risk when moving from a cold boat to warm humid air. Make sure your binoculars are fog proof to at least minus 20 degrees Fahrenheit.
Safari and Big Game Viewing
You're in an open vehicle, often at dawn or dusk. Low light performance is critical. An 8×42 or 10×50 gives you the largest exit pupil for these conditions.
The 10×50 is heavier but brighter.
A harness strap is a lifesaver here. It distributes weight across your shoulders instead of your neck. You'll be glassing for hours at a time.
Backyard Birding
You're close to your feeders and stationary. An 8×32 or even a 6×30 gives you a wide field of view and easy handling. Close focus is important for seeing details on a finch at 10 feet.
You don't need a heavy duty waterproof model for this use.
| Scenario | Recommended Spec | Key Feature |
|---|---|---|
| Forest birding | 8×32 or 8×42 | Wide field, close focus |
| Open plains | 10×42 | Reach, stability |
| Wetlands | 8×42 or 10×42 | Waterproof, fog proof |
| Safari | 8×42 or 10×50 | Low light, harness strap |
| Backyard | 8×32 or 6×30 | Close focus, light weight |
Common Mistakes That Waste Your Money and Your Viewing Time
Buying binoculars is filled with pitfalls. Here are the most common ones and how to avoid them.
Buying Too Much Magnification
New buyers often think higher magnification is always better. They grab a 12x or 16x pair and find they can't hold them steady. The image shakes so much that details are lost.
You end up seeing less, not more.
Stick with 8x or 10x for general wildlife. Increase magnification only when you have a specific need and a tripod.
Ignoring Eye Relief for Glasses
If you wear glasses, eye relief is the most important spec. A pair with 14mm of eye relief means you can't see the full field. You'll be pressing your glasses against the eyepieces.
Look for 18mm or more.
Overlooking Weight
A pair that weighs 30 ounces might feel fine in the store. After an hour of hiking, it feels like a brick. The average 8×42 roof prism weighs about 25 ounces.
A 10×50 can hit 35 ounces. Try to keep your pair under 28 ounces for all day use.
Buying Based on Brand Alone
A well known brand doesn't guarantee a good pair for your needs. Some expensive brands have models with poor eye relief or narrow fields of view. Check the specs, not just the logo.
Not Testing the Diopter
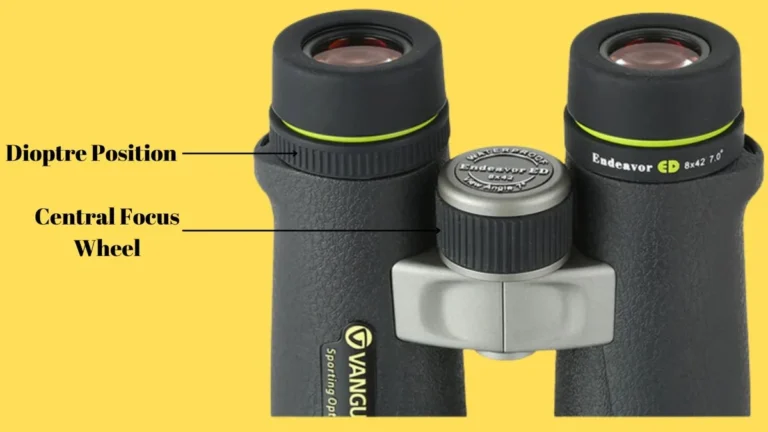
The diopter adjustment lets you balance the focus between your two eyes. Many people never set it correctly. They end up with a slightly blurry image in one eye.
Always set the diopter first: cover the objective lens on the side with the diopter ring, focus with the center wheel, then adjust the diopter for a sharp image in the other eye.
Maintenance and Long Term Care (Yes, They Need It)
Binoculars are precision instruments. They need routine care to stay sharp and functional.
Cleaning the Lenses
Dust, pollen, and fingerprints degrade image quality. Blow off loose particles with a rubber air blower. Use a soft lens brush for stubborn dust.
Apply a drop of lens cleaning solution to a microfiber cloth, never directly to the glass. Wipe in a circular motion from center to edge.
Never use paper towels, tissues, or your shirt. These scratch the coatings. Even a tiny scratch reduces contrast and creates flare.
Storage
Store your binoculars in a dry, cool place. Avoid direct sunlight and extreme heat. Heat can melt seals and degrade coatings.
Use a silica gel pack in the case for humid climates.
Always cap the objective lenses and eyepieces when not in use. This prevents dust and scratches.
Checking the Seals
Inspect the rubber armor and seals for cracks or wear. A damaged seal can let moisture in. If you see condensation inside the lenses, that's a sign of seal failure.
Send them in for service immediately.
When to Service
Most binoculars don't need regular servicing. But if you notice double vision, a stiff focus wheel, or internal fogging, it's time for a professional check. Collimation is a precise job.
Don't try to fix it yourself.
Warranty Tips
Register your binoculars with the manufacturer as soon as you buy them. Some warranties require registration within 30 days. Keep your receipt.
A lifetime warranty is worthless if you can't prove ownership.
Frequently Asked Questions
Is 8x or 10x better for wildlife viewing?
8x is better for most wildlife viewing. It gives a wider field of view, a brighter image in low light, and is easier to hold steady. 10x is better for open country where you need extra reach.
What does 8×42 mean on binoculars?
The 8 is the magnification. Objects appear 8 times closer. The 42 is the objective lens diameter in millimeters.
A larger objective lens gathers more light for a brighter image.
Are expensive binoculars worth the money?
Yes, up to about $500. Above that, improvements are smaller and cost more. A $300 pair is significantly better than a $100 pair.
A $1,000 pair is slightly better than a $500 pair.
Can I use binoculars while wearing glasses?
Yes, if the eye relief is 18mm or more. Look for a model with long eye relief and twist up eyecups. The eyecups should twist down to allow your glasses to get close to the lenses.
How do I clean binocular lenses safely?
Use a rubber air blower first to remove loose dust. Then a soft lens brush. Apply lens cleaning solution to a microfiber cloth, not directly to the glass.
Wipe in circles from center to edge.
What is the best binocular brand for wildlife?
There is no single best brand. The best brand depends on your budget, your eyes, and your use. Several manufacturers offer excellent models at different price points.
Final Verdict: How to Pick the Right Pair for You
You now have the framework to make an informed choice. The best binoculars for wildlife viewing are the ones that fit your specific situation.
Your Decision Checklist
Start with your typical wildlife. Forest birding calls for an 8×42 with a wide field and close focus. Open country leans toward a 10×42.
Dawn and dusk viewing needs a larger exit pupil.
Consider your eyes. If you wear glasses, prioritize eye relief over magnification. If you have shaky hands, stay with 8x.
Set a realistic budget. The mid range of $200 to $500 gives you the best value. Spend more only if you're a serious birder or professional.
The One Pair Rule
If you can only own one pair of binoculars, make it an 8×42 roof prism. This spec is the most versatile. It handles forest, field, and low light with equal competence.
It's light enough for a day hike and bright enough for dawn.
The Final Step
Try before you buy. Visit a store with a selection of models. Hold them.
Look through them. Adjust the focus. See how they feel in your hands.
The specs matter, but the feeling matters more.
A pair of binoculars is a window into the wild. Choose wisely, and you'll have that window open for decades. Choose poorly, and you'll be squinting through a crack.
The choice is yours.